
Finally winter has given way to spring and shortly it will be full blown summer. A vegetable garden has been something I’ve wanted to invest time in since we purchased our house upstate over 3 years ago. I hadn’t until this year, had the time to get things moving.
Read More
Beef with Barley Stew in an Instant(pot)
I love my Instantpot. I was kind of skeptical for a while. Mainly used it to cook jasmine rice (which it is excellent at) but the past few months I’ve really been branching out. A few weeks ago I cooked up some short ribs with mashed potatoes in under an hour. Tonight the menu was beef stew.
I don’t know about you, but when I start the work week, all my energy to make a full meal from scratch kind of drifts away from me. I have high hopes on Saturday and Sunday but by Monday or Tuesday I’m completely over it. I set myself up for success this week by chopping all of my ingredients in advance so today all I had to do was sauté, deglaze and then walk away for 45 minutes. While it was pressure cooking away I got my exercise for the day in (a new years resolution I’m still sticking to).
Here’s what I prepped:
1lb beef (stewing meat, came pre-cubed)
Chopped 1 lb mushrooms
Diced 1 small yellow onion
Peeled and chopped 3 carrots
Chopped 2 stalks of celery
Quartered 7 fingerling potatoes
Finely chopped 3 cloves of garlic
1/2 tbs fresh thyme removed from stem
Other non prepped ingredients:8 cups beef broth
1 tbs tomato paste
1.5 cups barley
1 bay leaf
salt
pepper
1 tbs olive oil
1/4 cup red wine
First step turn on the Instantpot- set to sauté
Bring up to a nice hot temperature and add in your olive oil. Once this is nice and hot add in your beef and sear it on all sides. Be sure to generously salt and pepper your meat before tossing it in. After about 6 minutes all sides should be nicely browned. Remove the beef.
Keep the Instantpot going and throw in your mushrooms. Add a little salt and pepper as you cook them down a bit as well. Once they are browned, remove the mushrooms.
Add a touch more olive oil at this stage and then toss in your onions. Add salt and pepper again. Cook these until lightly browned and golden throughout, about 6 minutes. Then add in the carrots and celery and cook all that together for about another 5 minutes. Throw in your garlic, bay leaf and thyme. Sauté for about 30 seconds then add the wine to deglaze the bottom of the Instantpot. Make sure you get all of the brown bits off the bottom of the pot, otherwise you may trigger the burn setting on the Instantpot while it’s in pressure cooker mode. Once you have fully deglazed add in your beef broth, potatoes, barley and tomato paste. Be sure to dissolve all of the tomato paste into the broth, you may find it easier to add the paste to a small amount of stock and then add the rest of the broth in after. Add a touch more salt and pepper, then close up your Instantpot, set it to sealing and set it on high pressure for 15 minutes. If you are new to Instantpot you may not yet know, it takes a while to come up to pressure so 15 minutes is really more like 25 minutes in the scheme of things; but your “cook time” on the Instantpot should read 15. Once this counts down to 0, do a partial natural release. You’ll wait til the counter goes back up to 15 and then carefully release the rest of the steam from the Instantpot using the release valve.
Voila! Beef Stew. I’m freezing a large amount of mine for future lunches and dinners as winter continues. Hope you enjoy!
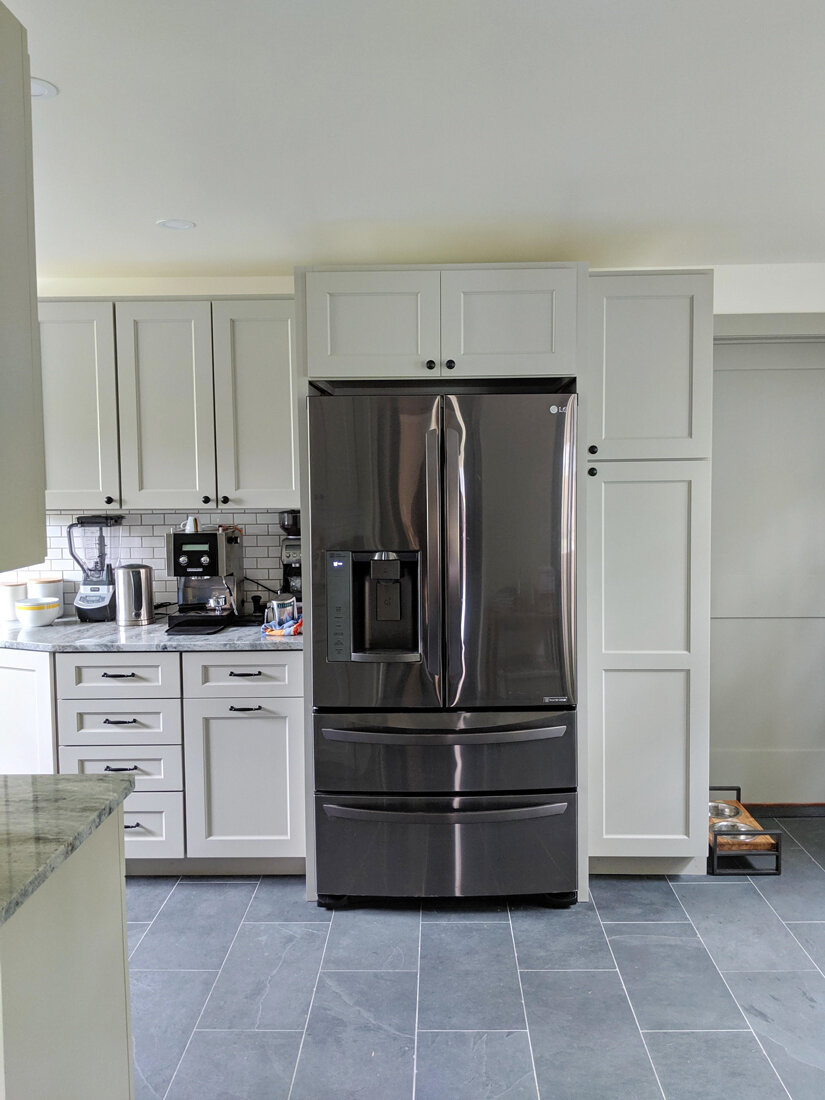
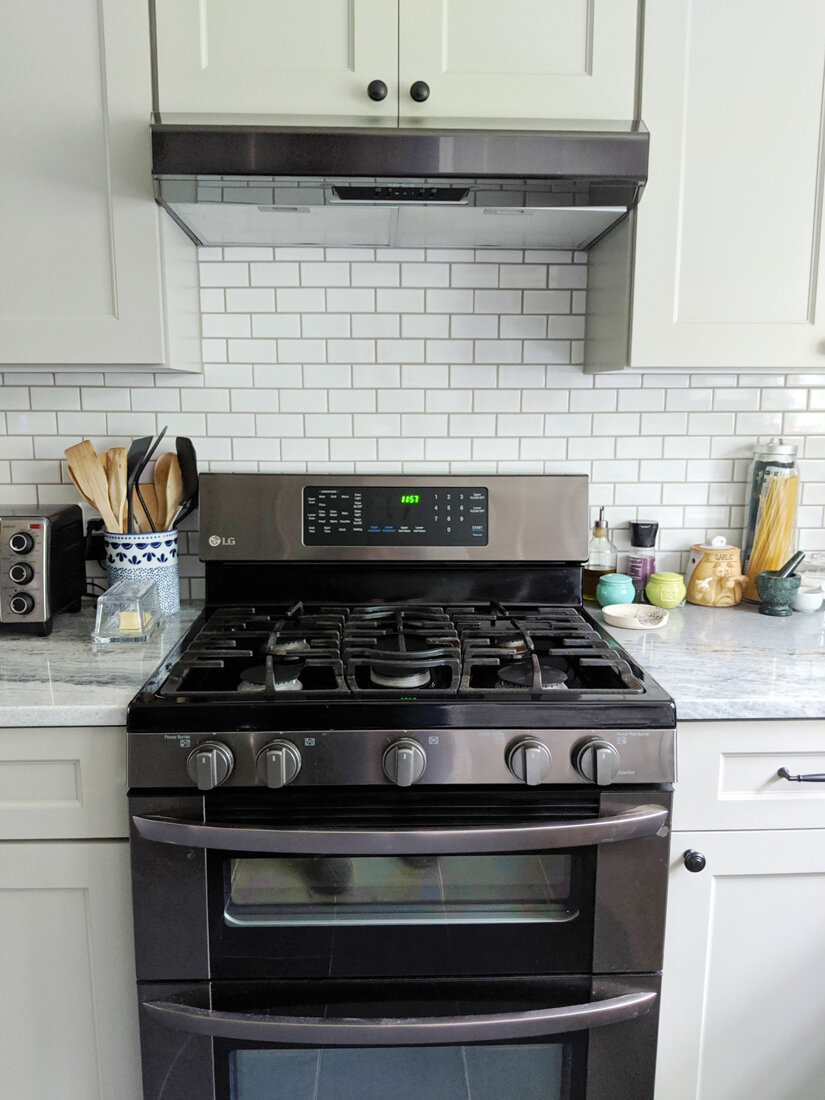
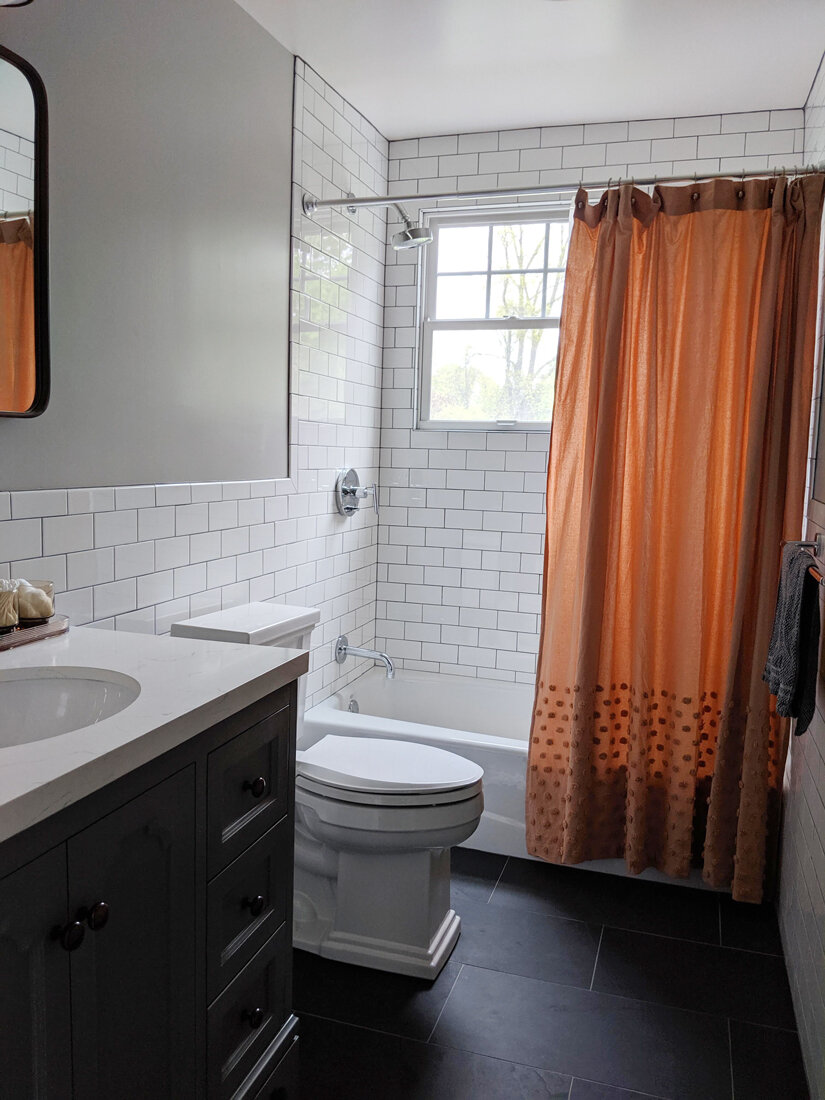
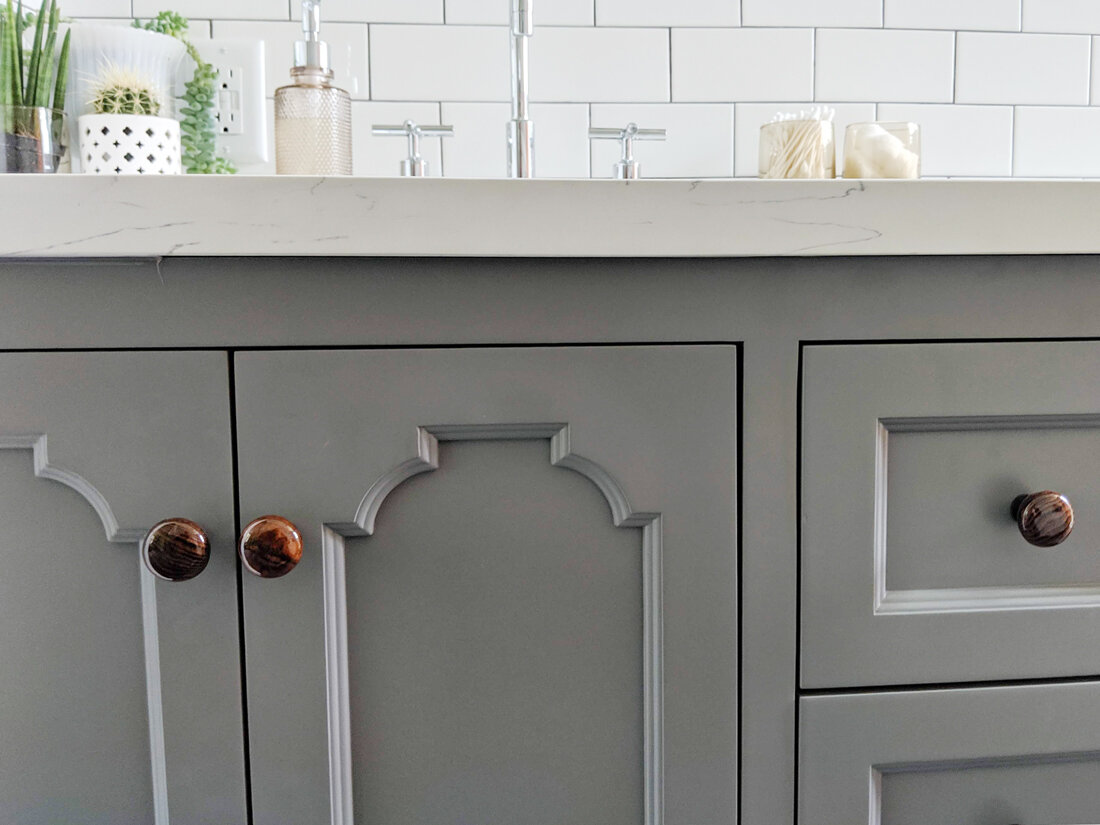
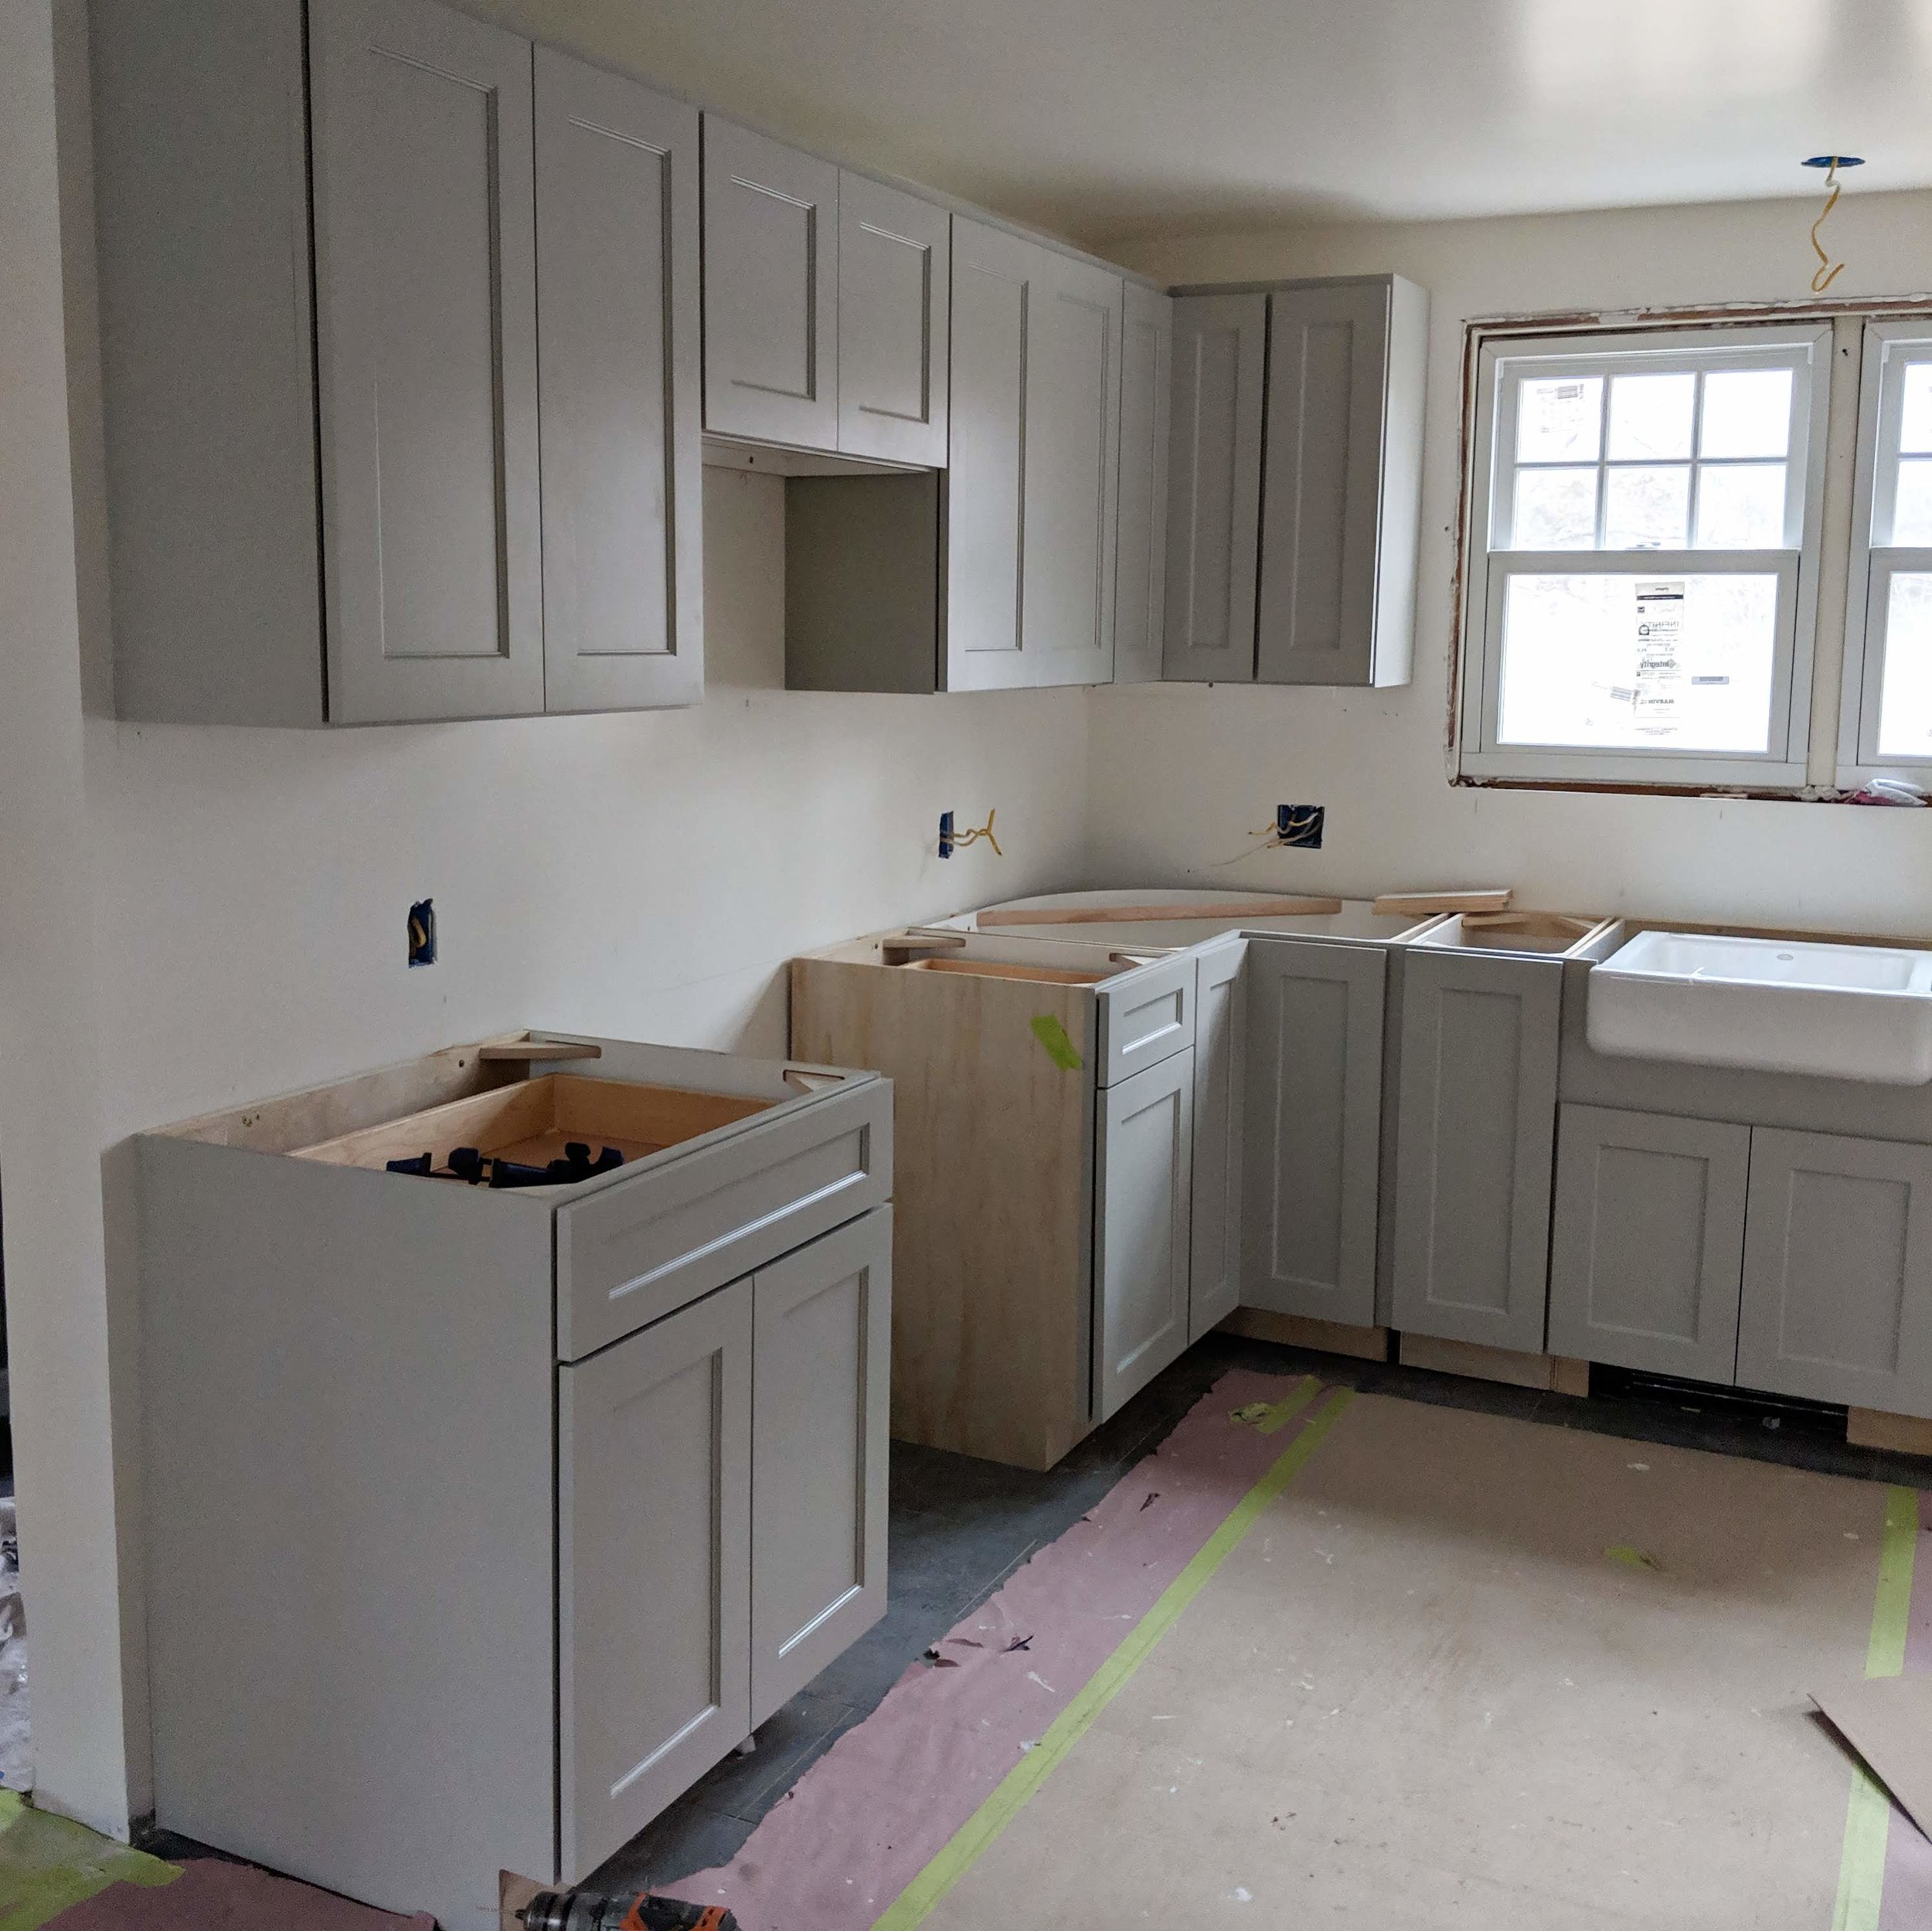
Kitchen and Bath renovation "Befores and Afters" 1850's farmhouse kitchen
It occurred to me as I was cooking endless meals this past week in my fabulously functional and beautiful kitchen… I never posted any after photos following my renovation. Since that renovation wrapped up in early April 2019, we’ve completed a new roof installation and renovated a guest room as well, so I guess that means there is a lot to catch everyone up on… BUT FIRST- Kitchen/Bath.
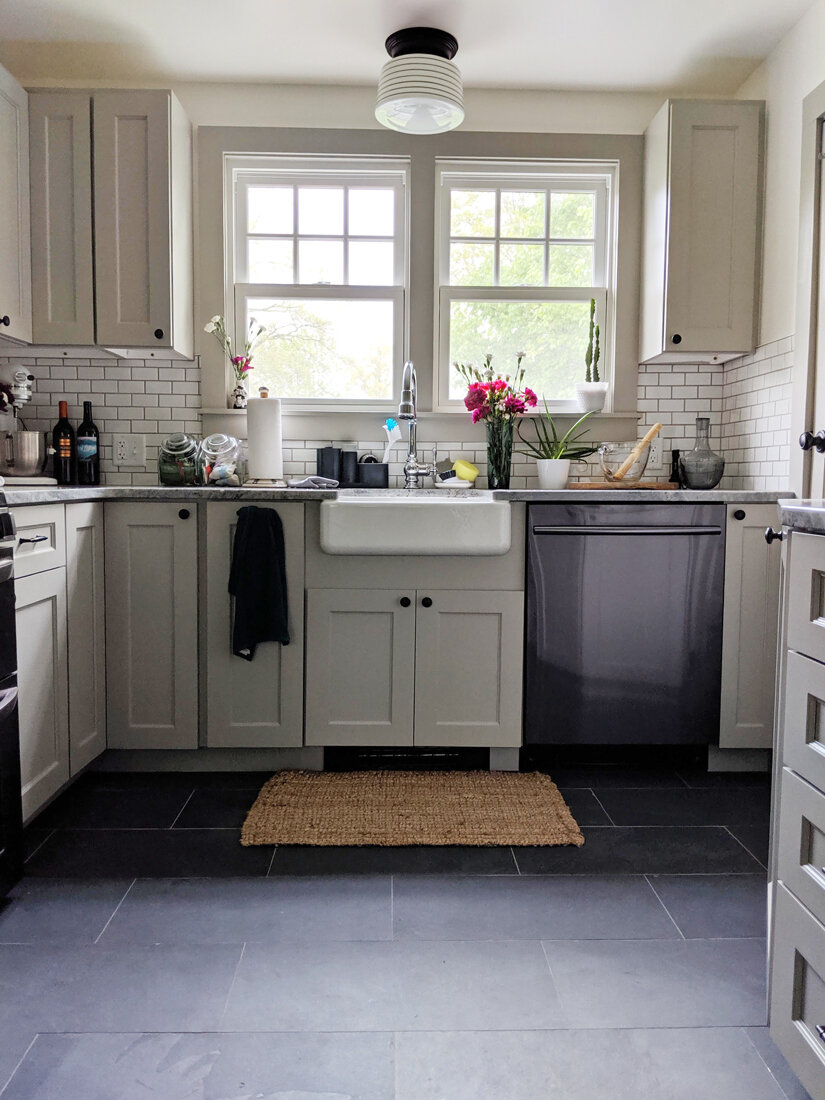
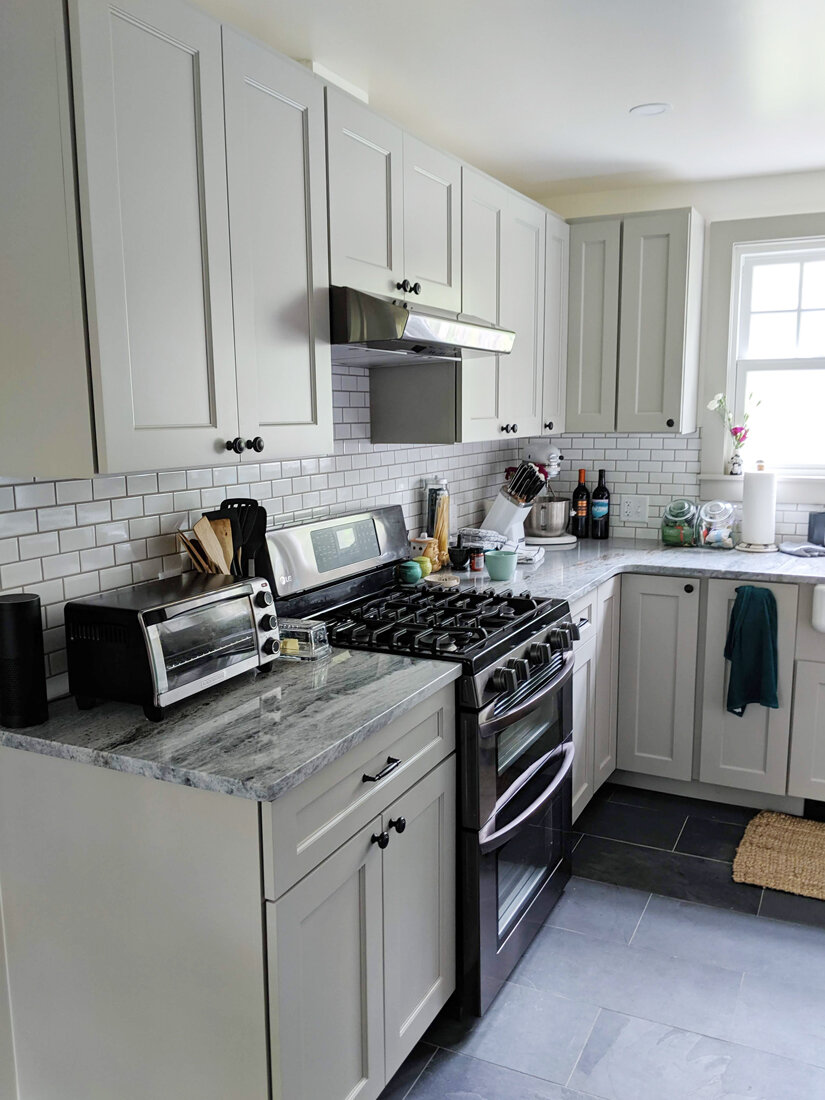
We put a lot of thought into the finishes we chose for our kitchen trying to balance trends of the moments with classic styling that would increase the value of our home over the long term; as well as satisfy our desires to be up to date and in the moment. I think we accomplished that, but only time will tell. Either way, I know I am very happy with it in this moment and who knows what tomorrow will bring anyway.
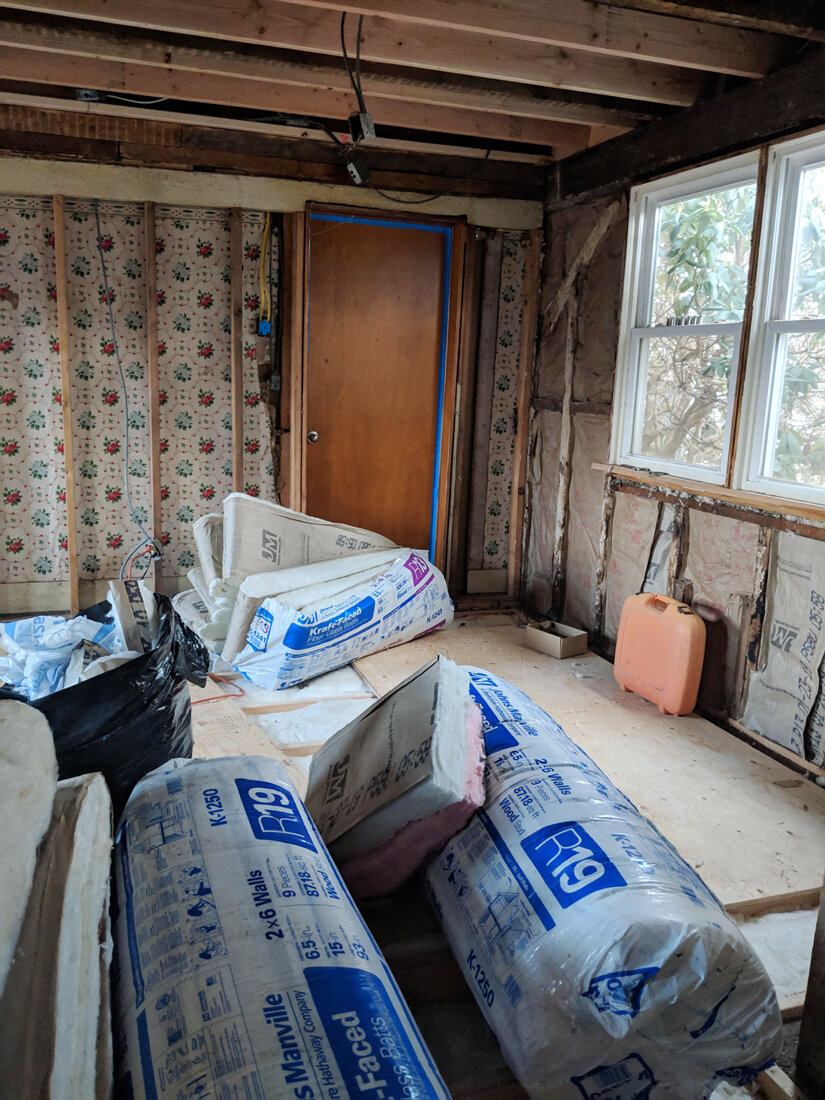
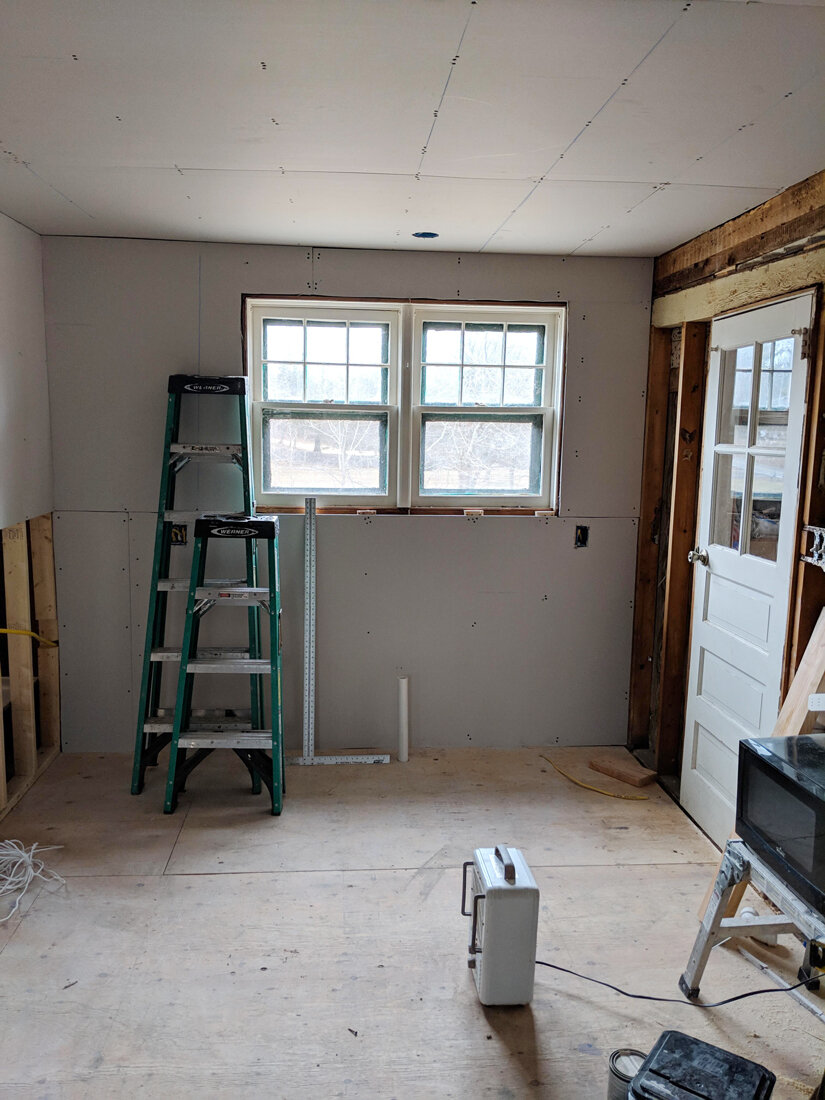
In order to really understand the massive change this brought to our home, I think you’ll need a good look at the “Before” images for this space. We re-did both the downstairs bathroom and kitchen in one swoop as they share a wall:
As I mentioned, we spent a lot of time thinking about finishes. I’m planning to put together a post detailing our “finish choosing journey” but til then lets talk about it as an overview. Things we knew we wanted from the project:
stone countertops or quartz
shaker cabinets light grey, dark grey or white
all new energy efficient windows that also matched the style of the space
DISHWASHER
new up to date lighting that would give us significant illumination at night
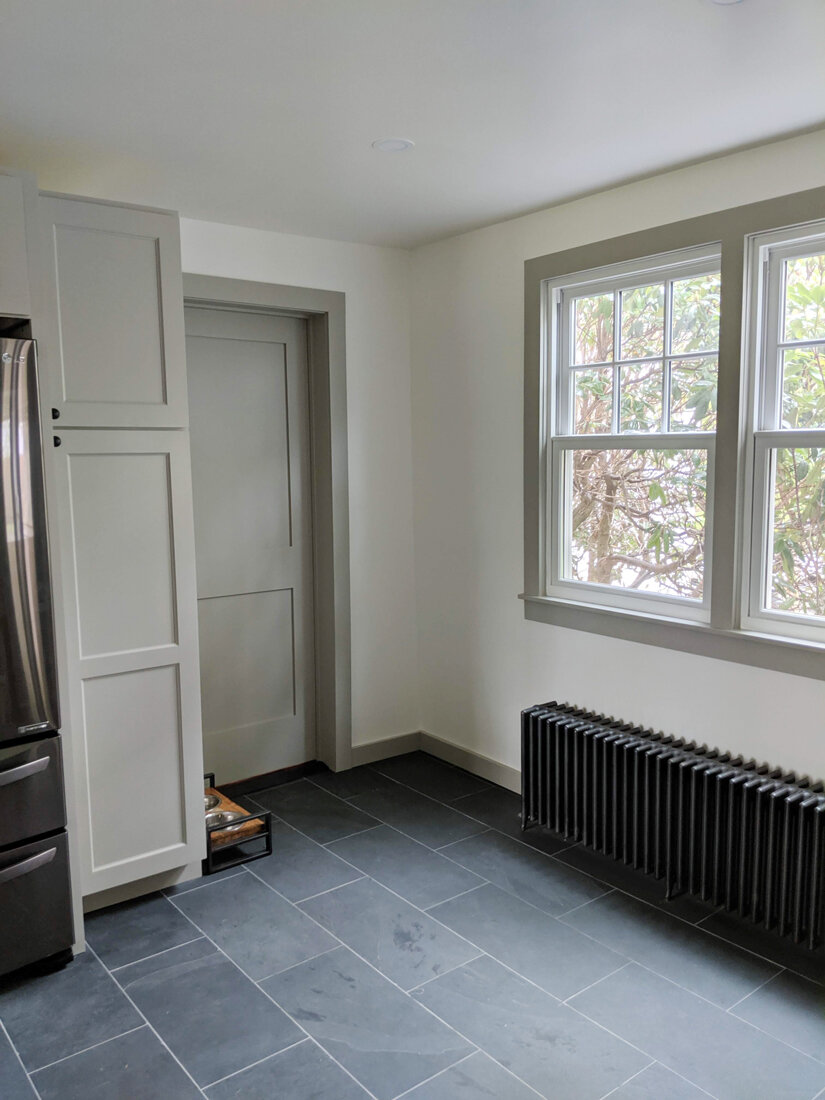
less obtrusive heating (to accomplish this we nixed 2 of the radiators and opted for under sink kick toe heaters)
vent hood
deep farmhouse sink
insulation
a functioning bathroom (out of commission for 8 months before we started the job)… we wanted a beautiful space for guests to use when they visited- this serves as both powder room and guest bath
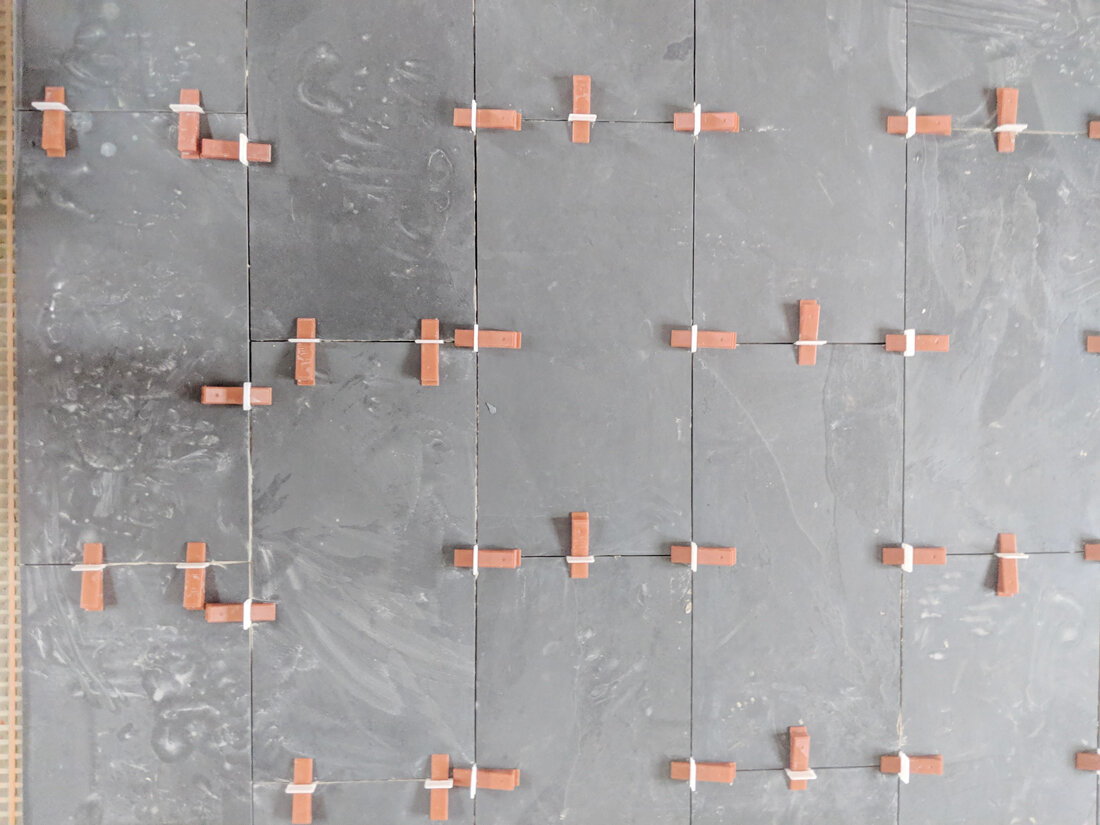
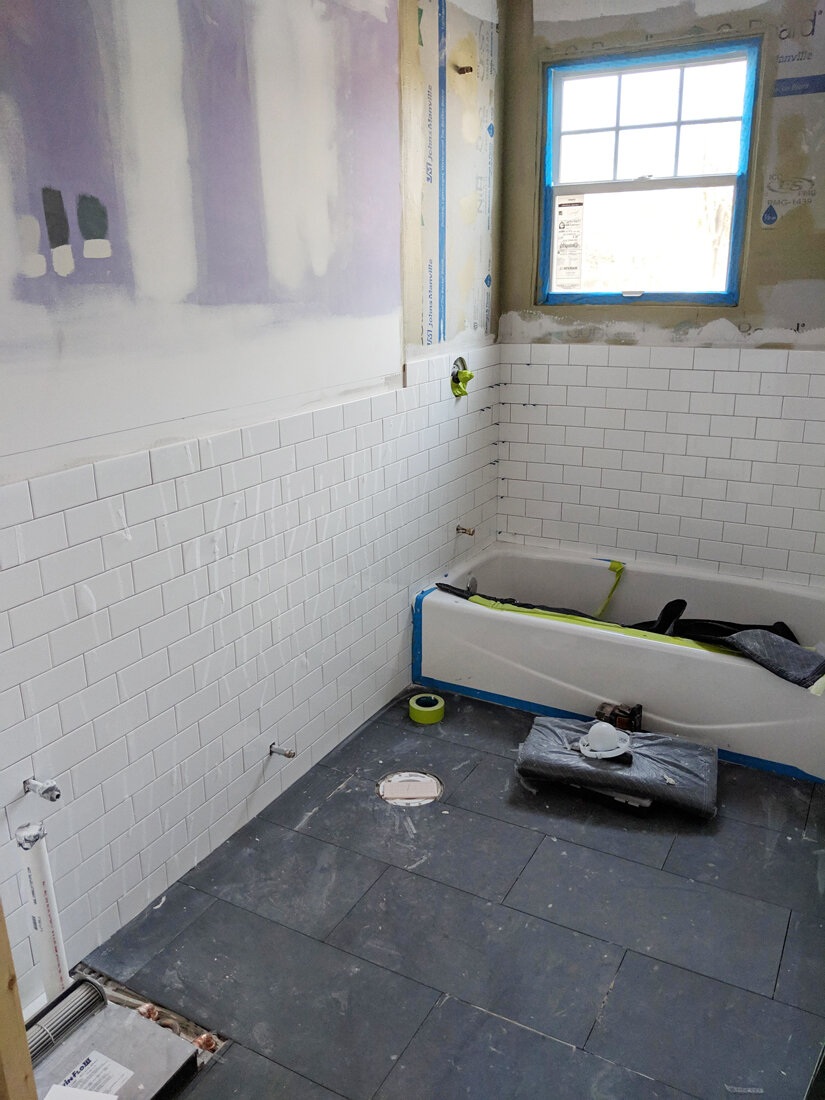
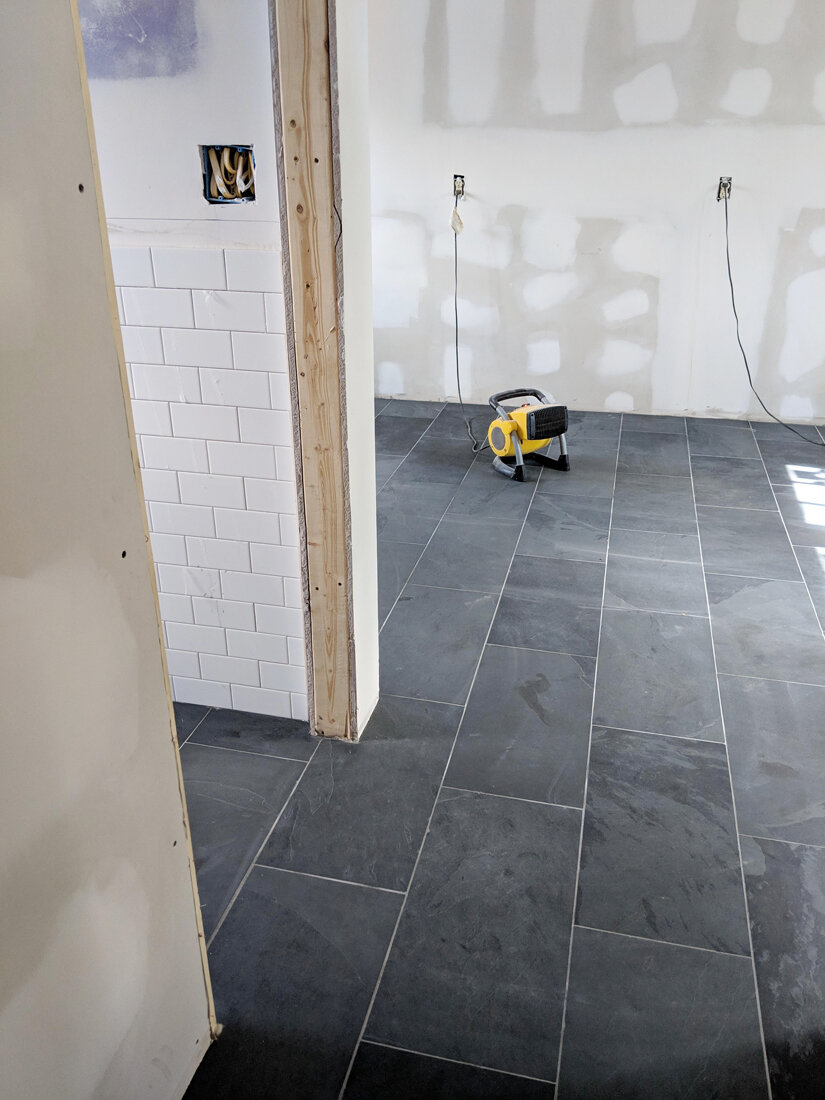
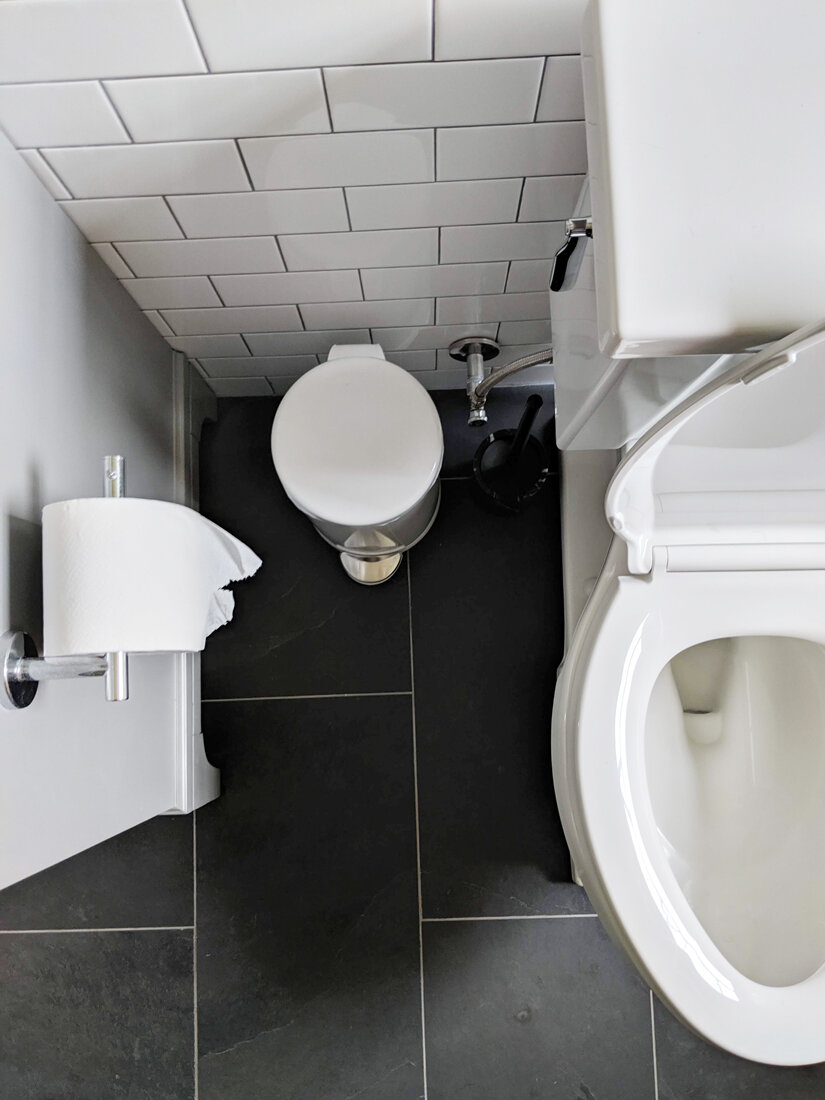
tile floor that matched throughout the project to unify the space
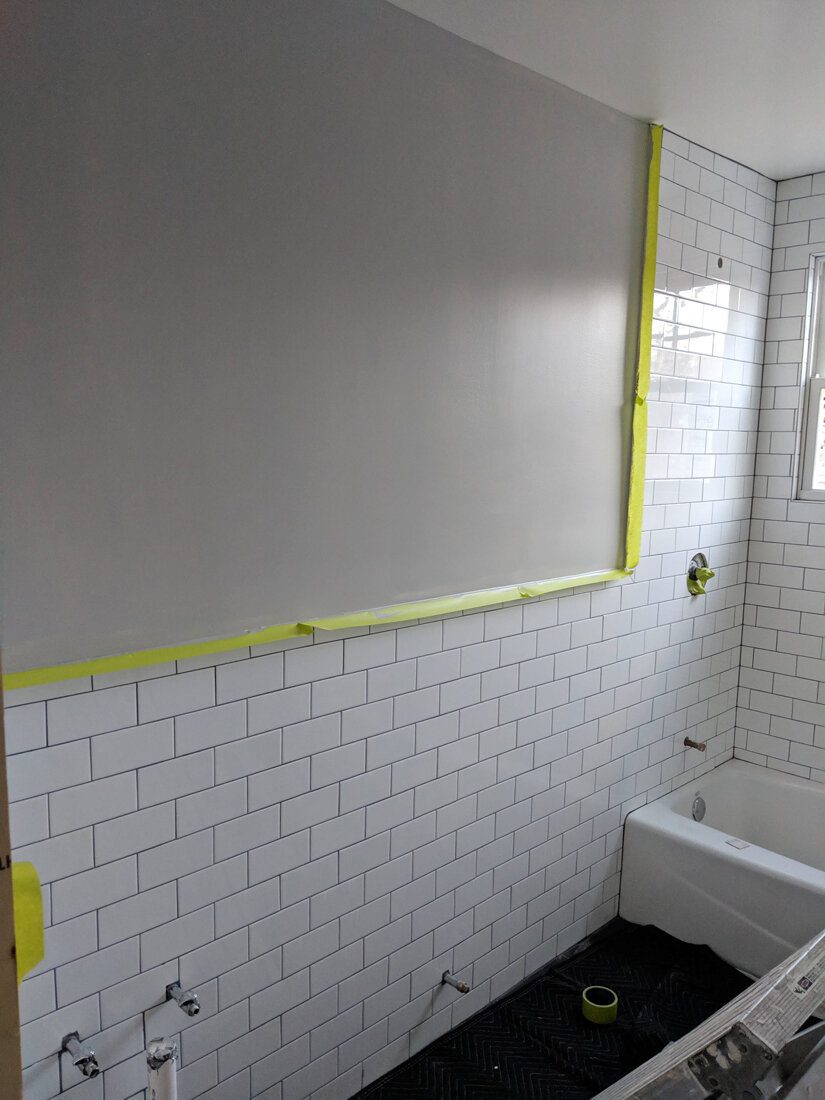
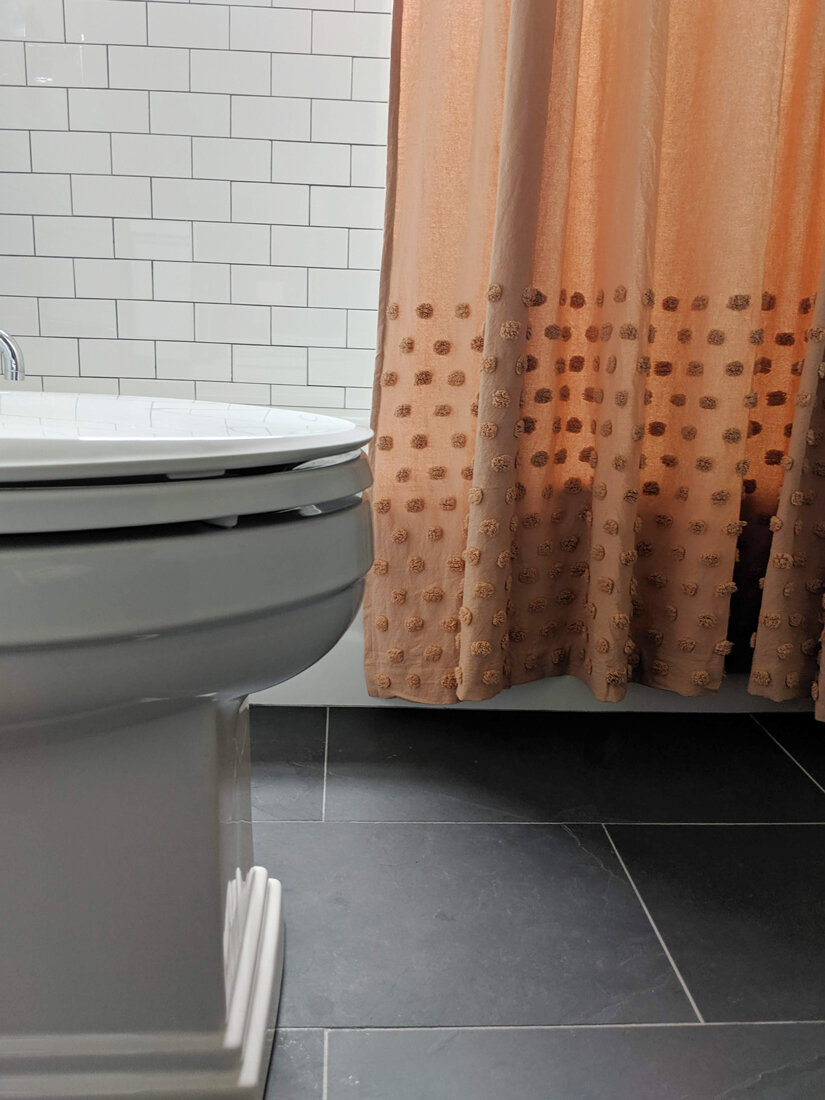
half wall tile in bath and backsplash in kitchen
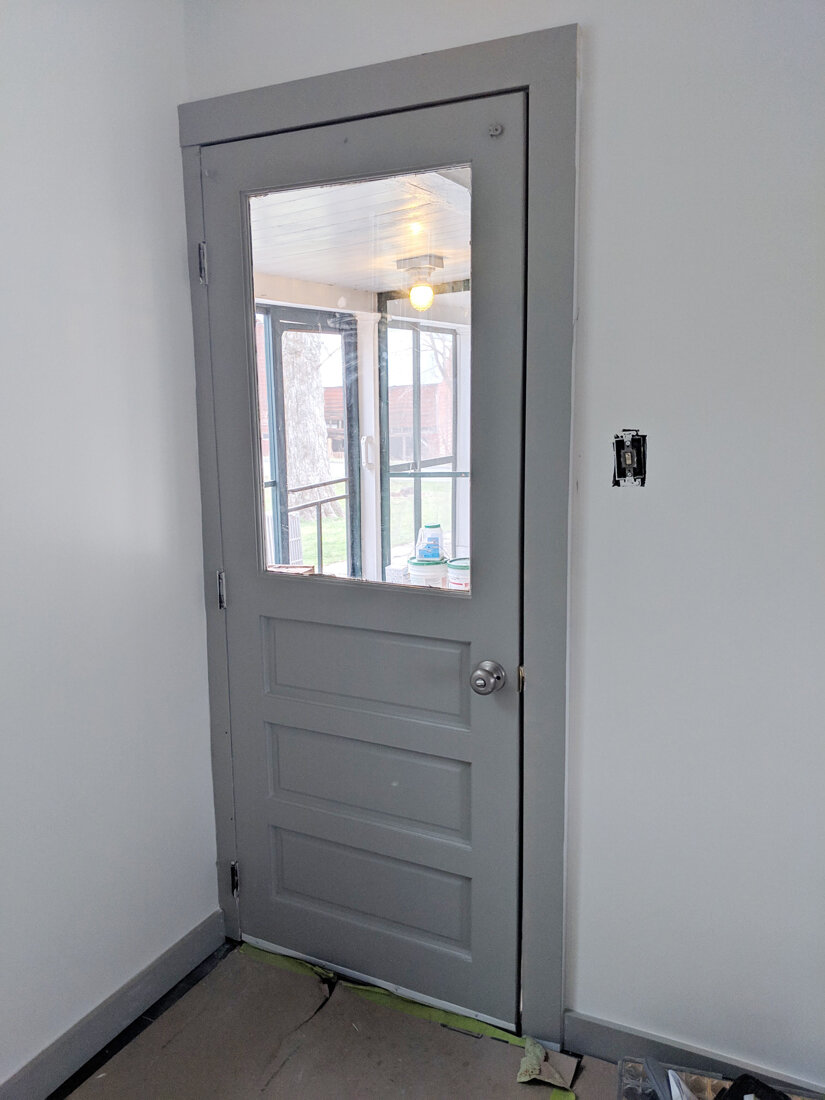
keep original doors (except interior door to bike room)
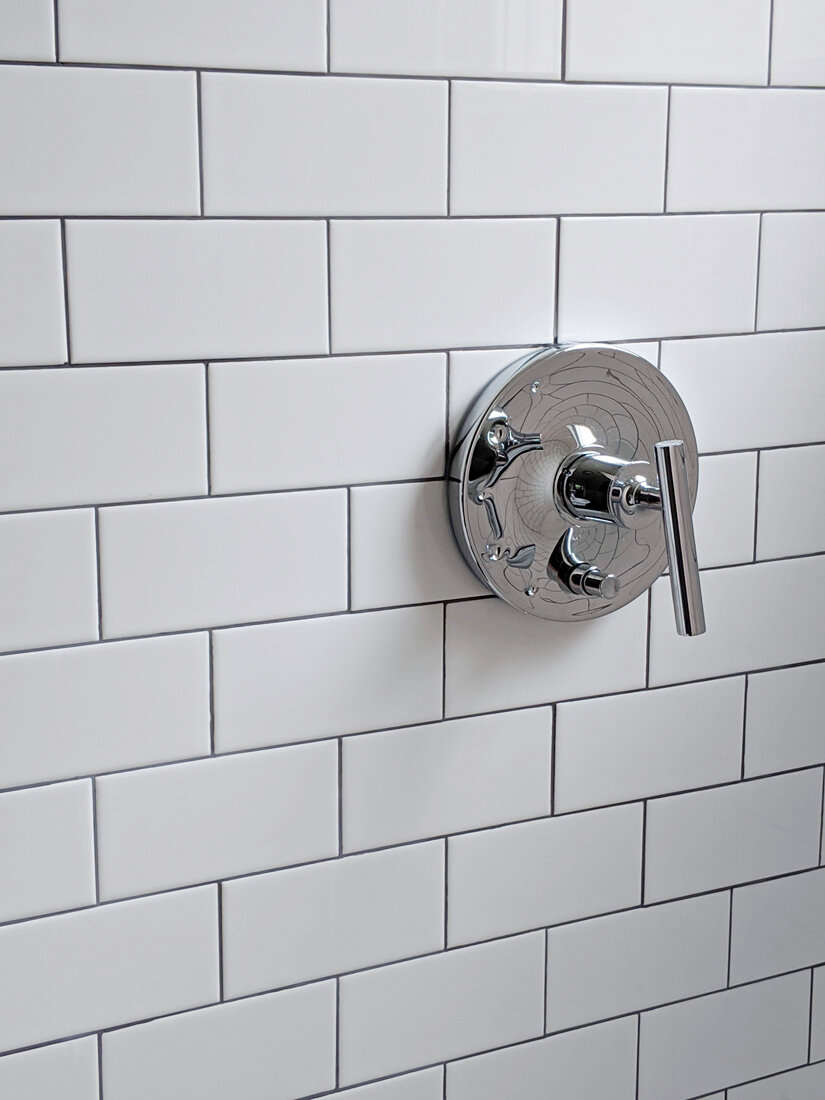
chrome and black fixtures
It’s too easy to jump from start to finish so lets look at some progress shots along the way
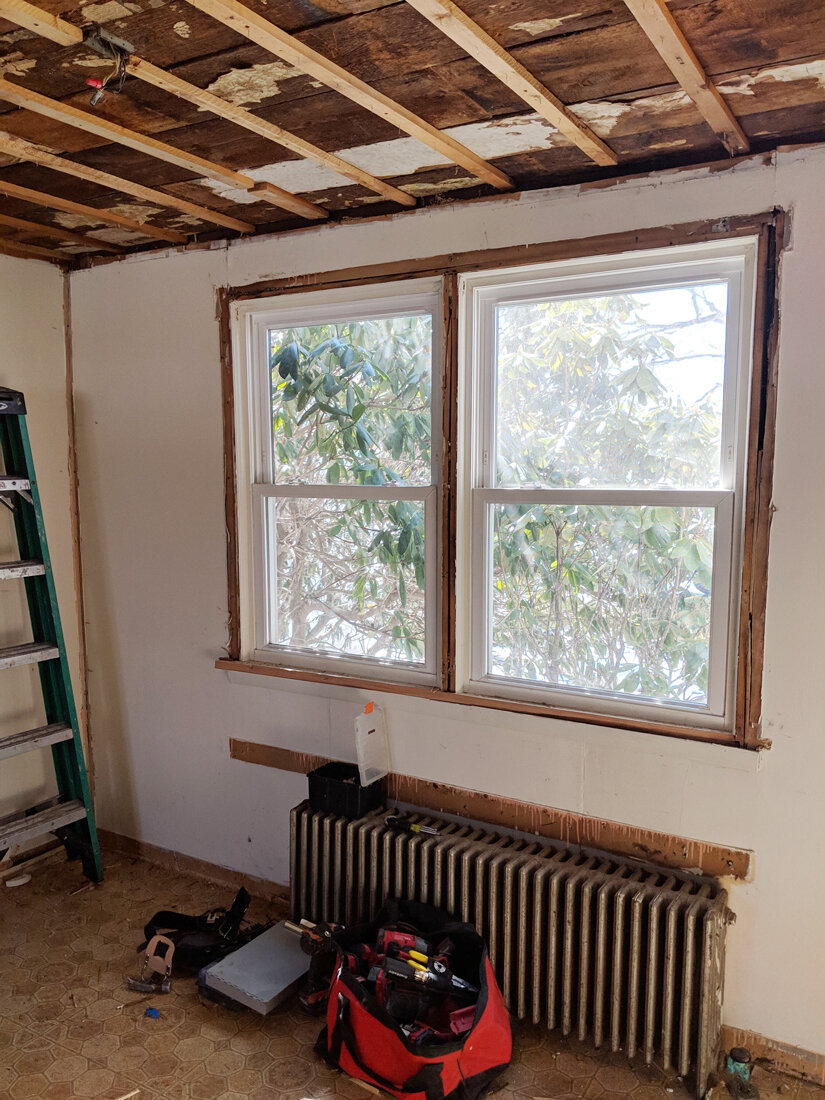
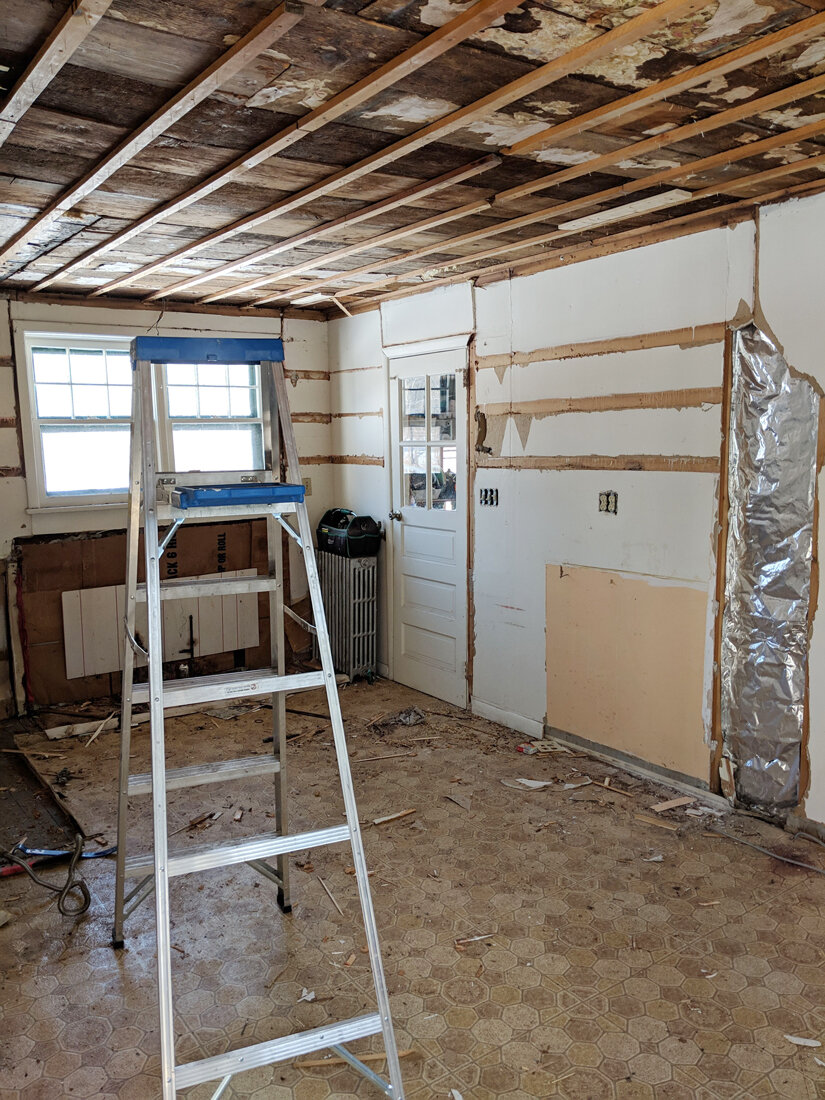
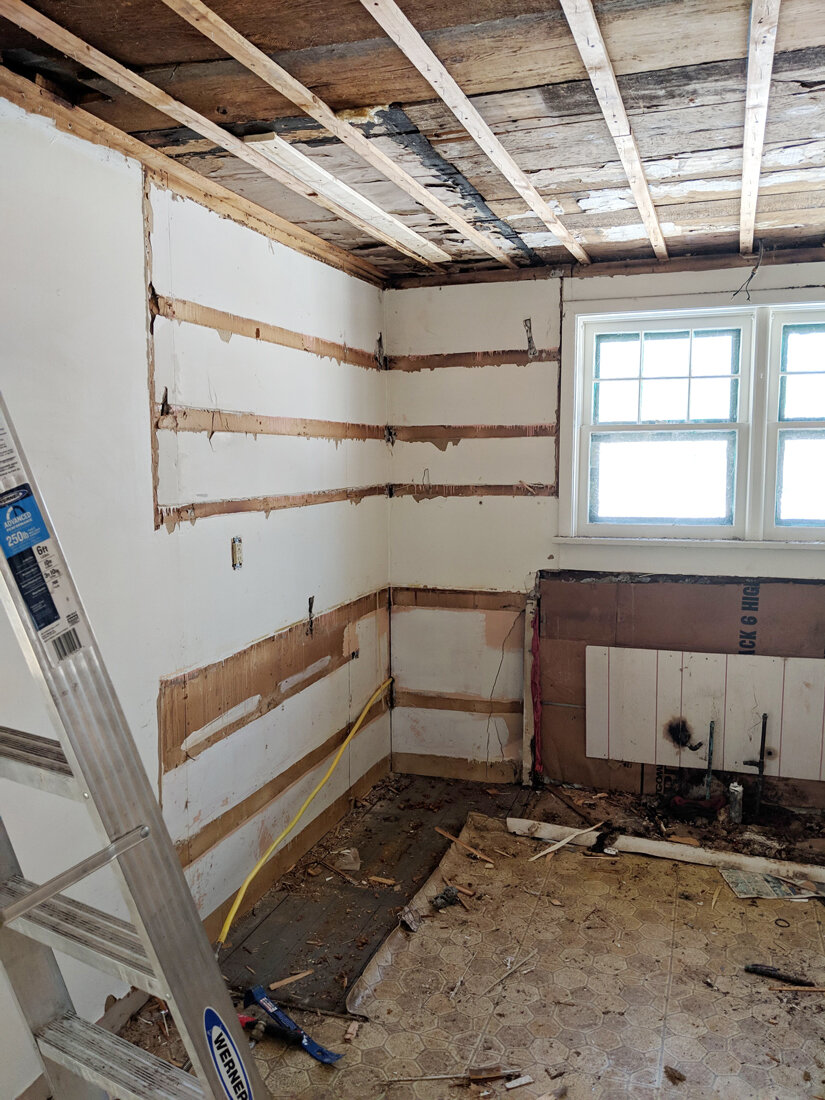
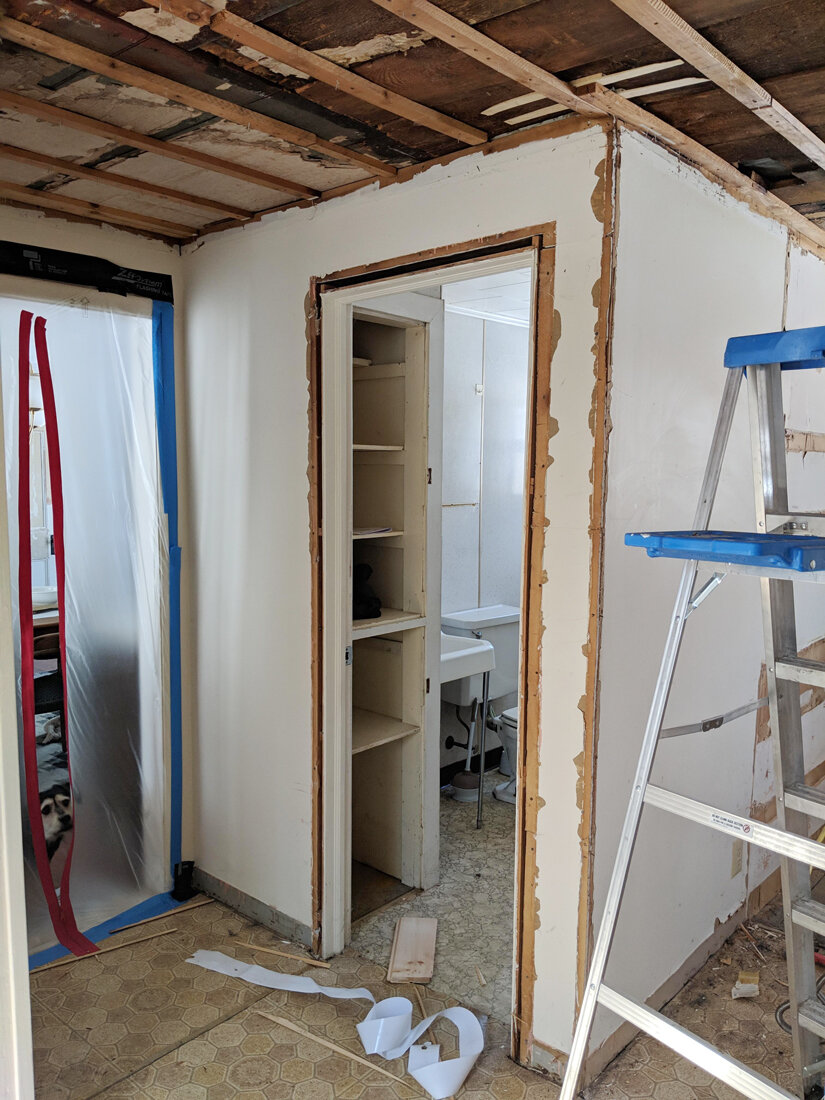
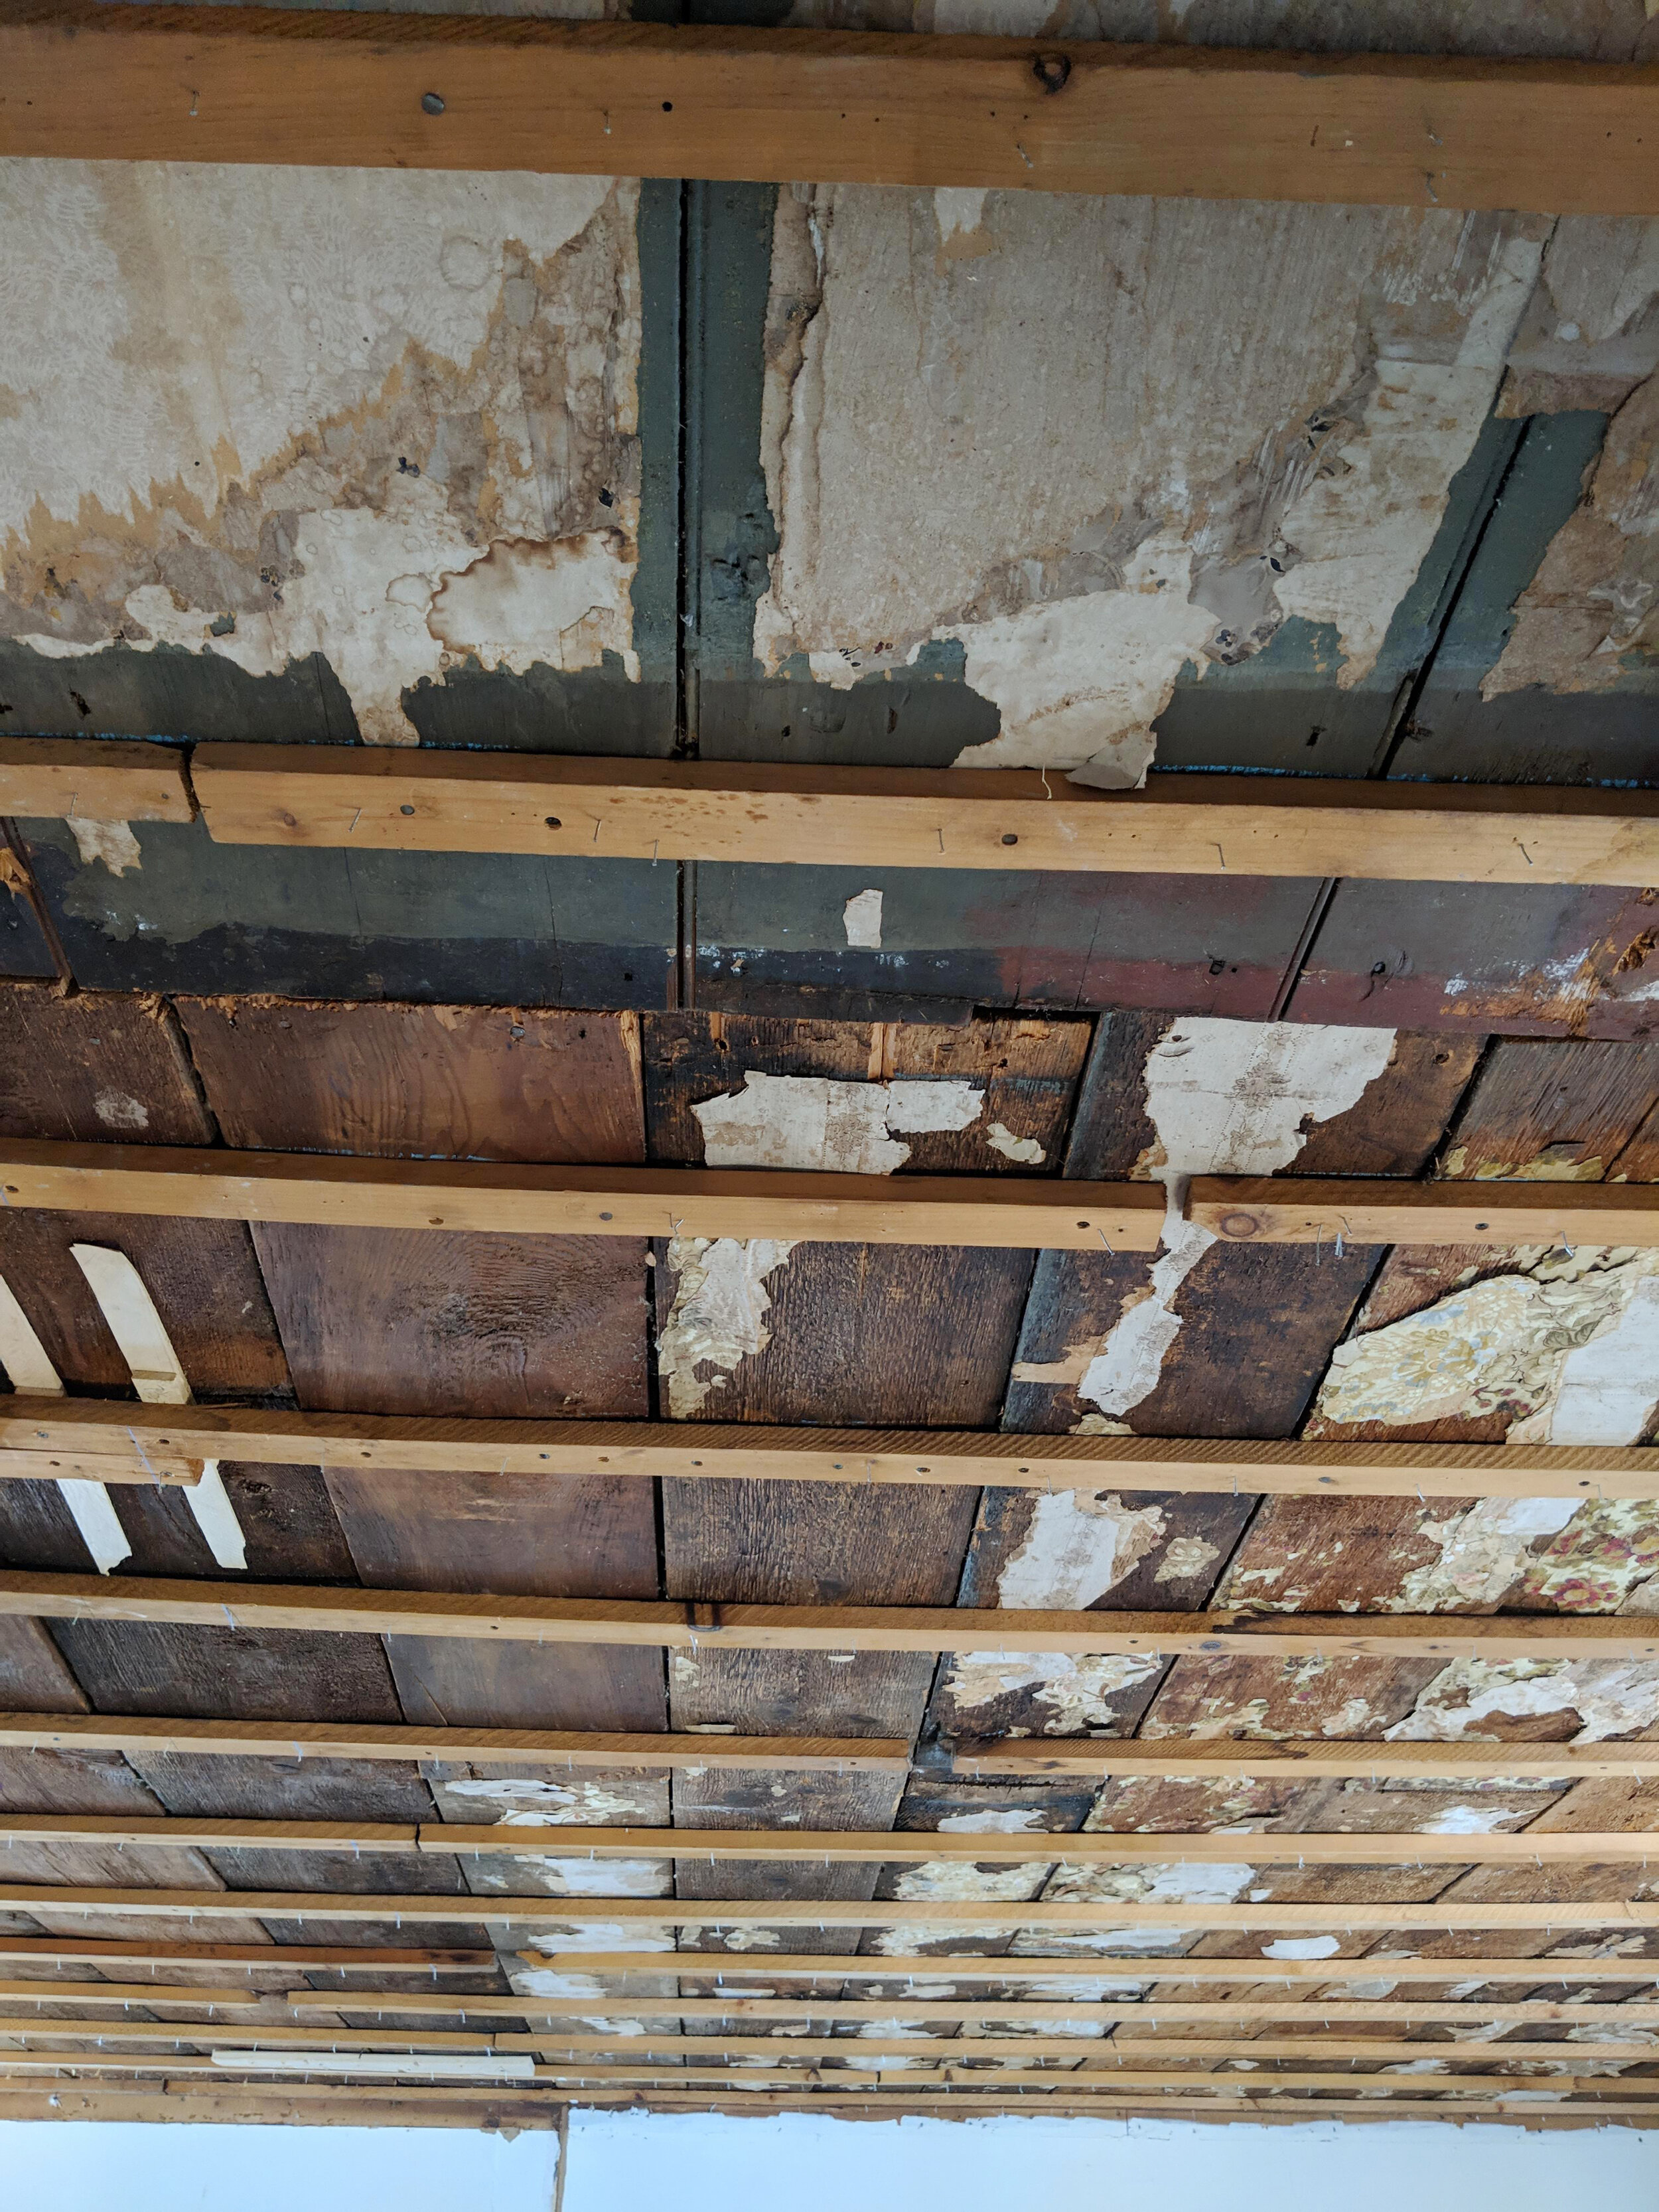


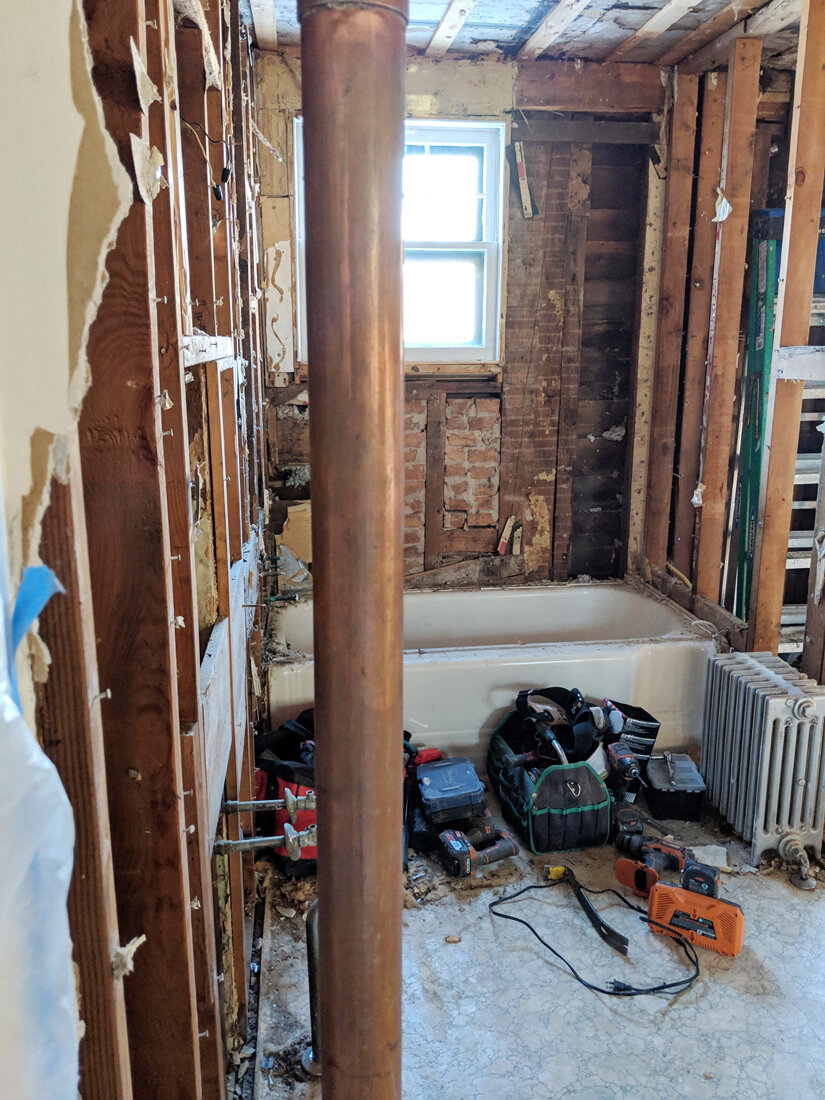

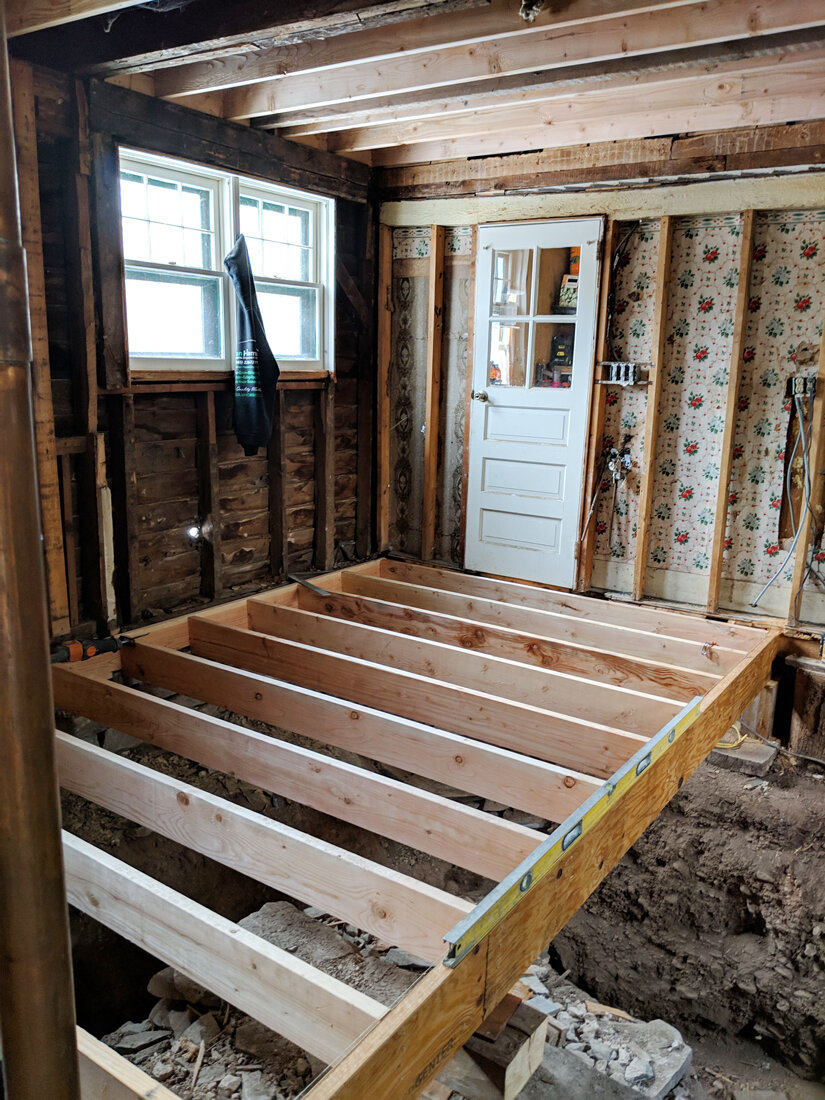
Round 1 of process photos above show the initial demolition, followed by the stripping to the studs and then finally the floor being entirely removed due to insufficient structure.
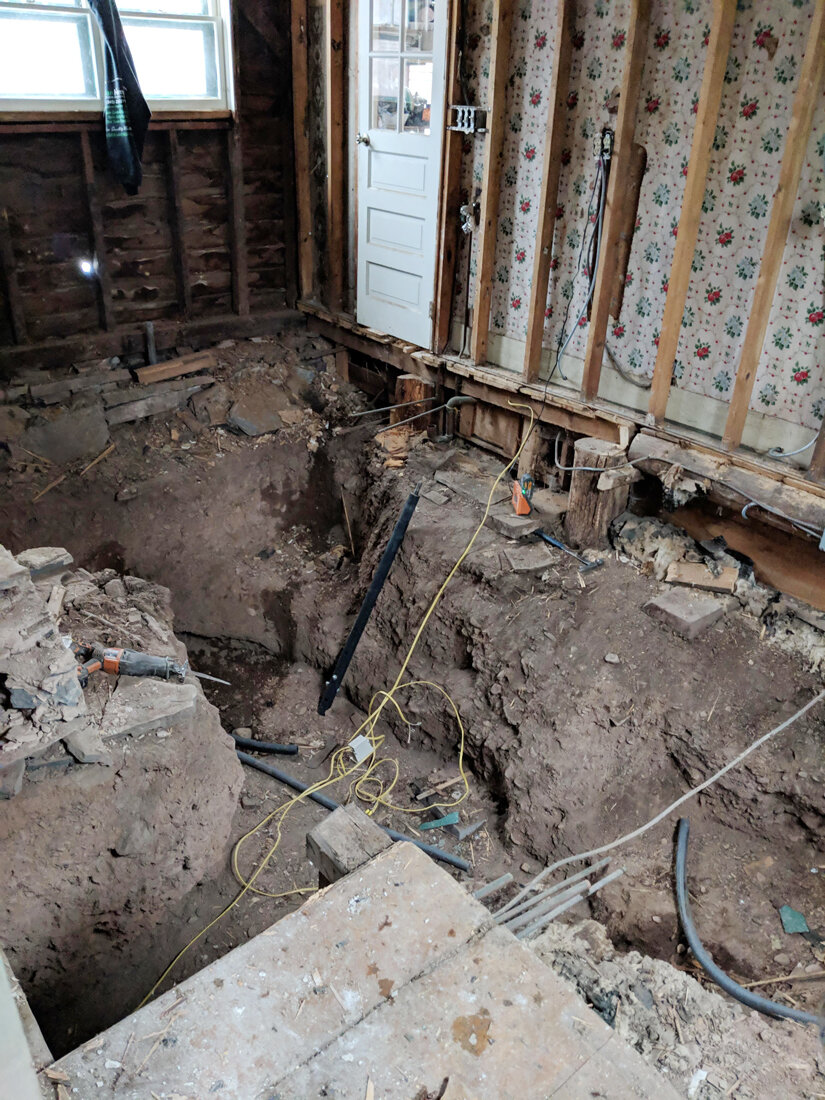
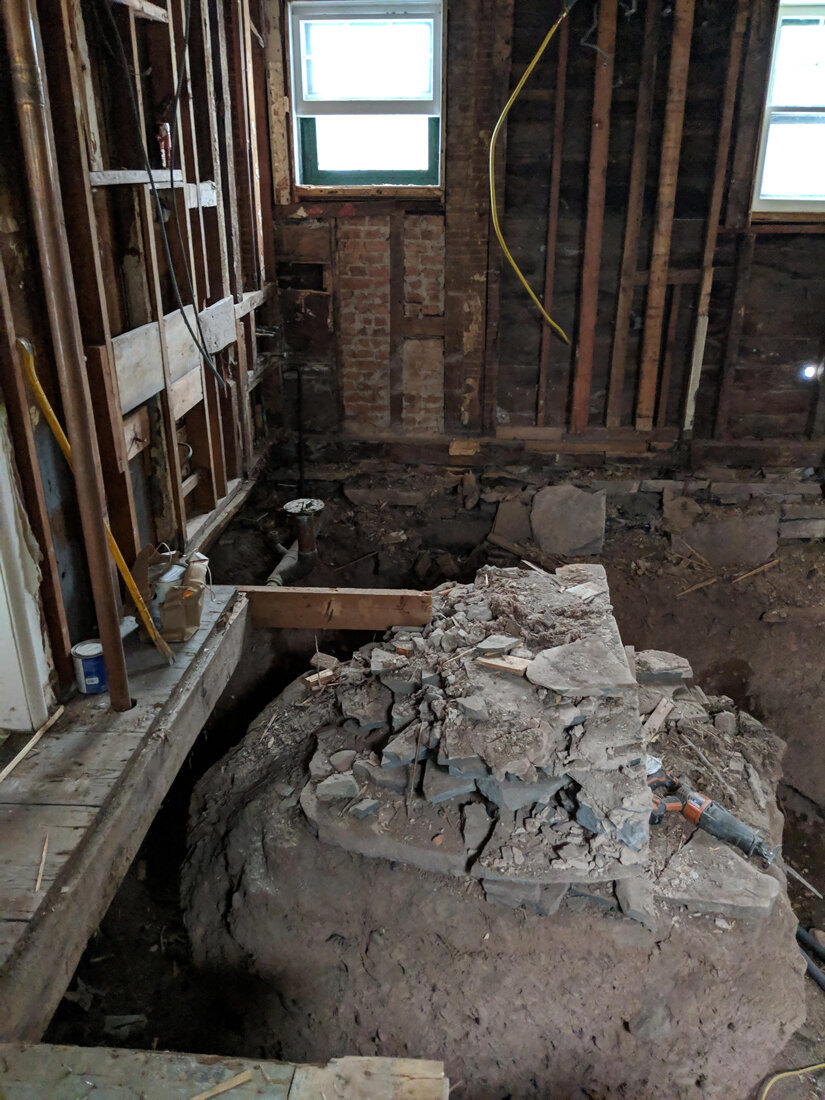
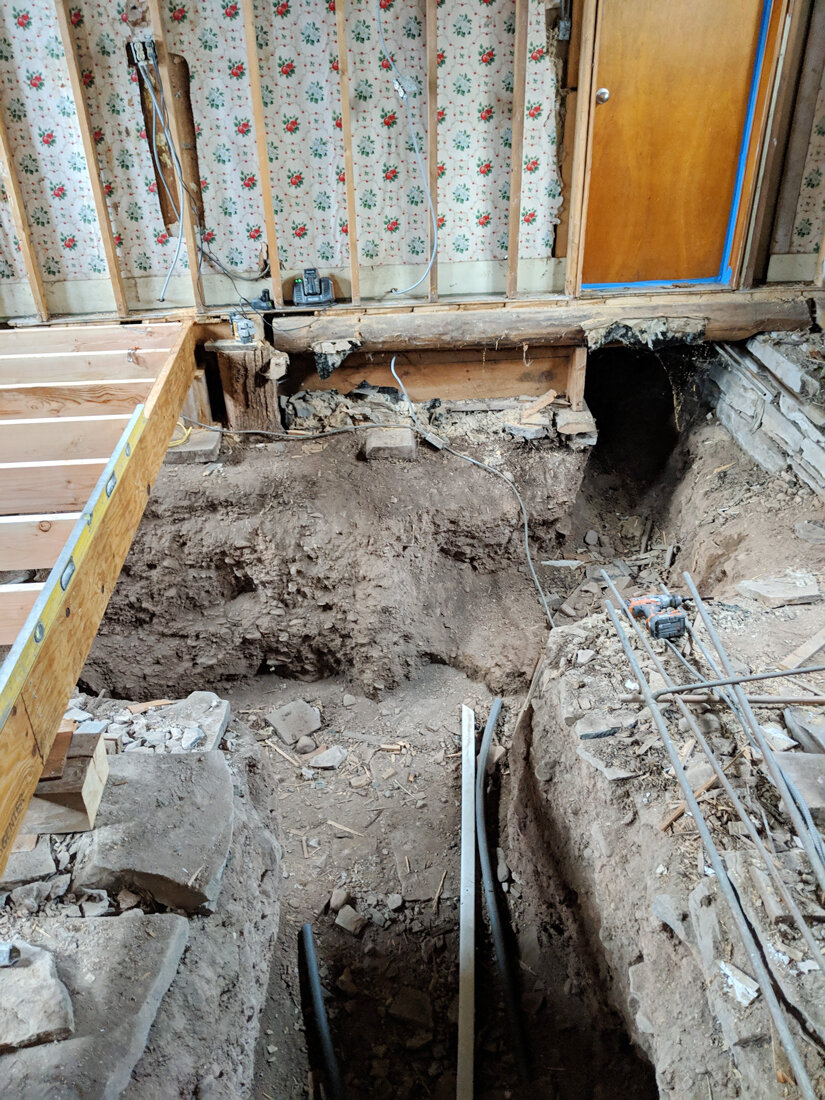
Next step is the rebuilding of the floor with brand new framing, which was something we always suspected was going to be necessary but came as a bit of a surprise in regards to the appearance of what I like to call “the pit” (pics 10 & 11 above 1&2 below).

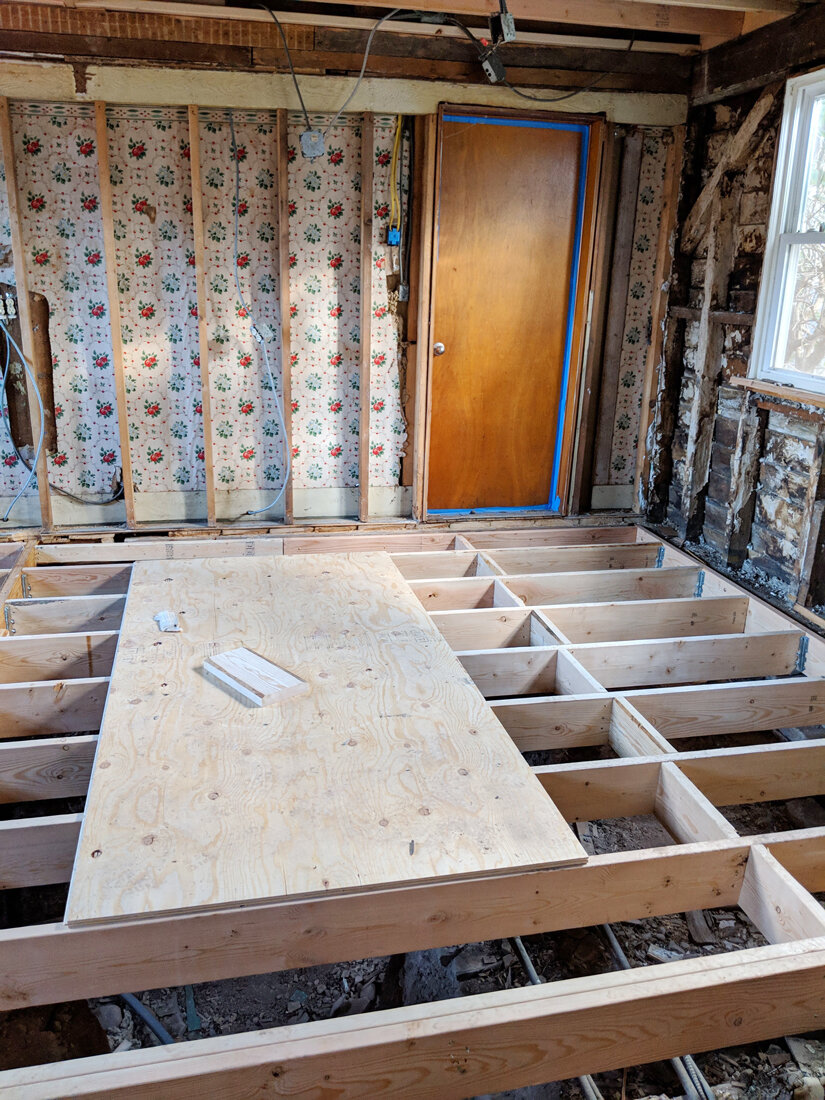
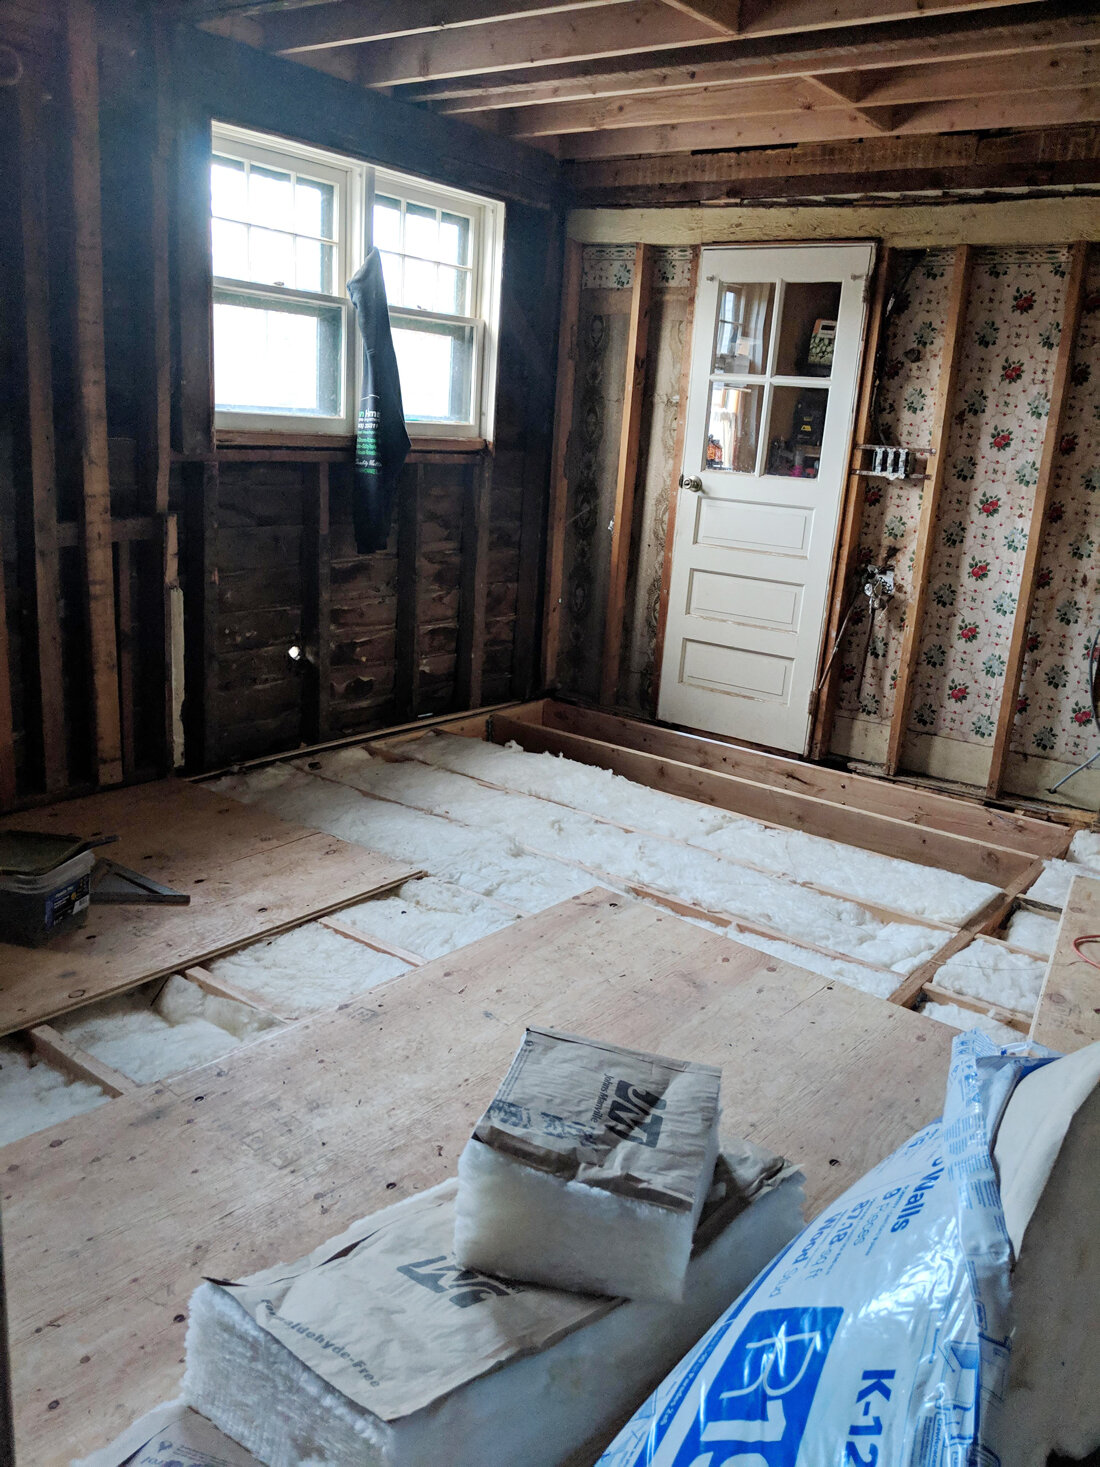
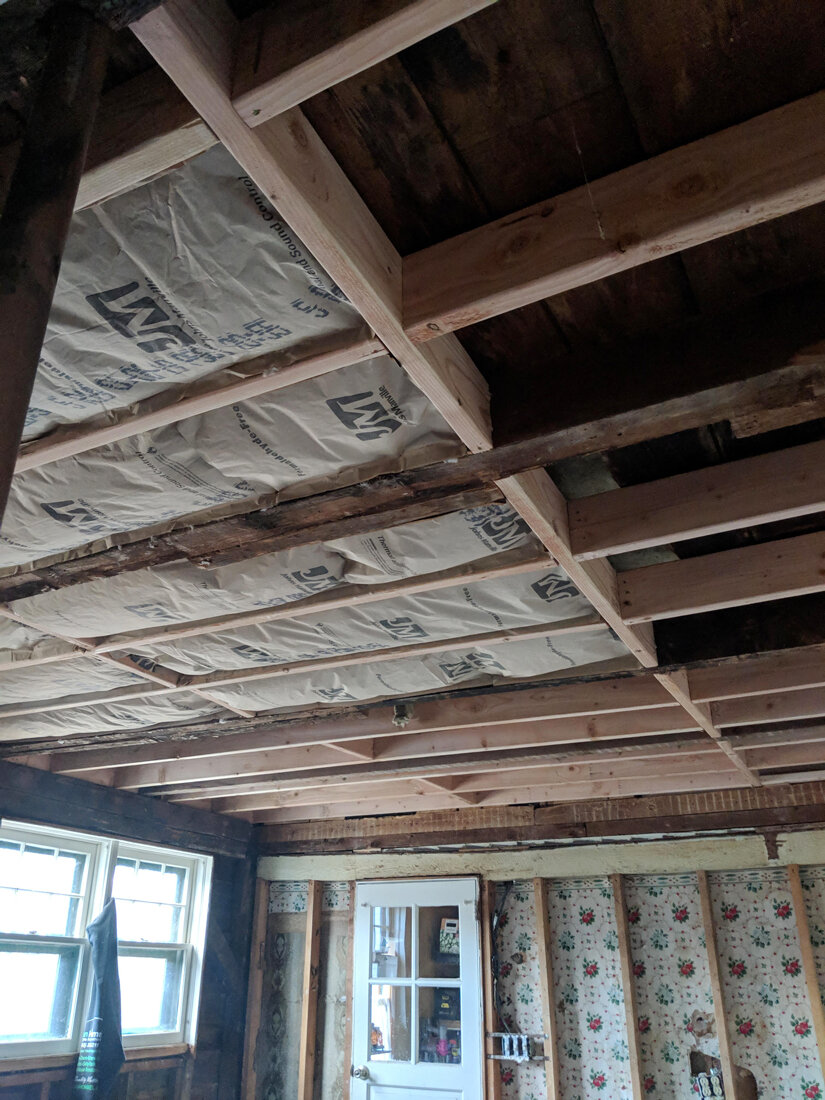
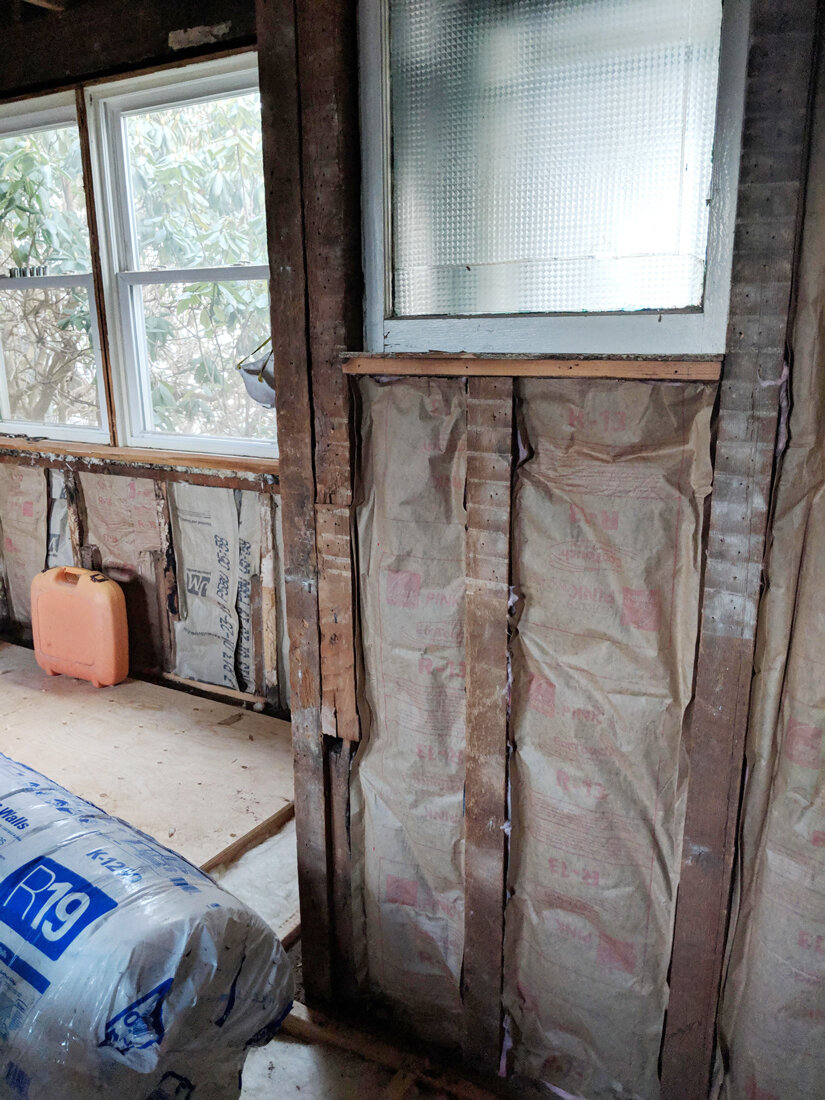
In the progress photos above you can see as the pit becomes a memory, we add insulation to the ceiling, floor and walls and the subfloor is completed.
In the next grouping the surfaces start to be added back into the space, making it feel like a real room once more.
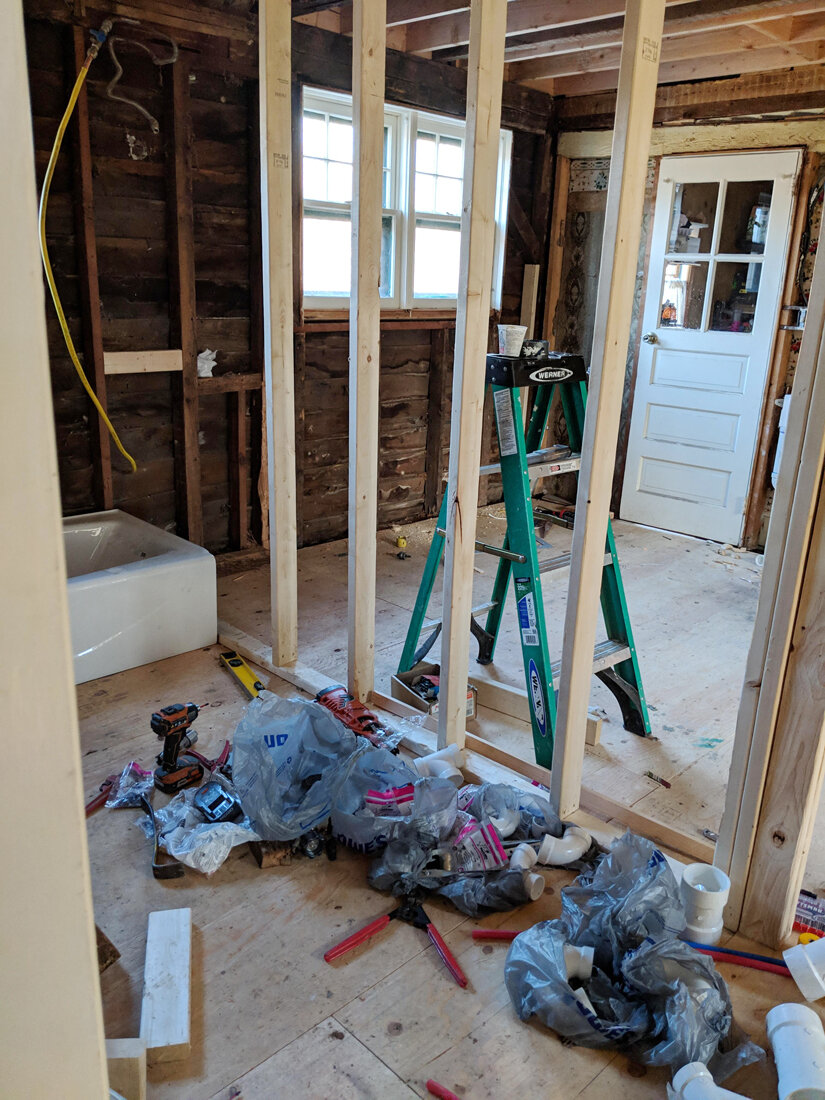

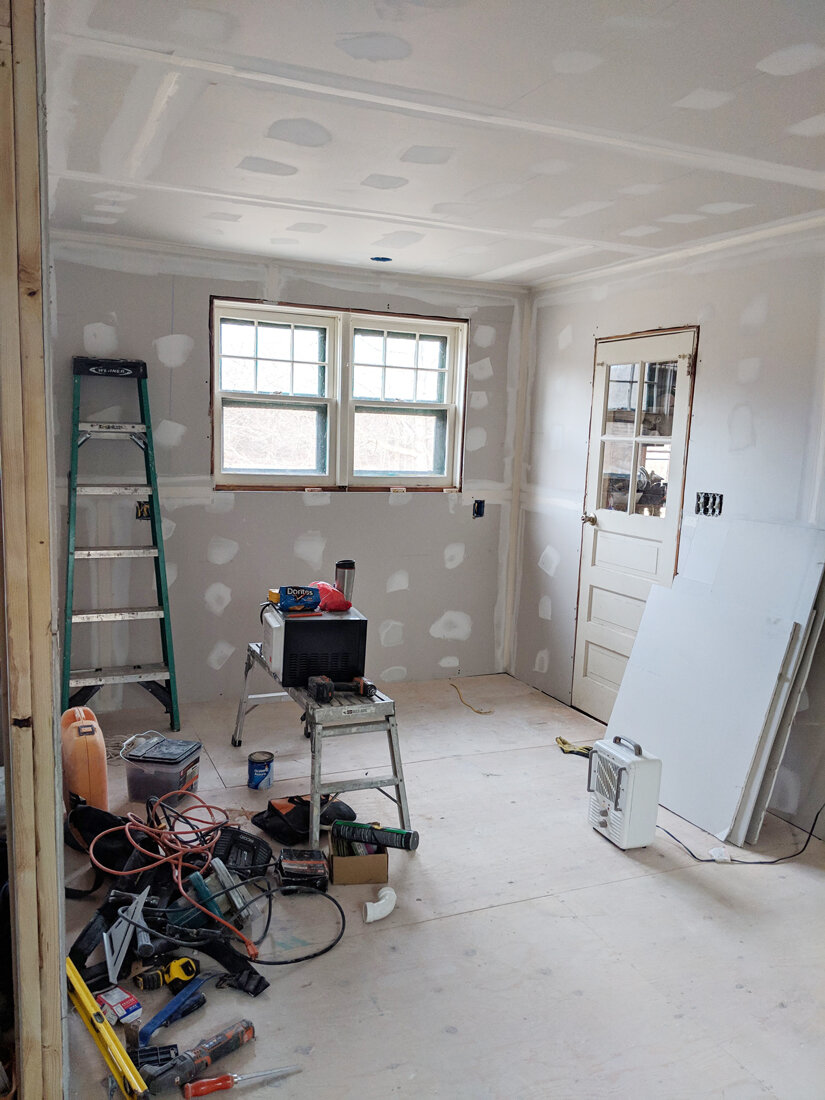
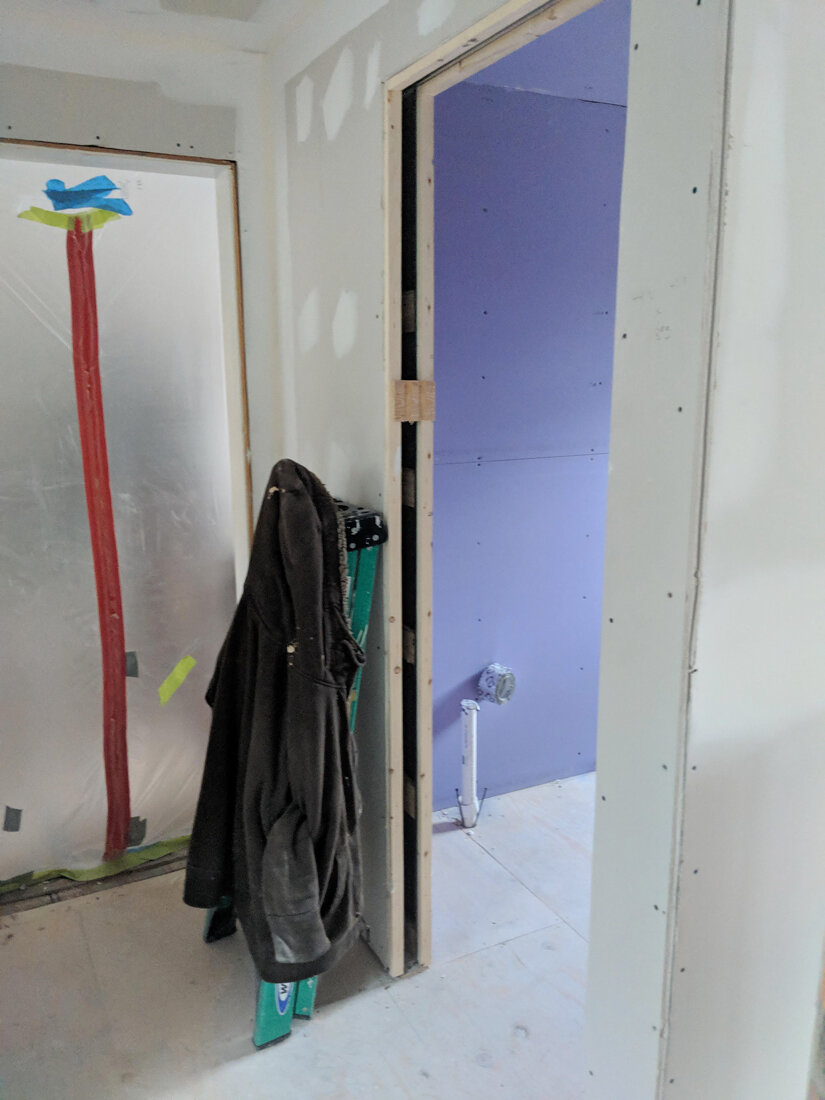
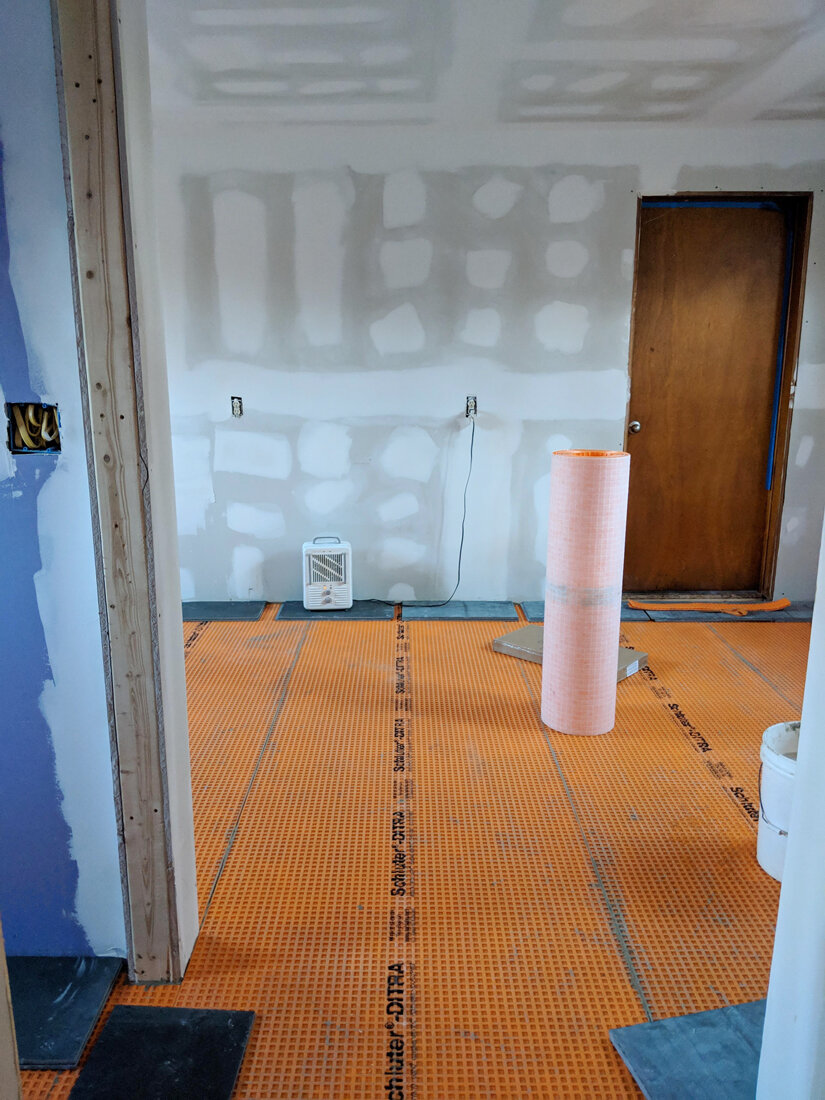
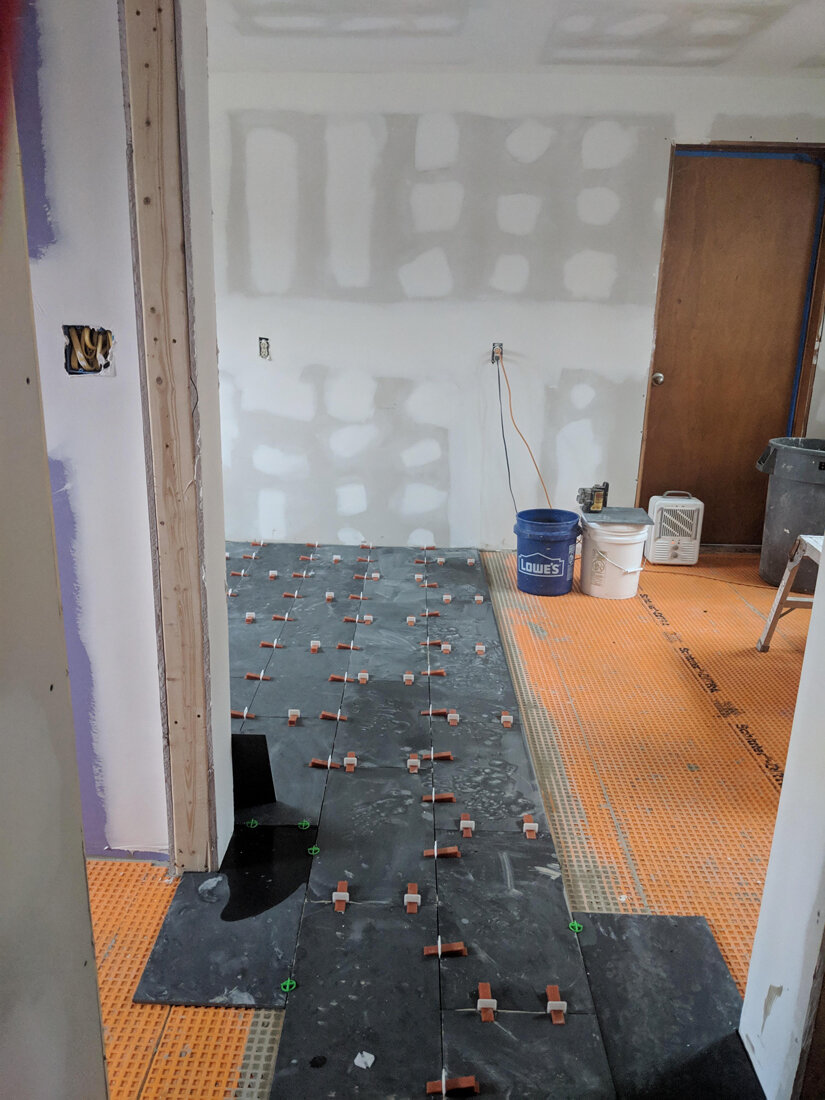

Wall framing, drywall, mud, wall tile, flooring… things were really moving along at this stage. Everyday I would come home from work to find things looking more and more finished which was very exciting.

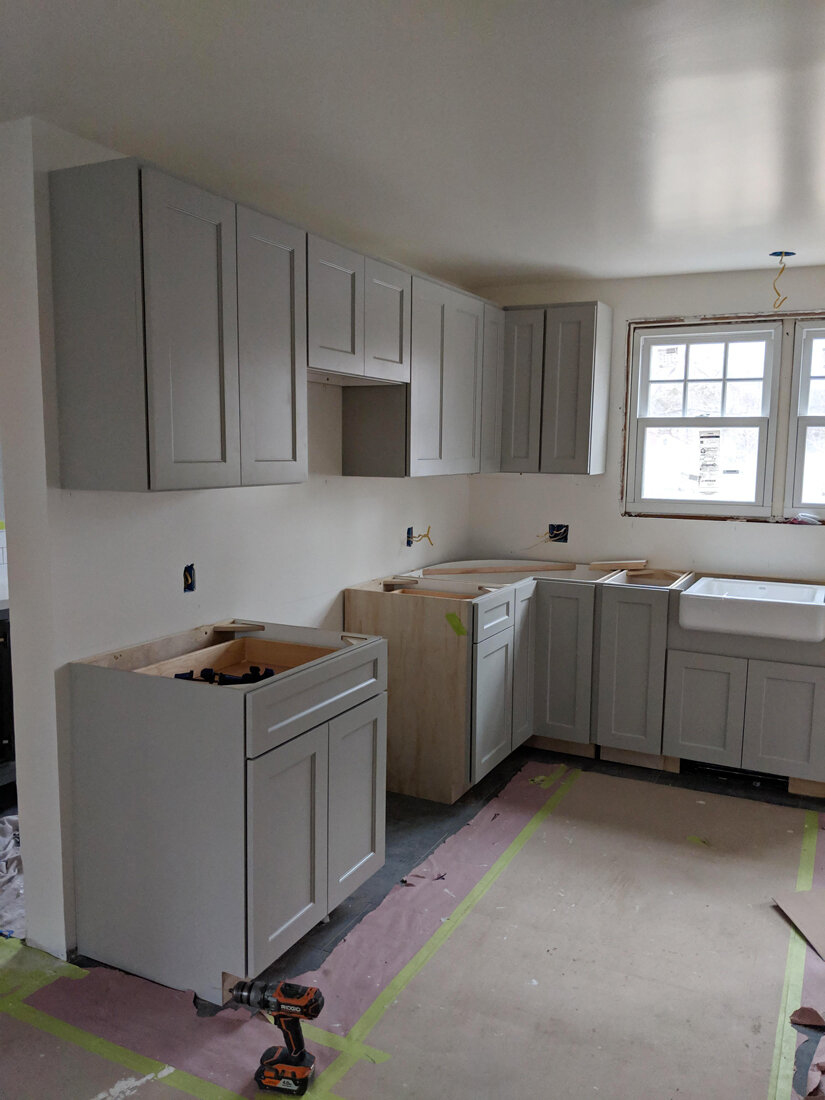
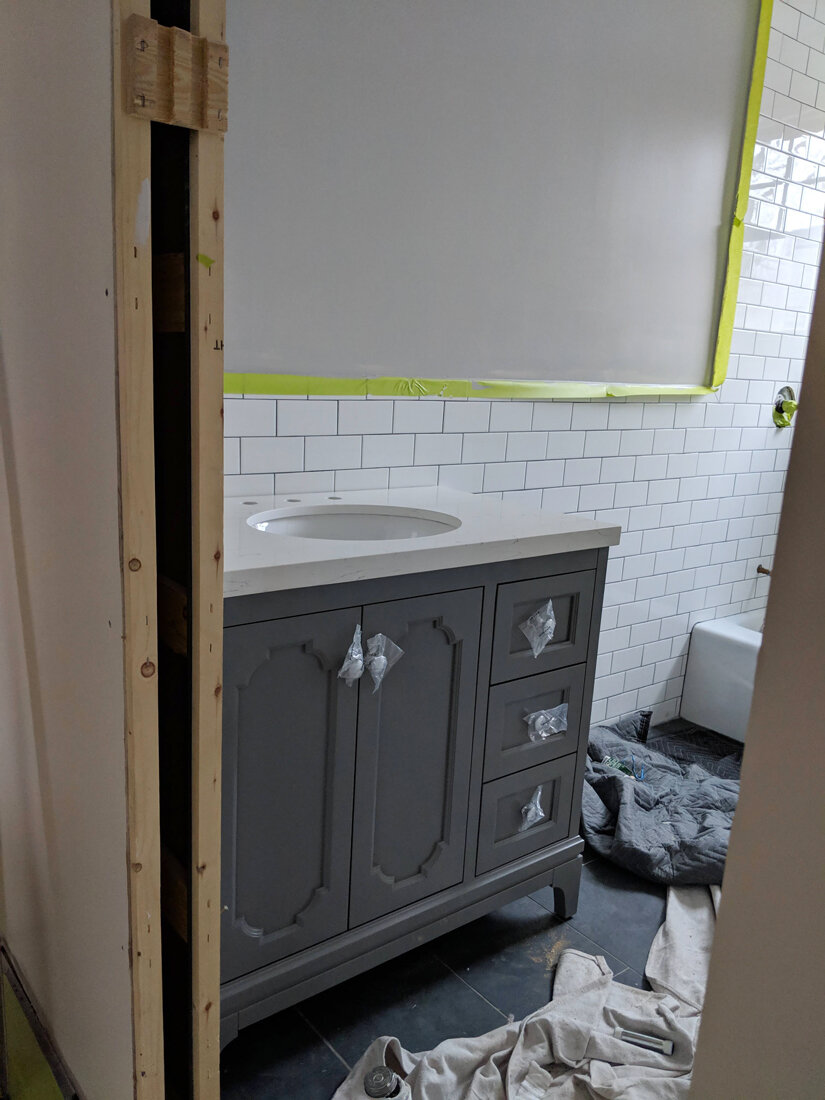

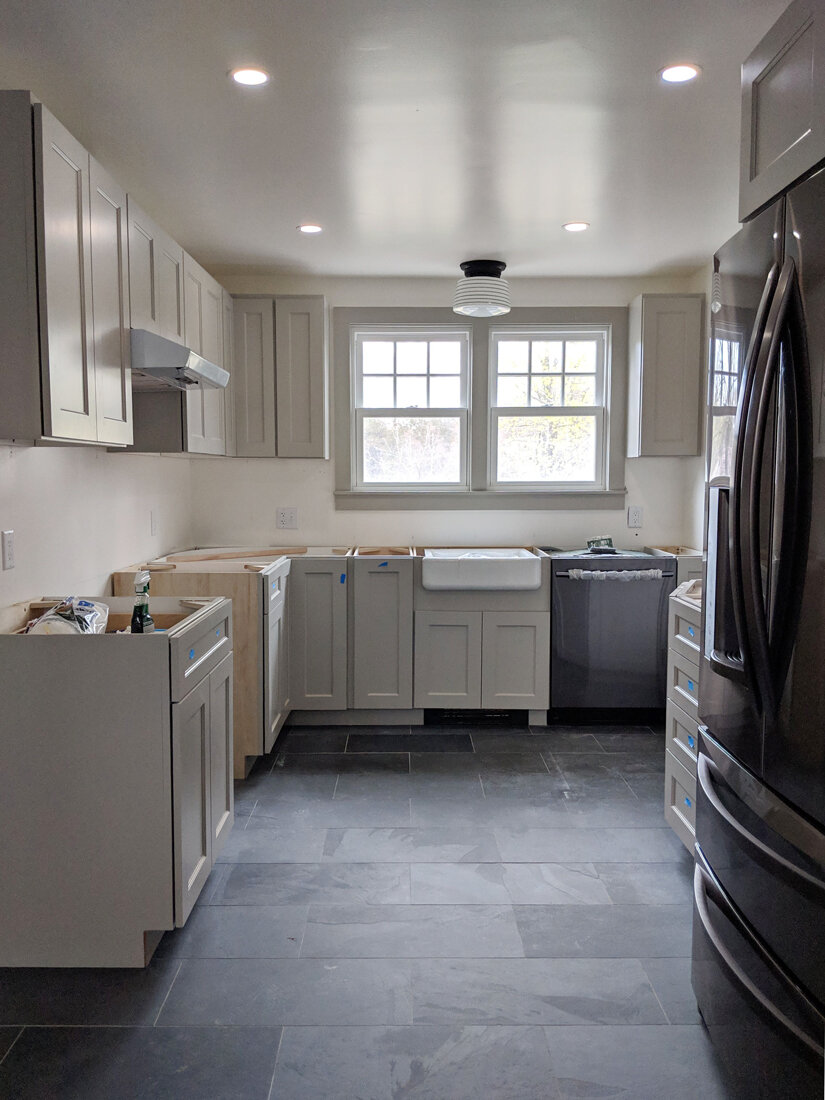
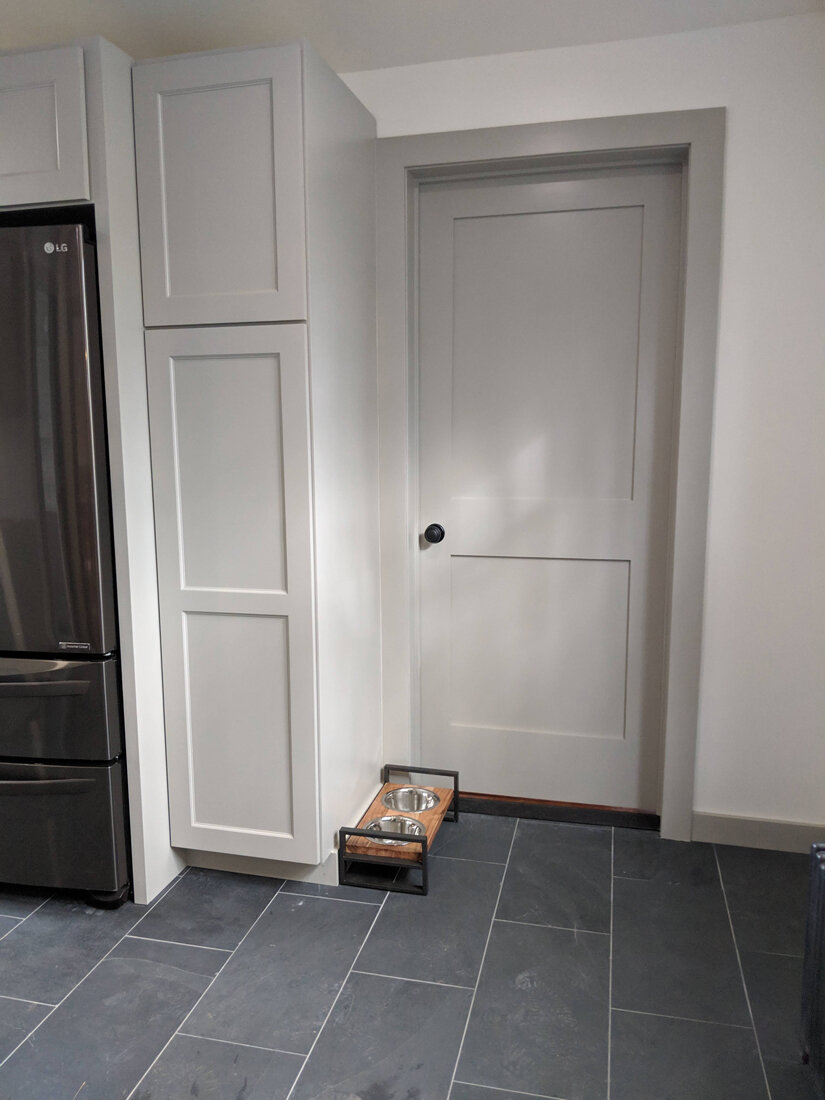
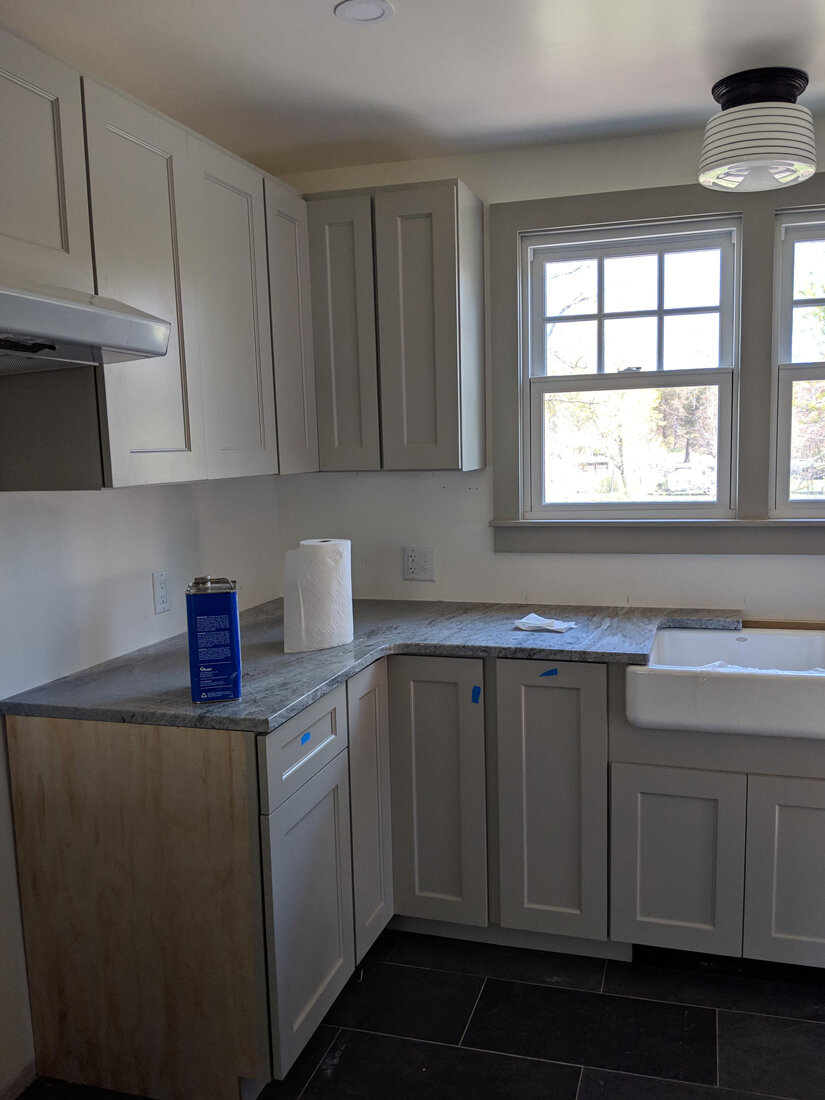
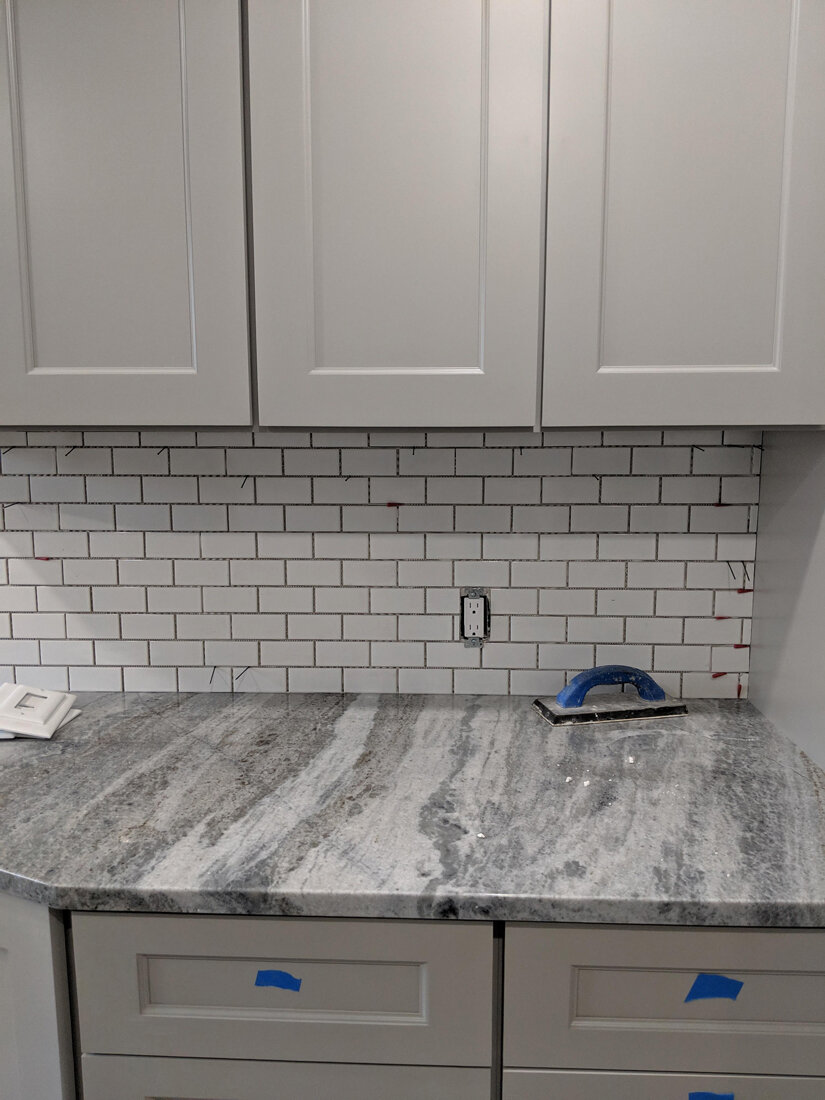

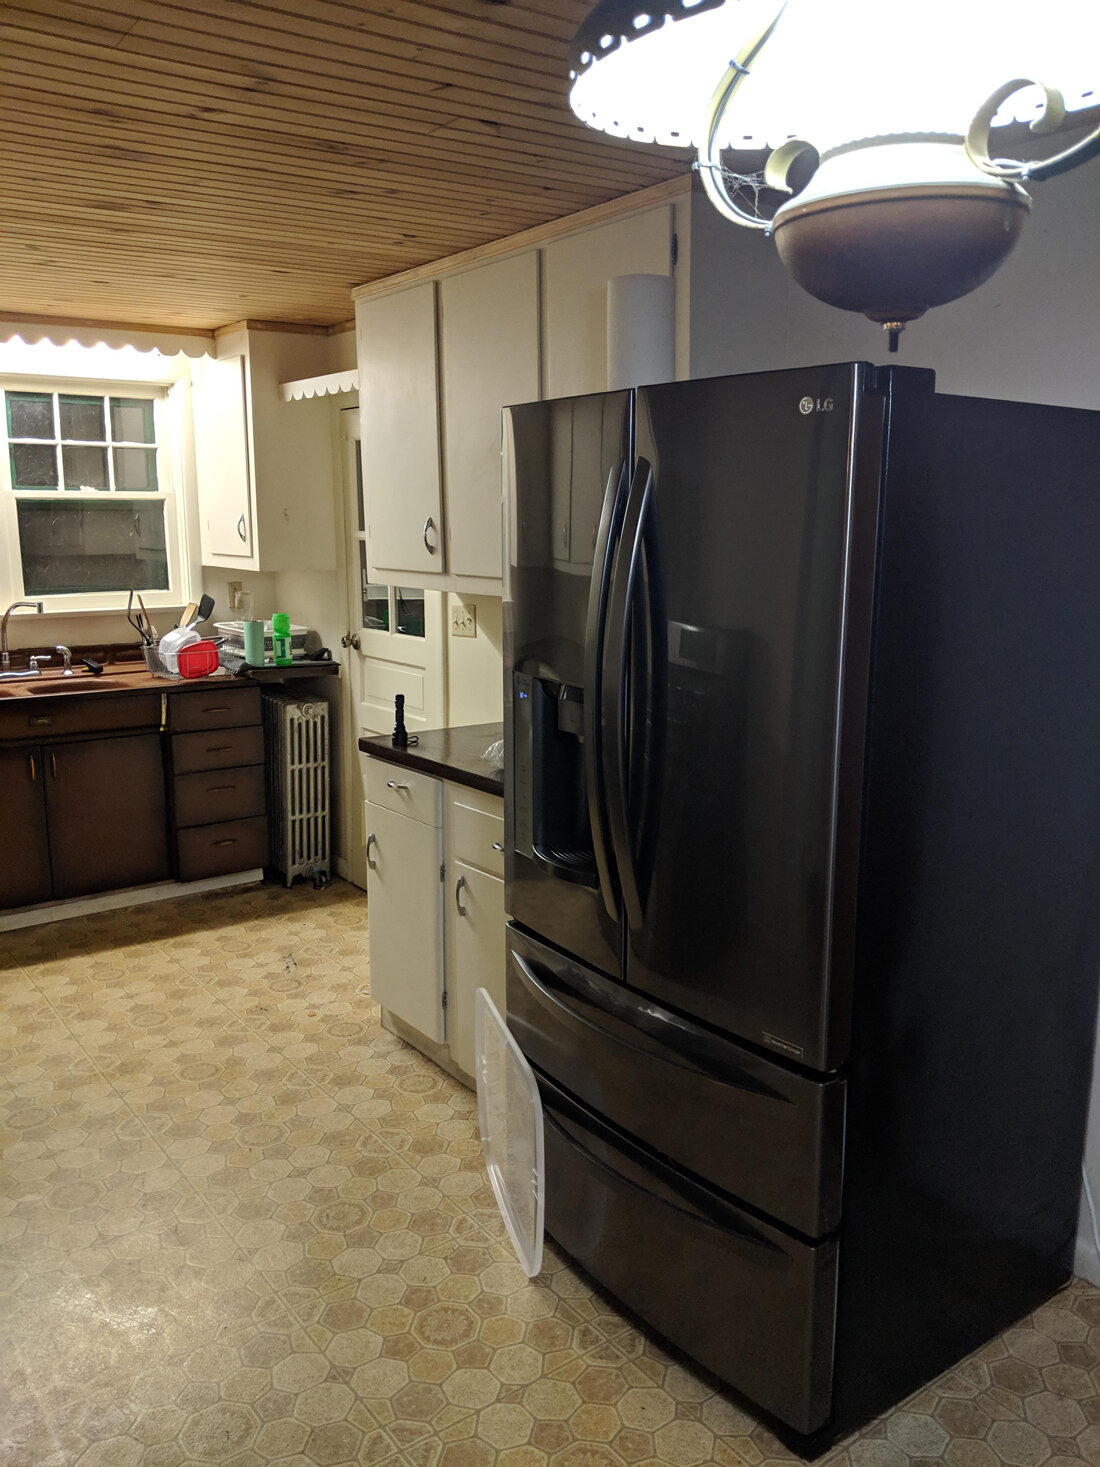
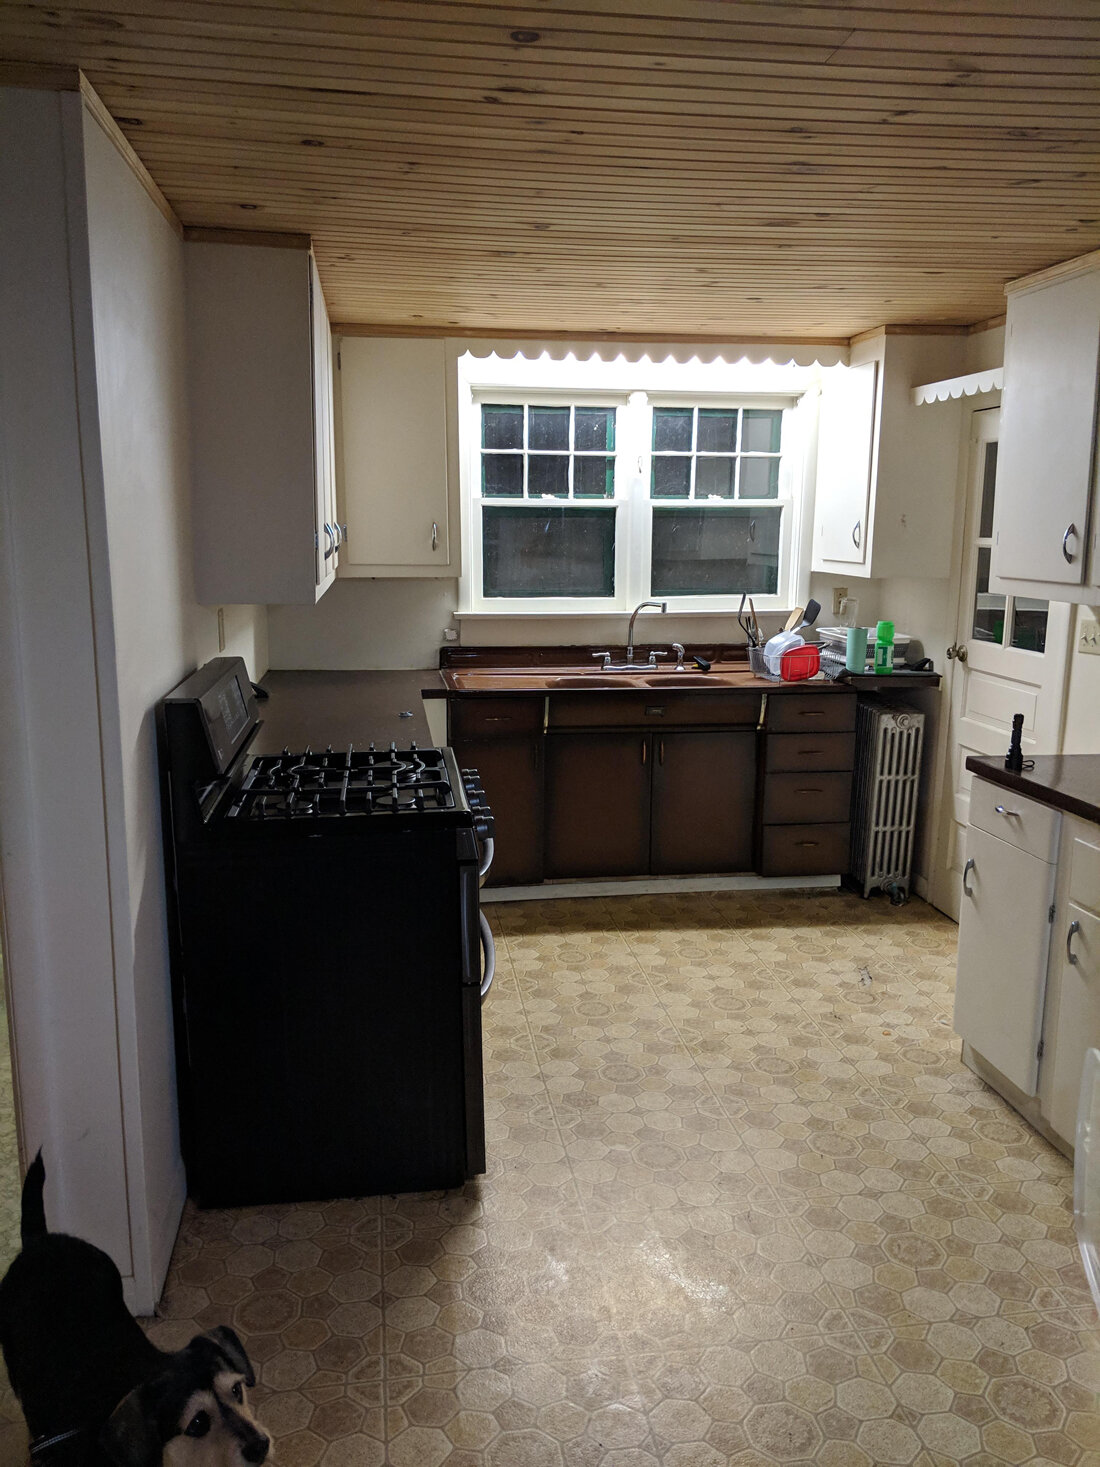
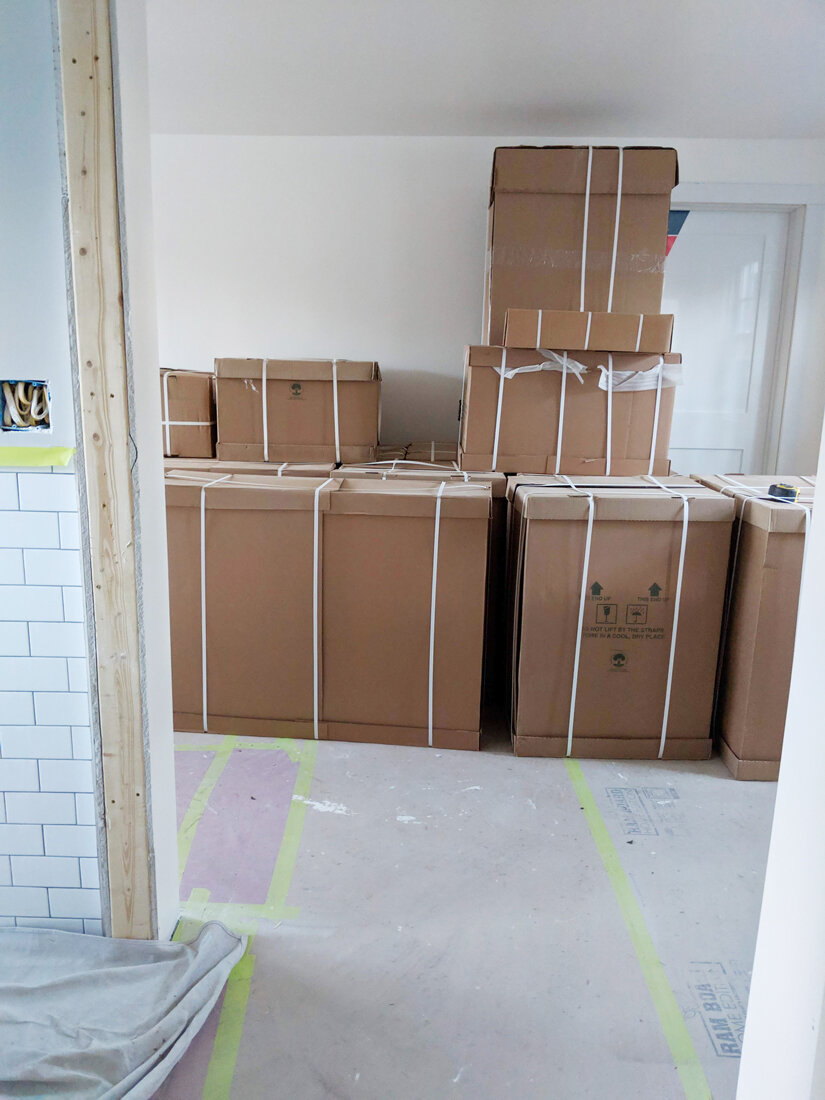
In the above group of pictures you can see the cabinet install, trim painting, radiator reinstall, the countertops go on and finally the backsplash.
Now for the afters!
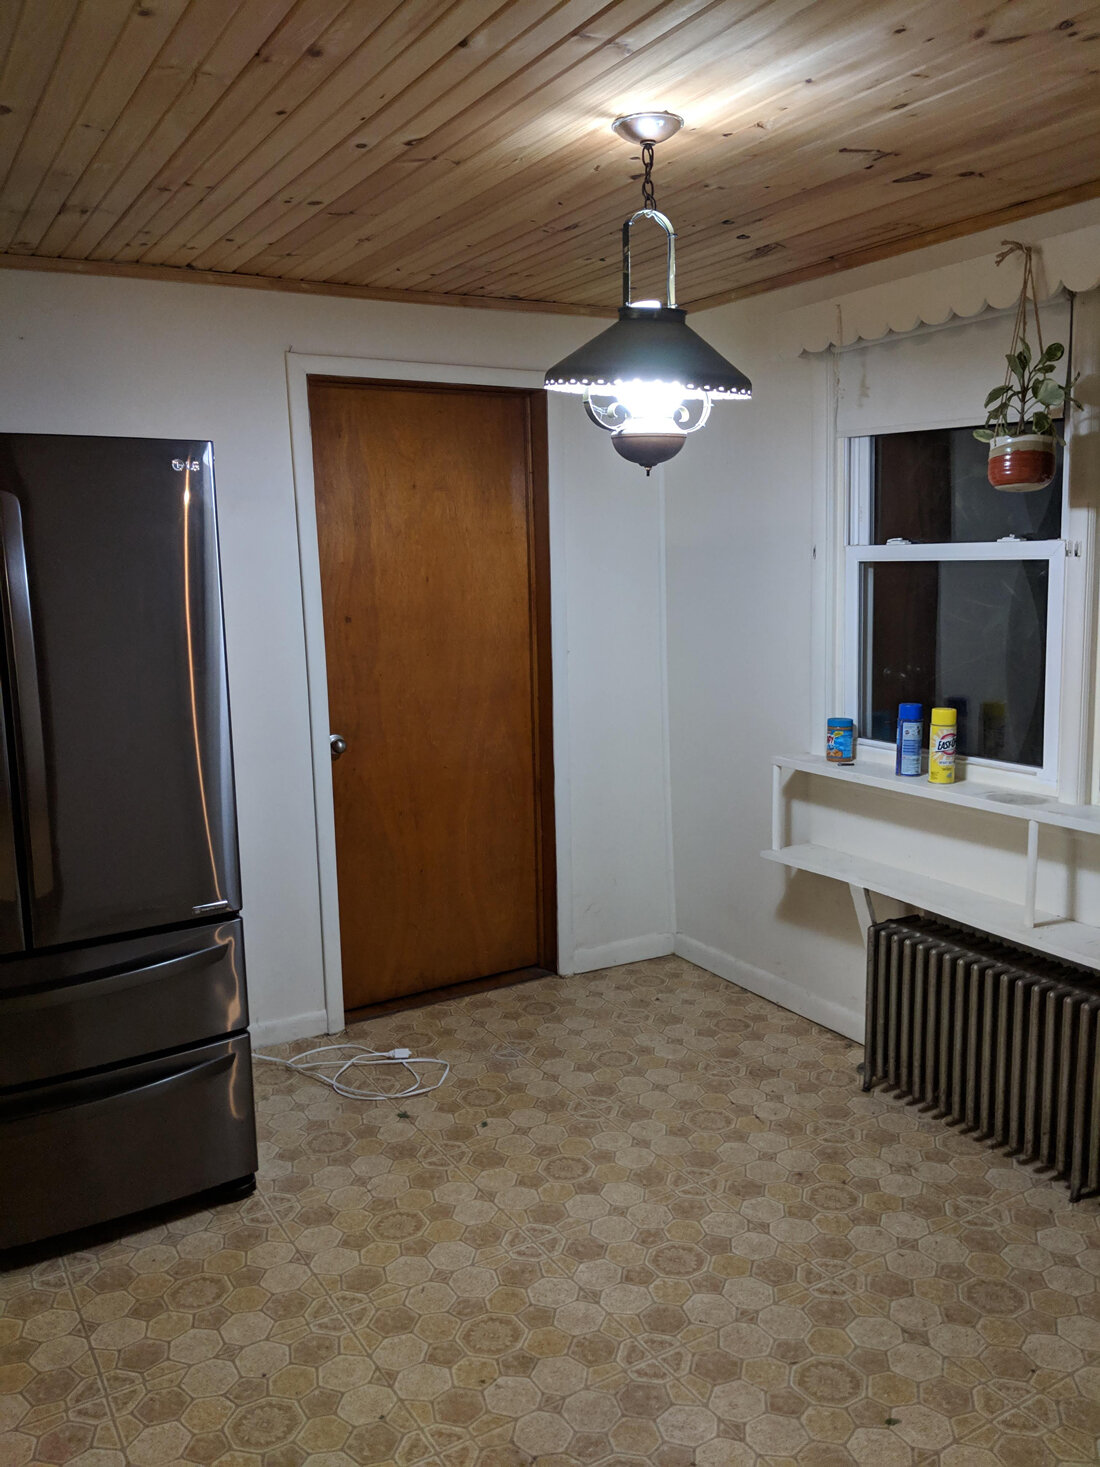
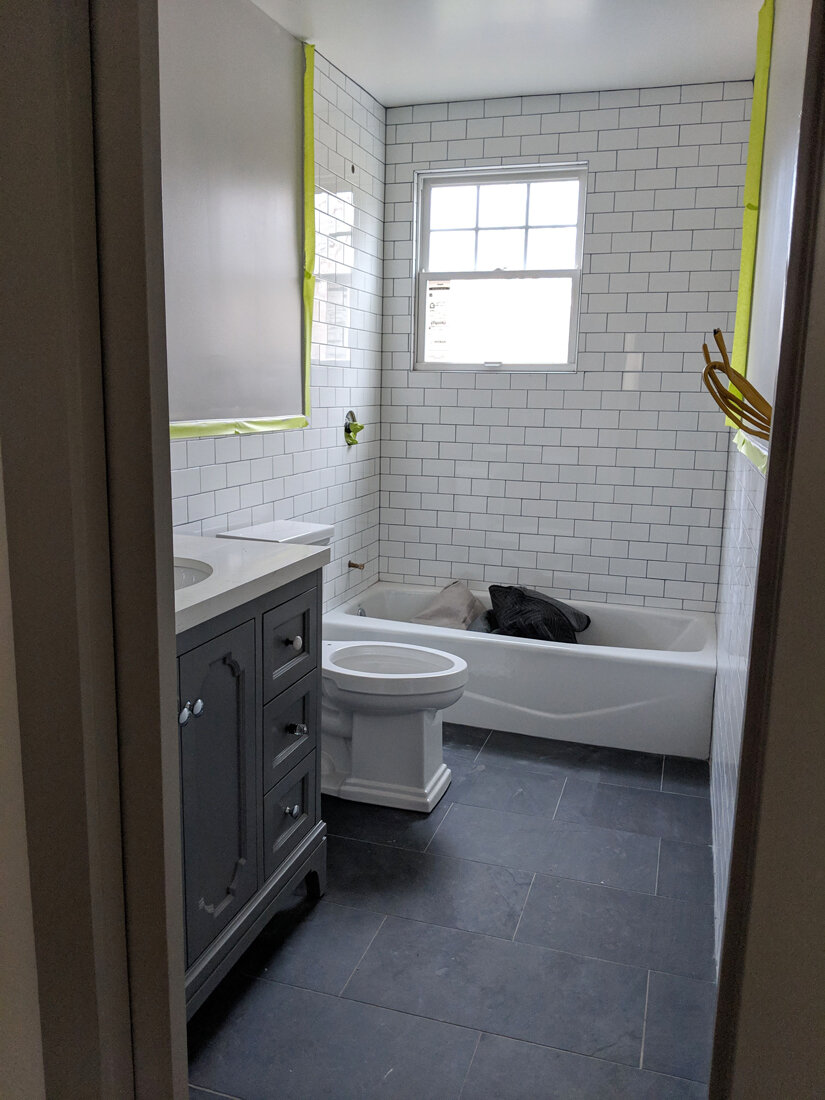
When all was said and done this renovation took around 8 weeks. The results were in my opinion spectacular. We went from having a dark dingy kitchen with vinyl floorings, open back cabinets from the 1940’s and a kitchen sink that froze up every winter. To a kitchen where we can see what we are cooking, chopping and looking for; that stays warm in the winter and cool in the summer. Not to mention a bathroom with a leaking toilet and bath tub with formica walls and gold marbled vinyl floors to a bright white clean and open space where we can feel proud to have guests brush their teeth.
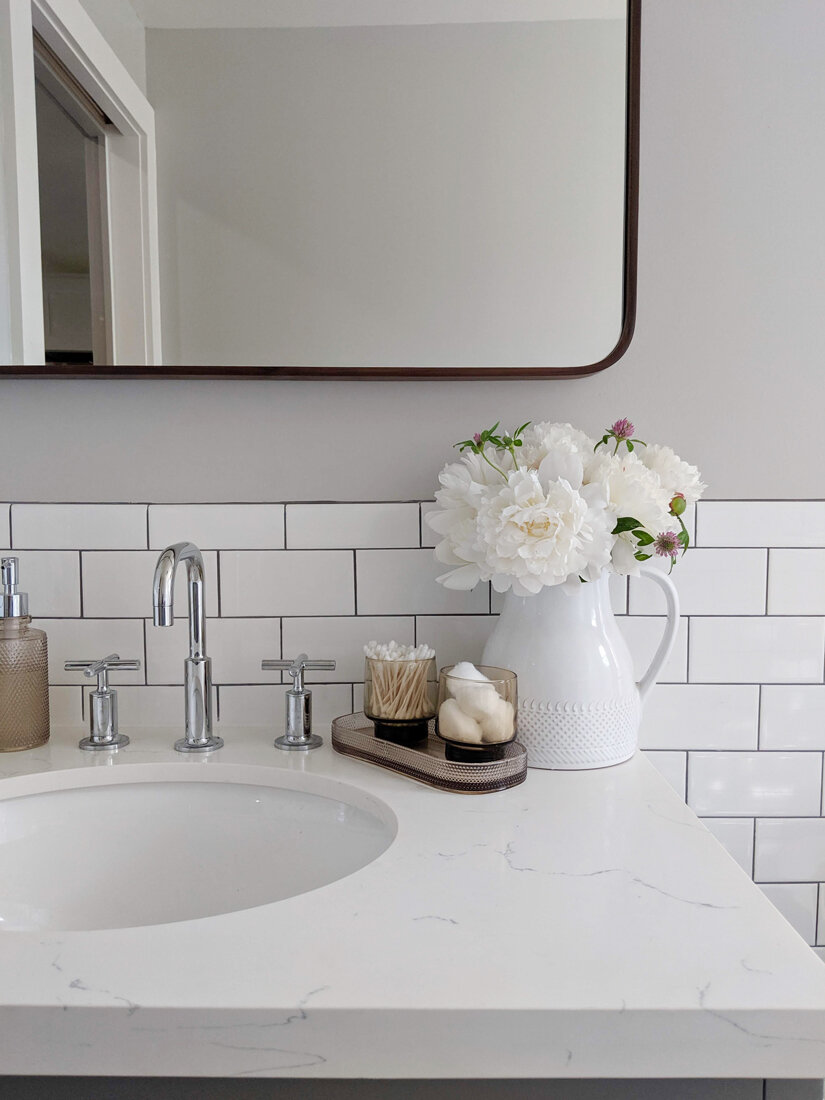
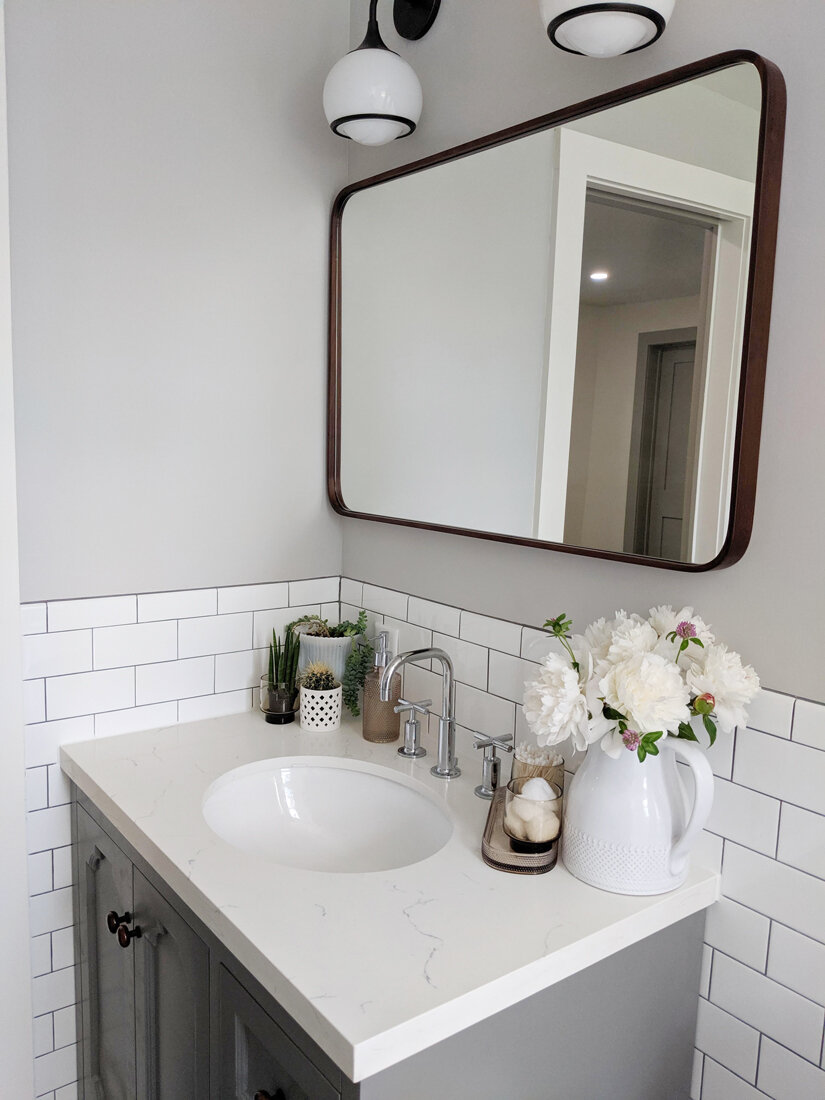
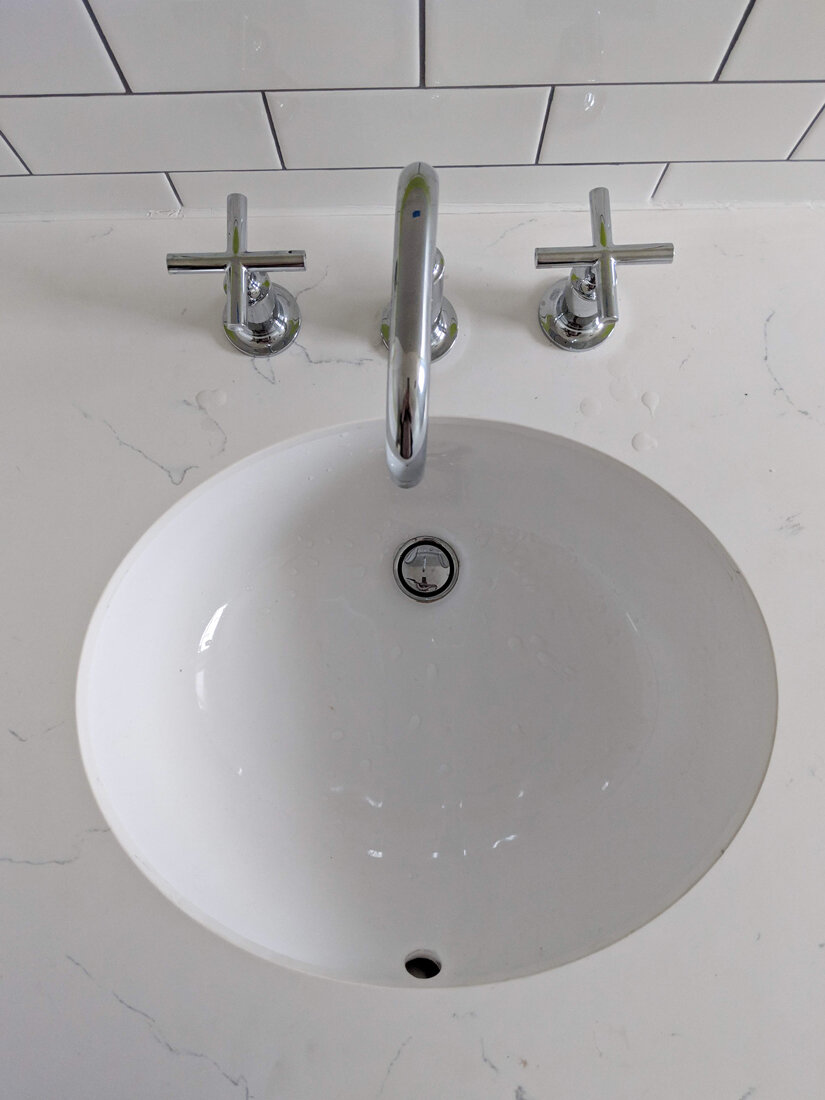
We went with all Kohler faucets which I am very pleased with in quality as well as appearance. They feel like they will last a lifetime.
One of my favorite touches in the bathroom are the knobs I found that match some of the old glass door knobs we have in the house. Alternatively we went with simple black knobs and pulls in the kitchen.
Another of the things I am very pleased with are the countertops. There was a lot of thinking about this decision and in the end it came down to what granite was at the stone spot we went to. I think we made the right decision. We vacillated between quartz and natural stone, dark counters or light and in the end I think the slab we bought turned out beautifully.
More posts coming soon detailing our new guest room!
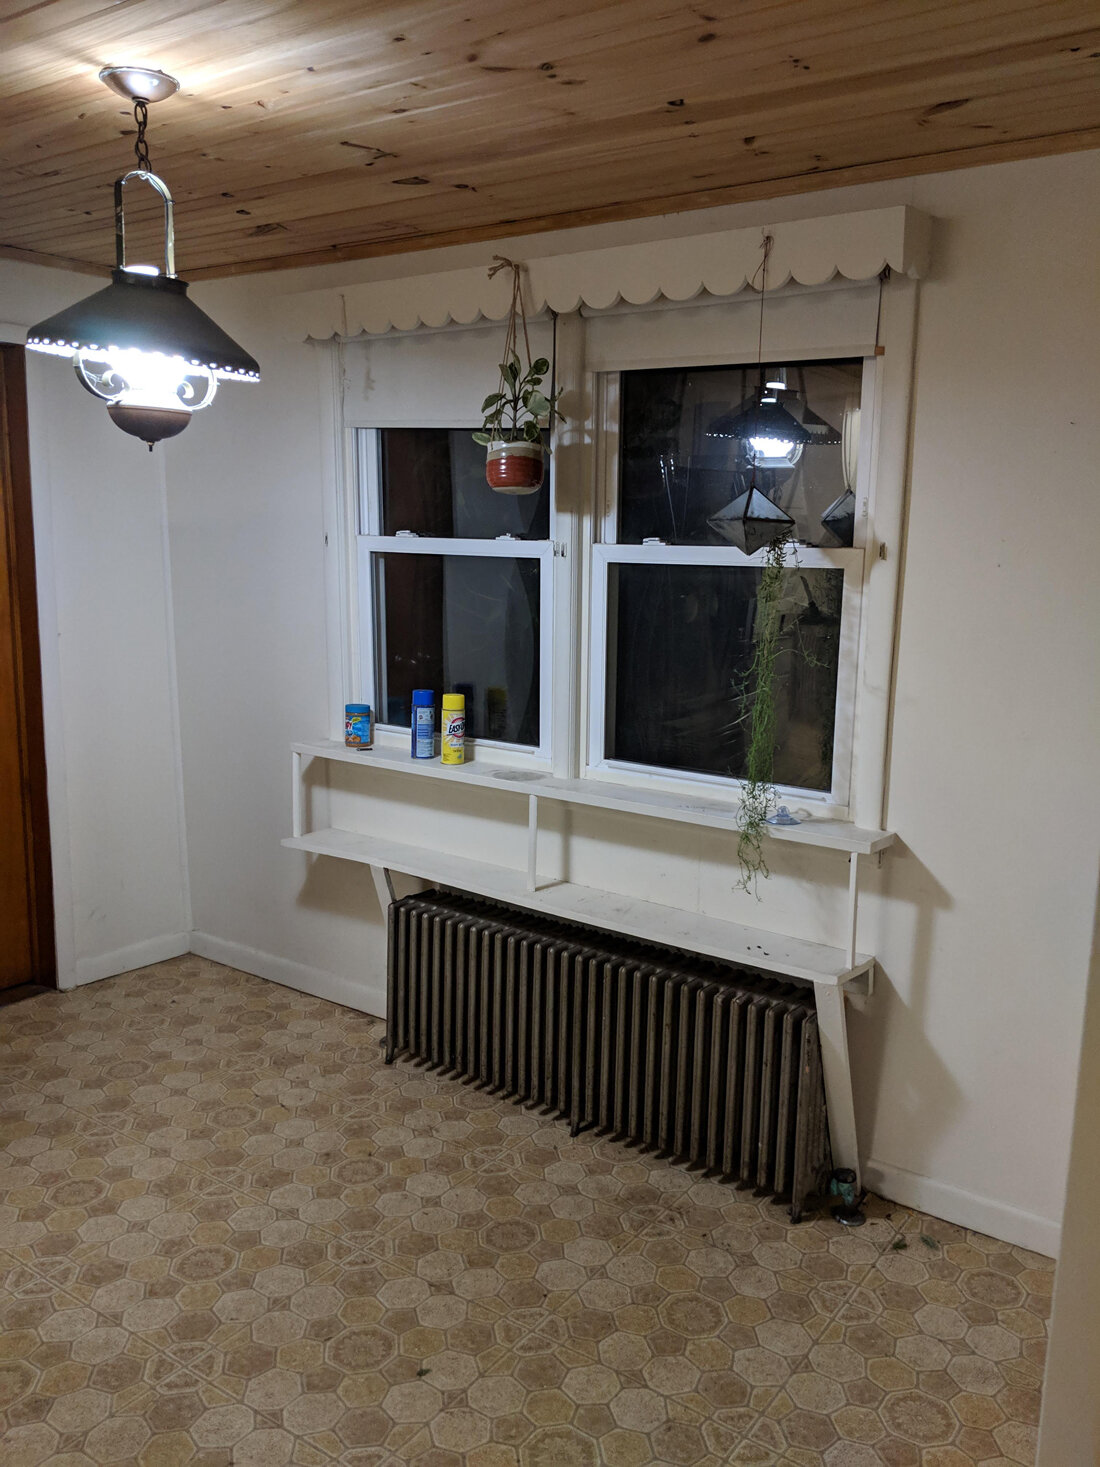
Our radiator afterthought ... kitchen renovation 2019
Details are everything. The more my reno project moves towards completion the more obvious this is. Knobs, fixtures, grout color these choices really define the overall feeling you get when you walk into a room whether you realize it or not. I can only compare it to the feeling Goldie Locks had when she sat in Baby Bears bed, when you’ve chosen the right finishes it feels jussssst right. Same goes for spacing on a gallery wall or the amount of antique versus new items you place in a room to get the vibe just right.
So you’d think knowing this, I’d have prepared for every single detail in advance of my renovation. Lol. No.
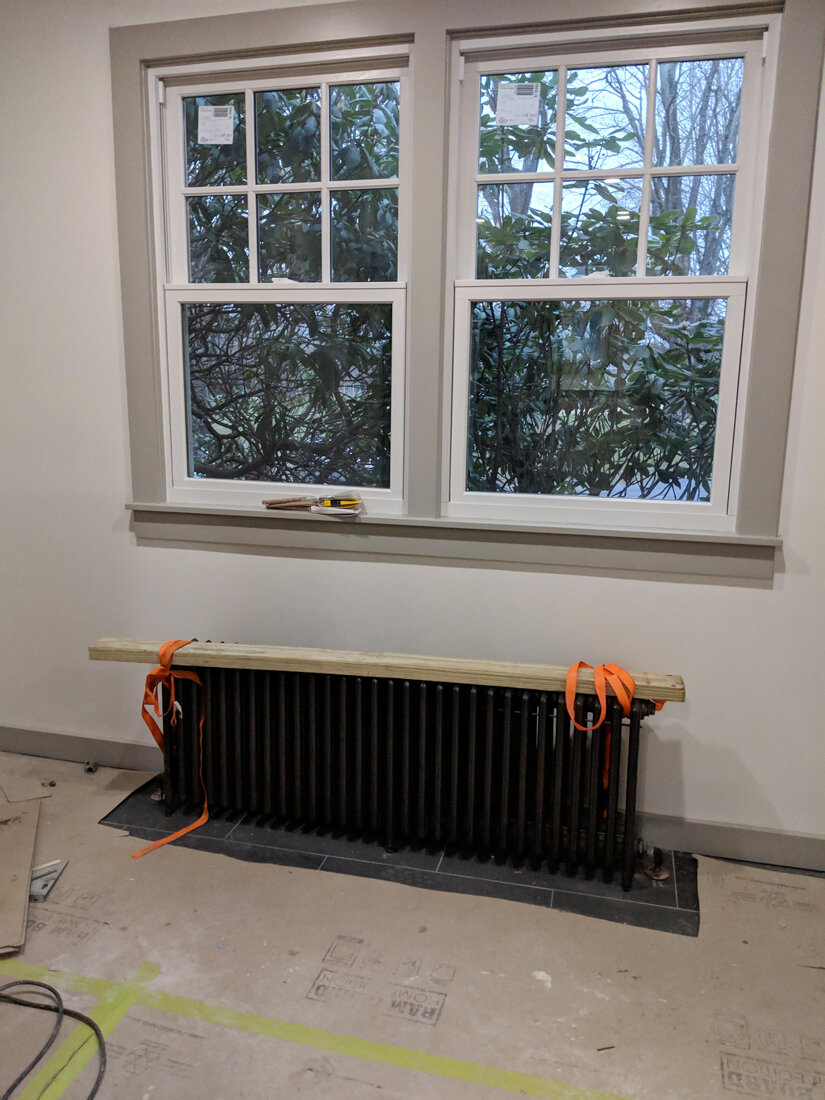
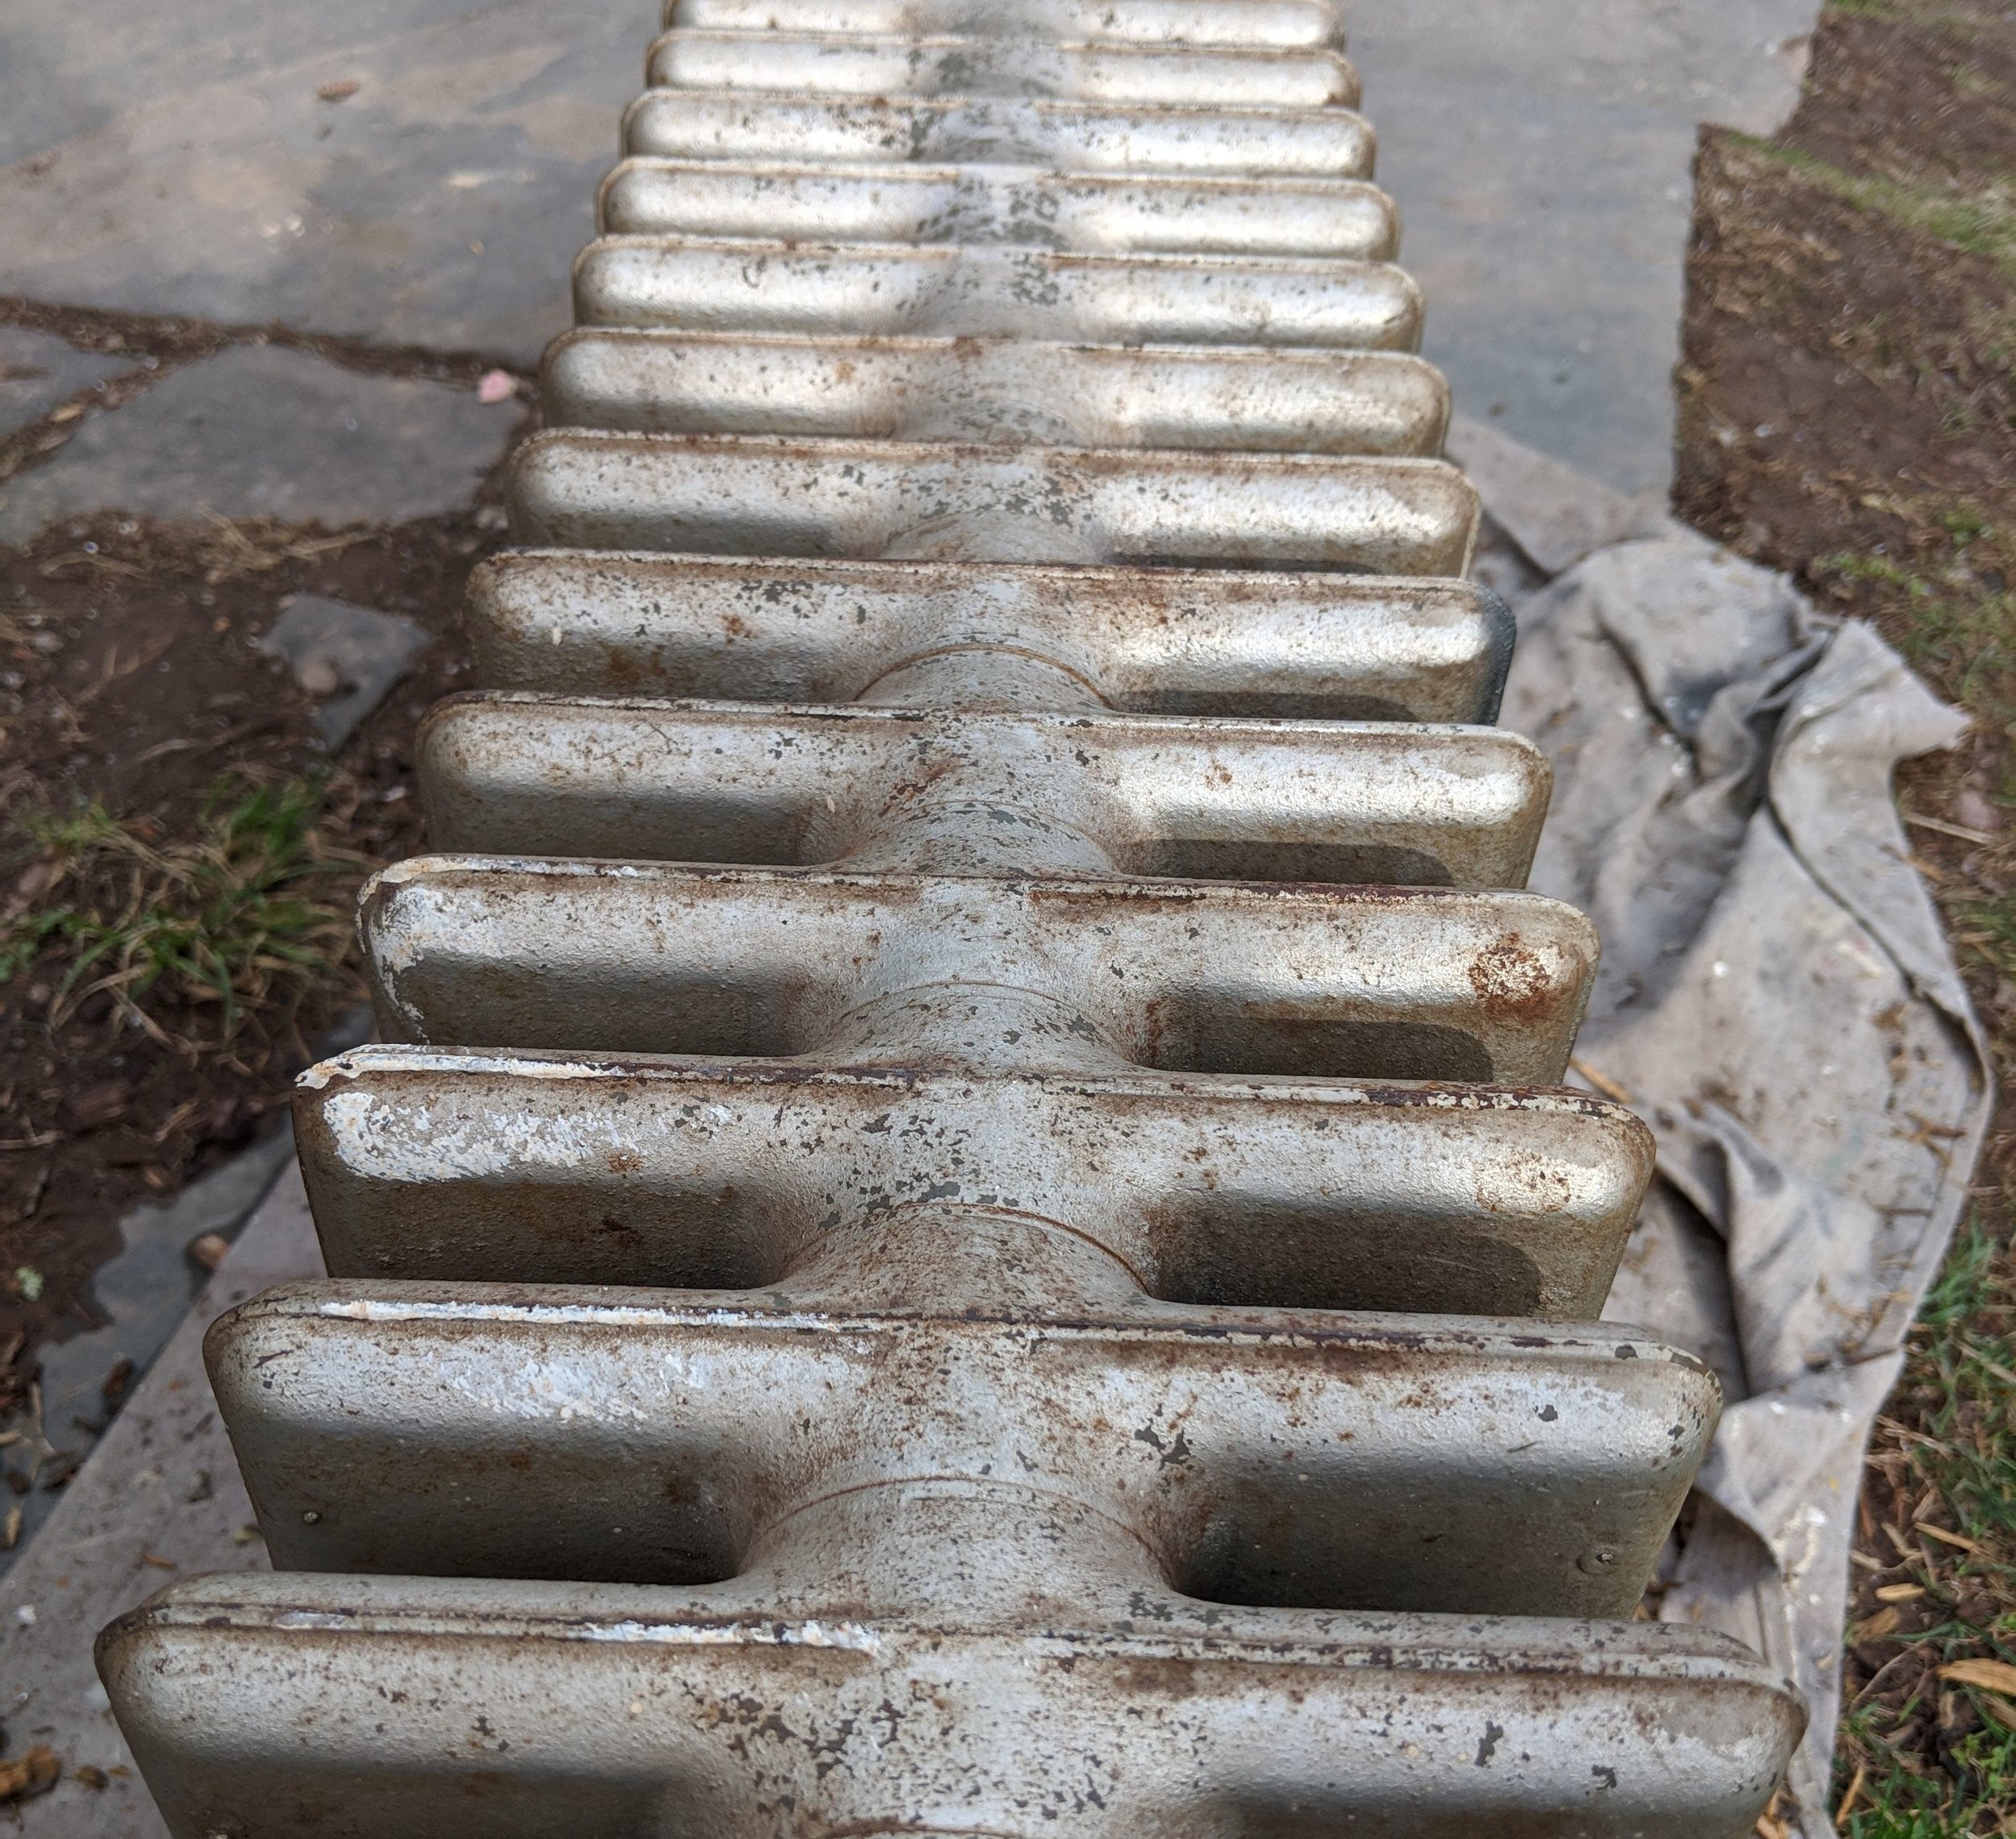
After we ripped everything our of my kitchen, I realized everything was going to be beautiful and fresh when it went back in except my radiator. This thing weighs around 250 lbs and I’ll tell you it had seen better days. Rusty, dirty and dirty. Did I mention dirty?
So what are our options? Well with planning- powder coating would be a great option, though pricey and the logistics of getting the 250lb radiator to the facility adds challenges and further expense. Also did I mention we completely forgot about this detail in the planning phase?

So this leaves me with only one option, and not a bad one either. Spray Paint! My trusted old friend. 2 cans ran me around $14, I had a wide variety of color options to choose from and even some with a splash of metallic material to mimic the coating on vintage radiators. I chose a “black stainless” tone as it would match my appliances and meet my black knobs and pulls somewhere in the middle of the rest of the grey tones in the room.
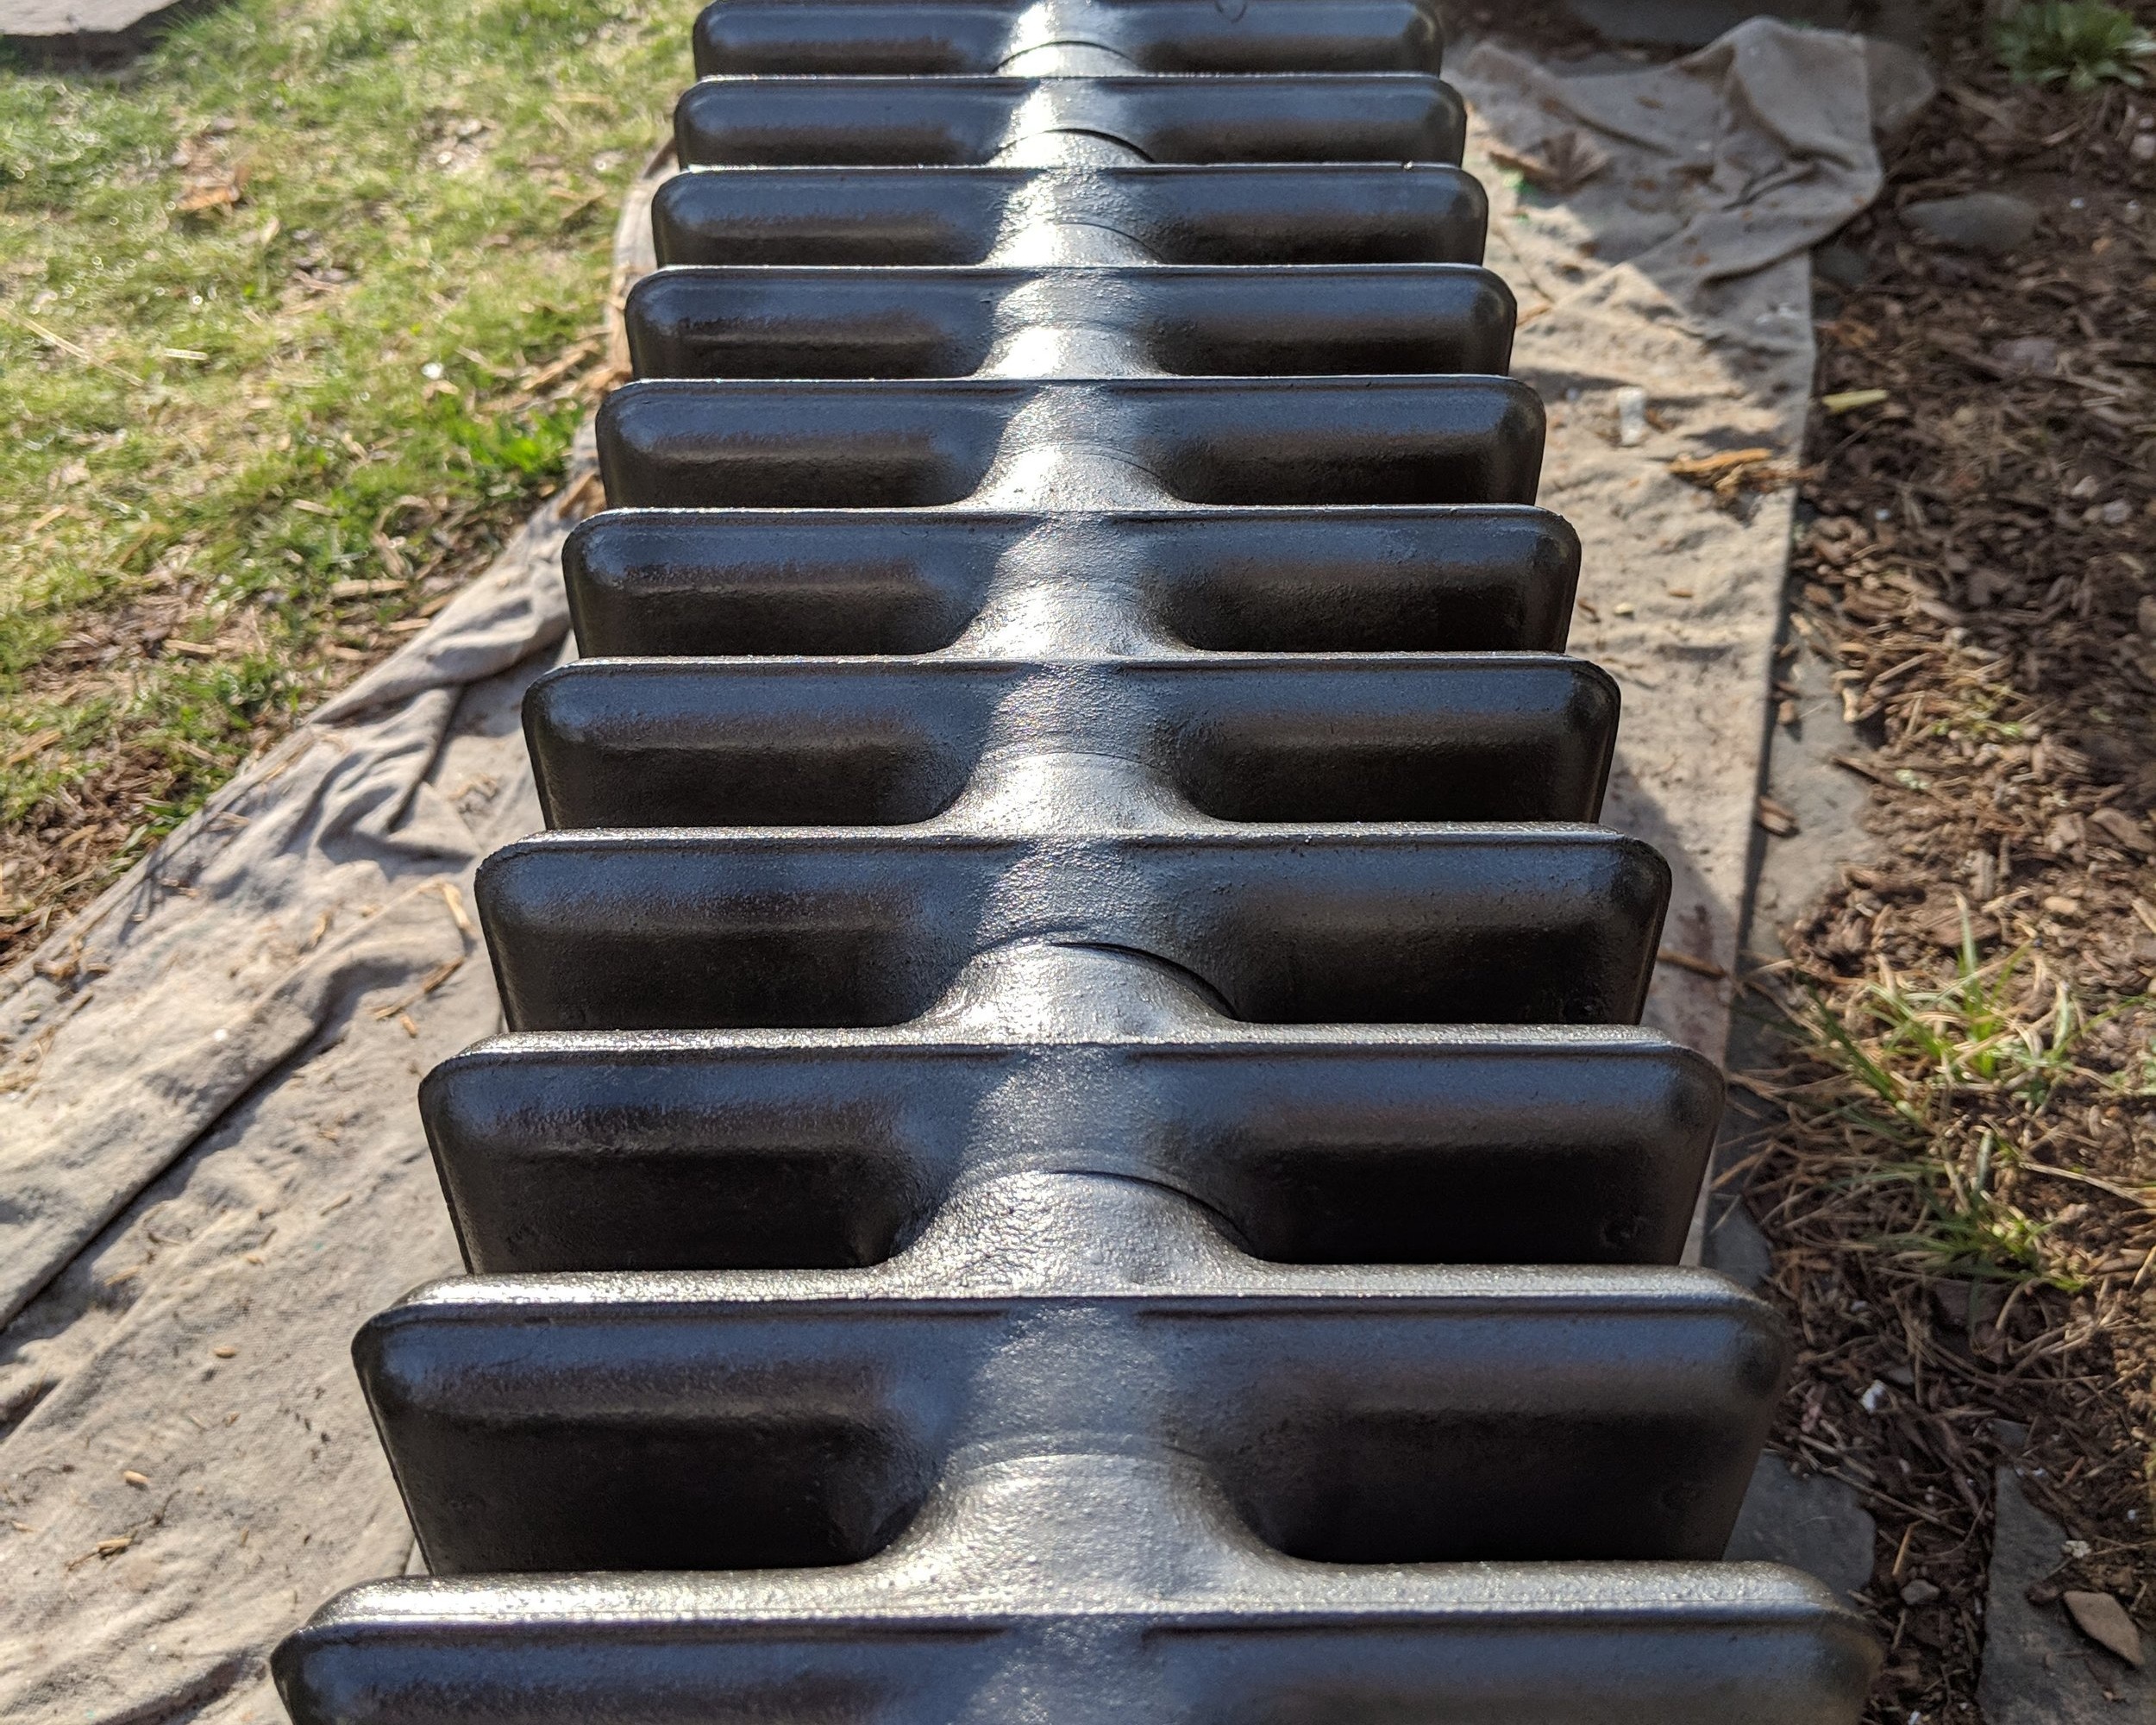
First we sprayed the radiator with a can of air and knocked loose any dust hanging on using a swiffer. Then we scrubbed the radiator with a brush and hot soapy water to get all the years of grime as cleared off as we could. Rinsed with the hose and then let it fully dry in the sun. After it was dry I sprayed each individual section from every angle ensuring full even coverage. The key with spray paint is to stay the right distance away so you don’t get drip marks and let it dry in between coats for the best possible adhesion.
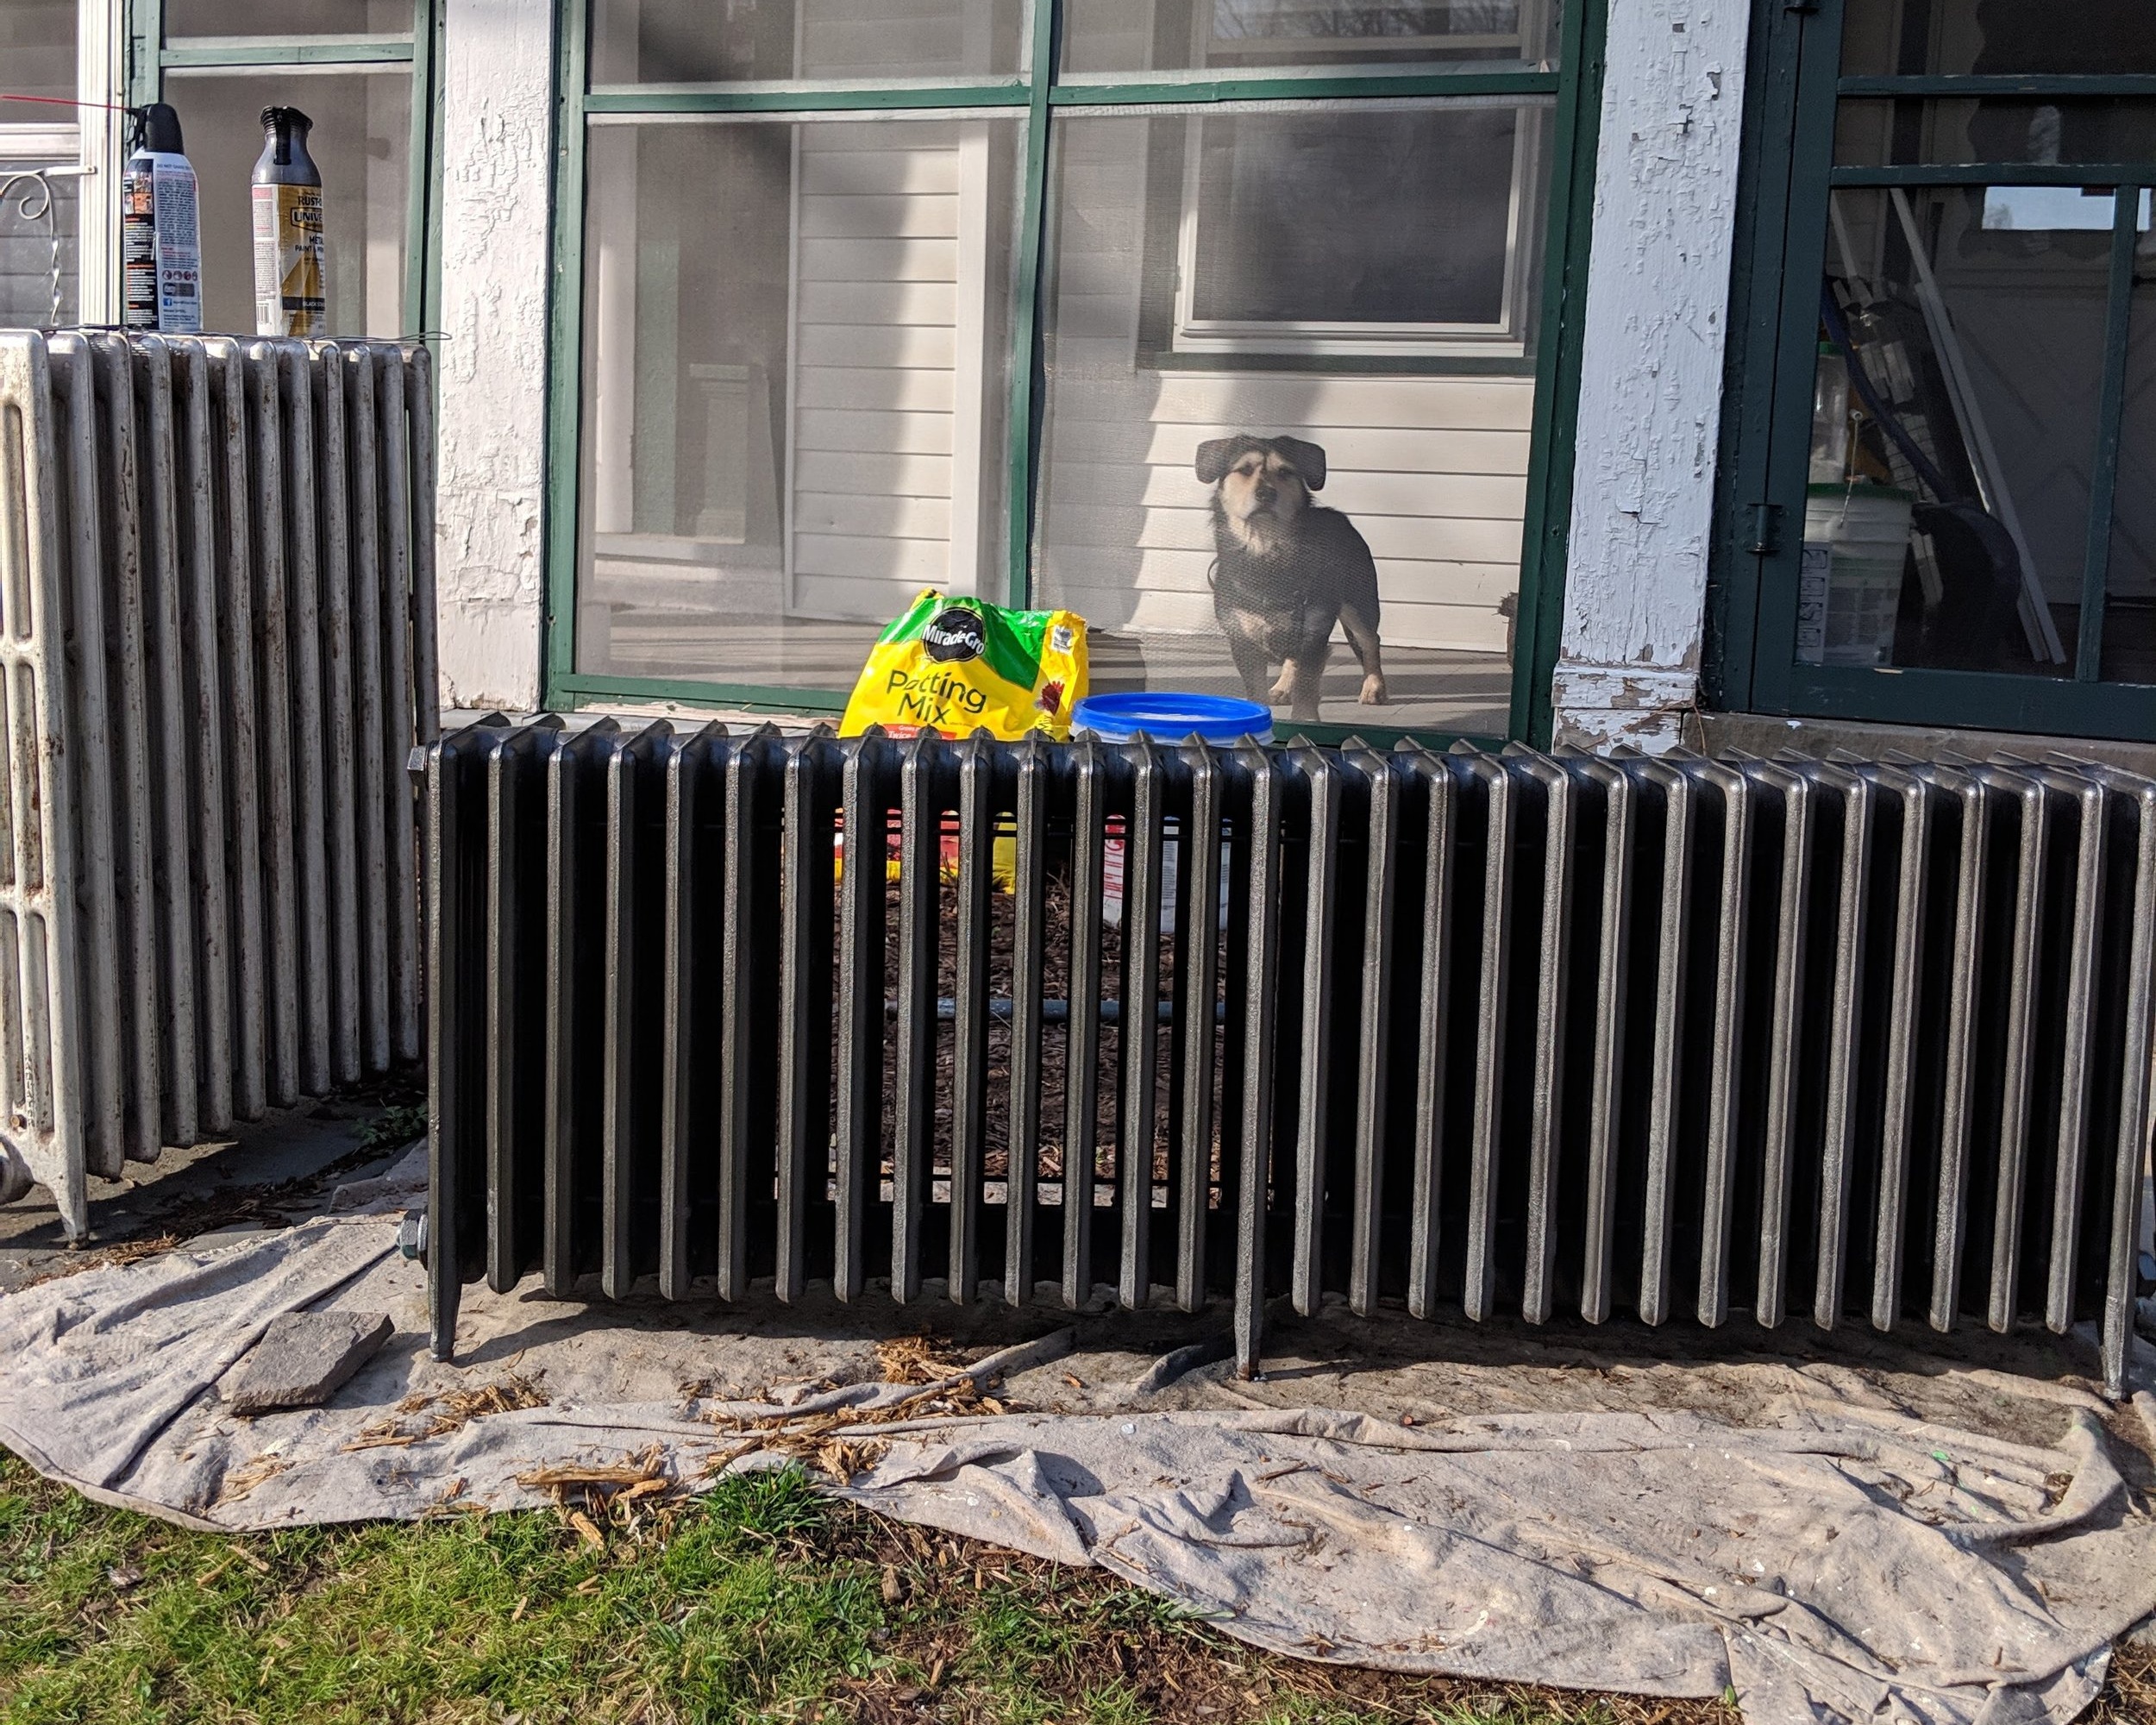
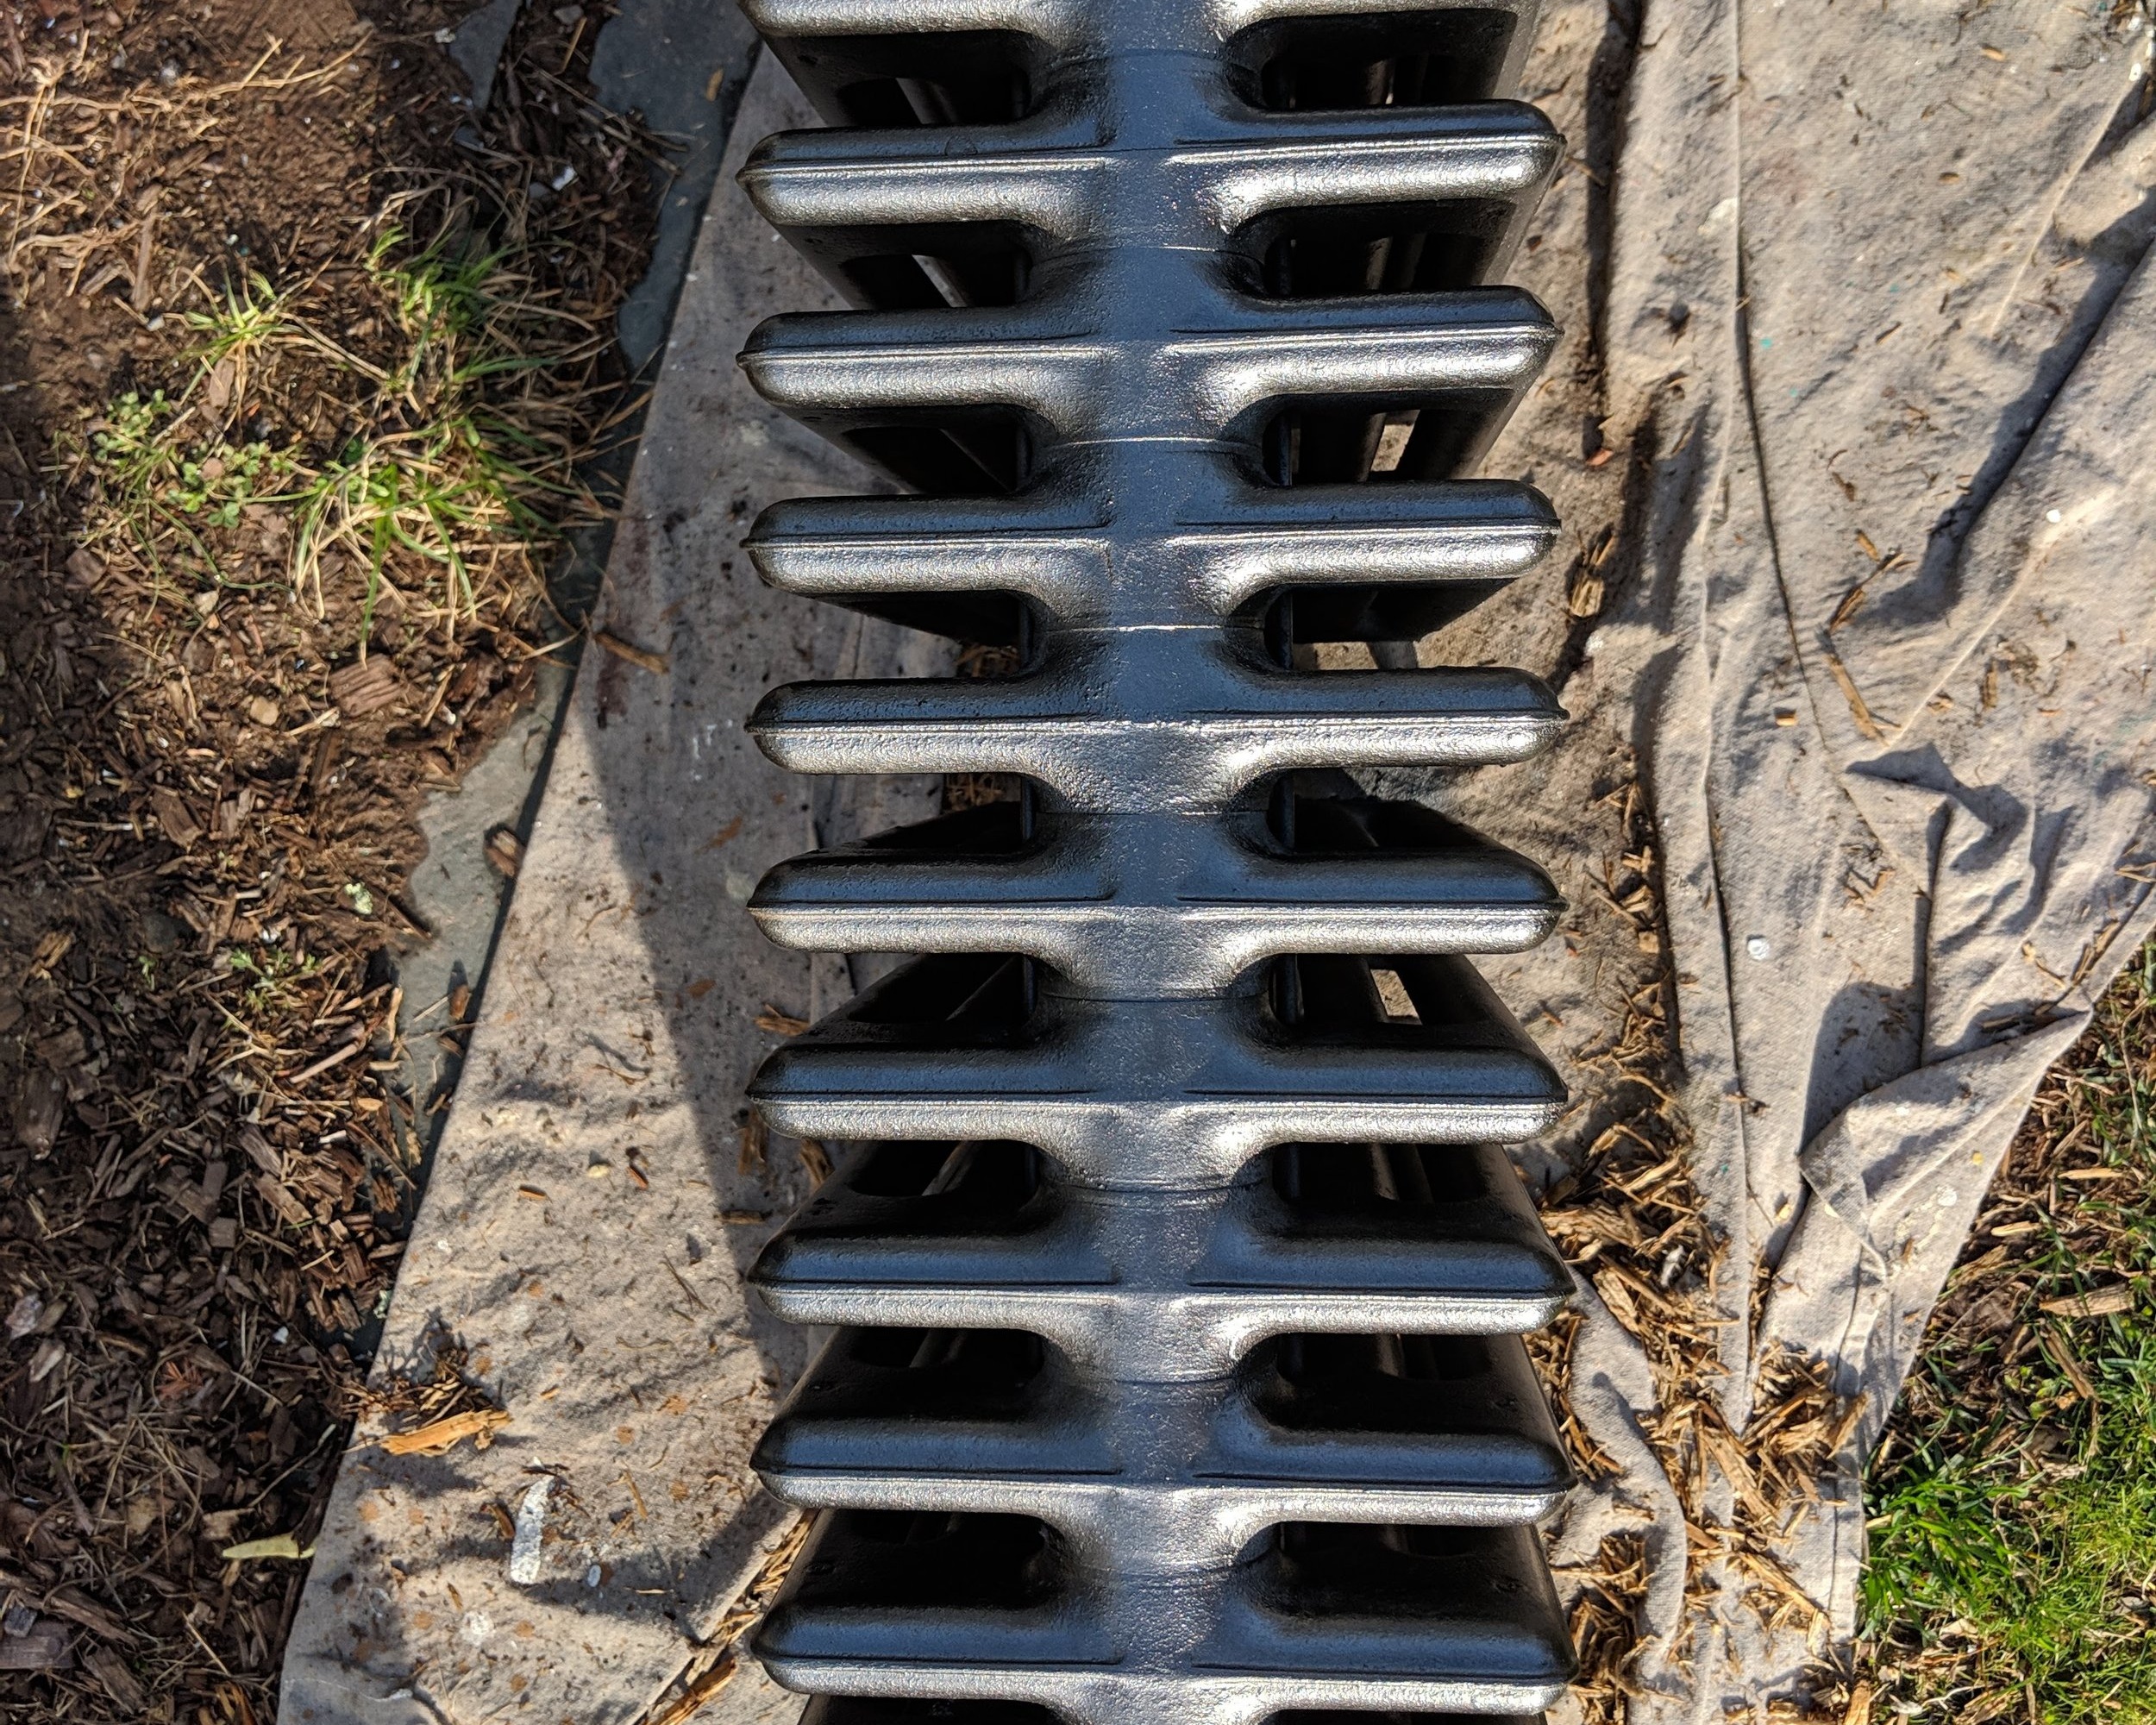
I think the results are really great. If I didn’t know it was spray paint I would have thought it was powder coated. Hopefully the longevity of the paint meets our needs in the long run. We don’t plan to move this piece ever again unless there is a need to repair something. Stay tuned for the final reveal of the kitchen to see the radiator in place. Till then here’s a couple of after shots of my handy work!

You said 2 weeks left... I knew it was too good to be true... but we are getting there.
Who doesn’t love a terrible before and a satisfying after?
I know I do.
This will not disappoint. How many home reno befores include a pit in the middle of their kitchen… MINE DOES.
Don’t be jealous… well be a little jealous of the afters maybe? I hope… we thought there were only 2 weeks left when I posted on the 5th… thinking we are again at the 2 week mark. Not sure EXACTLY how this time hole I am living in works with the larger fabric of the universe but I am trying to roll with it.
In the mean time- for those of you who have not been following along with the progress on my instagram (feels free to stop on by and click the - Kitchen Renovation! - story if you want the full rundown of where we came from and where we are at- updated daily)… above is a little peek at the pit…
Enjoy with the relief of knowing we can again walk across our kitchen... and in fact our cabinets are in. For anyone else in the middle of their own renovation journey, breath in, breath out… it’s going to be worth it.

2 weeks left... kitchen renovation 2019.
It’s almost over.
It’s April 5th, 2019. I’m coming to the end of week 4 of my full gut Kitchen and Bath renovation. This is the first time I’ve hired professionsals to help me bring a part of our 1850’s farmhouse into the 21st century. It has been both amazing and exhausting. The exhausting part was mainly internal- me worrying about if the decisions I had spent years considering and mere moments finalizing them were very tiring. I agonized over little things like towel bars and paint colors and seemingly huge things like floor tile and cabinets. Paulo and I chose granite countertops which go in, in the next two weeks which I am still feeling stressed will be far busier than I dreamt of when I envisioned this kitchen. What happened to my white quartz with grey veining?? I think I spent a total of 6 months actually collecting options and then sourcing our fixtures, lighting and other parts we had to select and supply.
What’s done is done. No turning back. We have granite and it’s coming in hot. Will I always wish I’d spent the extra $250 for a soaking tub, maybe… too late! When it comes to a 2 room kitchen and bath renovation budget $250 isn’t much, but where do you draw the line? On what parts do you spend your money and where can you cut corners? At the end of the day I’ve decided this- if you’re not going DIY, you spend your money on the labor. The team we went with on this job was not by any means the cheapest of the 4 bids we had- but I feel pretty confident we made the right decision there.
I found the whole process of organizing and executing this project to be kind of terrifying, but also incredibly educational. I’ve dealt with all sizes of budgets during the time I worked as a prop stylist, but that was always someone else’s money and at the end of the day they had the yeh or nay vote. Being your own client and spending your own money is a whole nother ballgame.
But little by little piece by piece the house is coming together and I am feeling a bit more relieved each day. I’m still holding my breath on the granite and bathroom sconces (which I have a feeling are slightly bigger than they should be…) but the floor looks great. I’ll be sharing start to finish pictures of my renovation in another post once all is said and done.
If you want a little taste of the research I did during the project you can check out my Pinterest boards for the project; kitchen inspiration board, as well as my bathroom inspiration board and my ongoing Farmhouse Chic board where I will forever be adding my big dream inspiration for our home, as well as little things I find along the way.

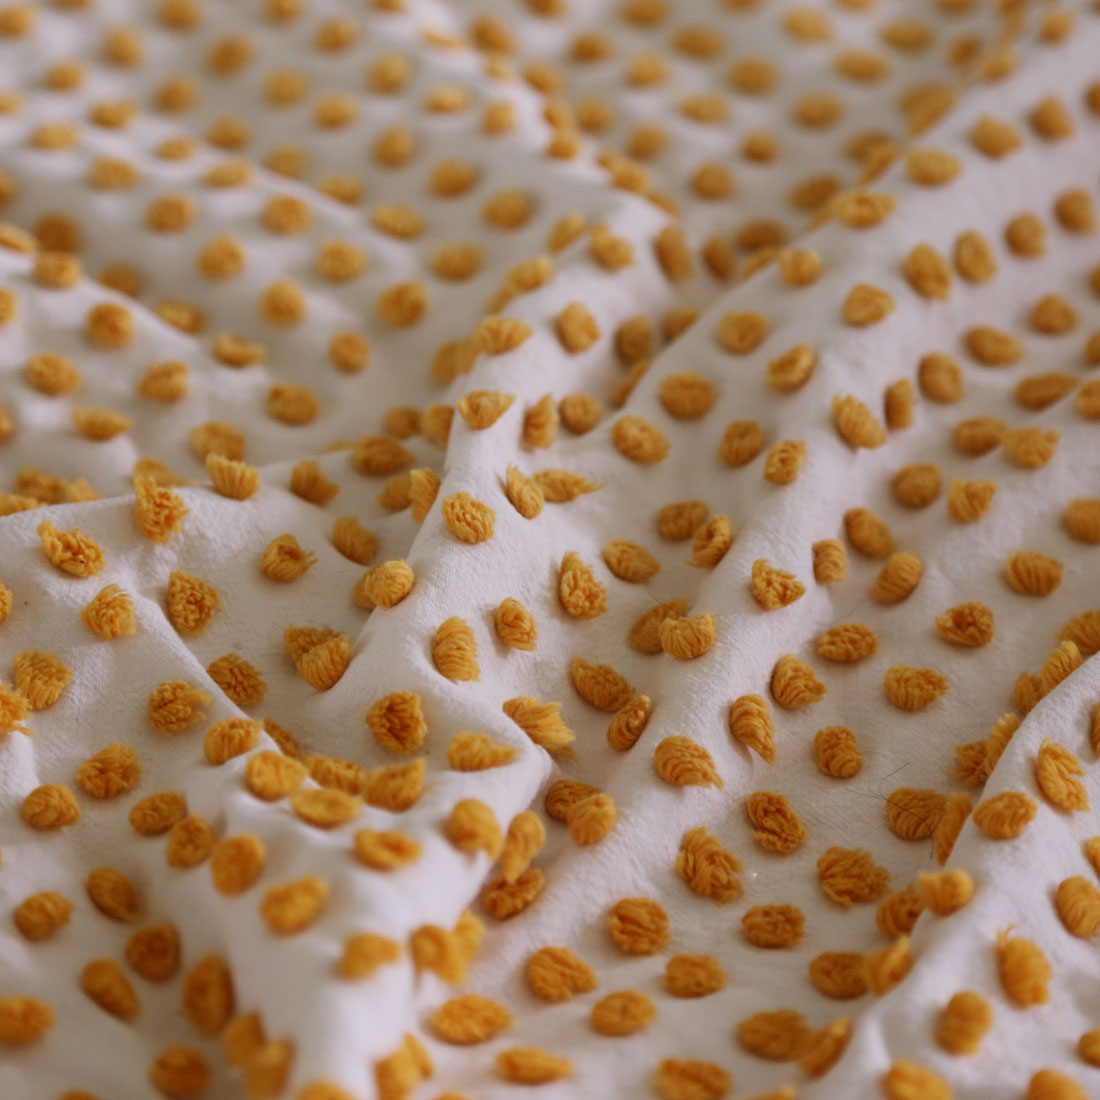
New in the shop! Handmade pillows from vintage textiles
I've been taking a break from blogging and working on the house (and running my business to some extent), since August of last year. I took a full time position working with Etsy (WAHOO!) and after that it took a while to readjust.
I'm feeling a lot more settled now, and I was finally able to finish (at least in part) a project I have had waiting in the wings for quite a while. PILLOWS! This small collection is made from vintage chenille comforters I sourced from all over. I have been collecting them for at least a couple of years now. I love chenille but it often has a granny look to it (which lets be honest, I for one like a little of, but too much becomes apparent very quickly... one can only have a granny moment or two in a space before the whole room looks dated... I'm getting off track). I specifically gravitated towards the simple more graphic patters of chenille (popcorn aka polka dot tufting is my favorite) and stuck with on trend and classic colors. I then backed each pillow with a modern fabric to balance the old with the new and create a fresh feel.
I am hoping I will be able to do a repeat of these pillows but that involves finding the exact same chenille in excellent condition a second time around (not impossible but not guaranteed) so consider this a limited run!
I'm so pleased to introduce:


Farmhouse entryway in progress
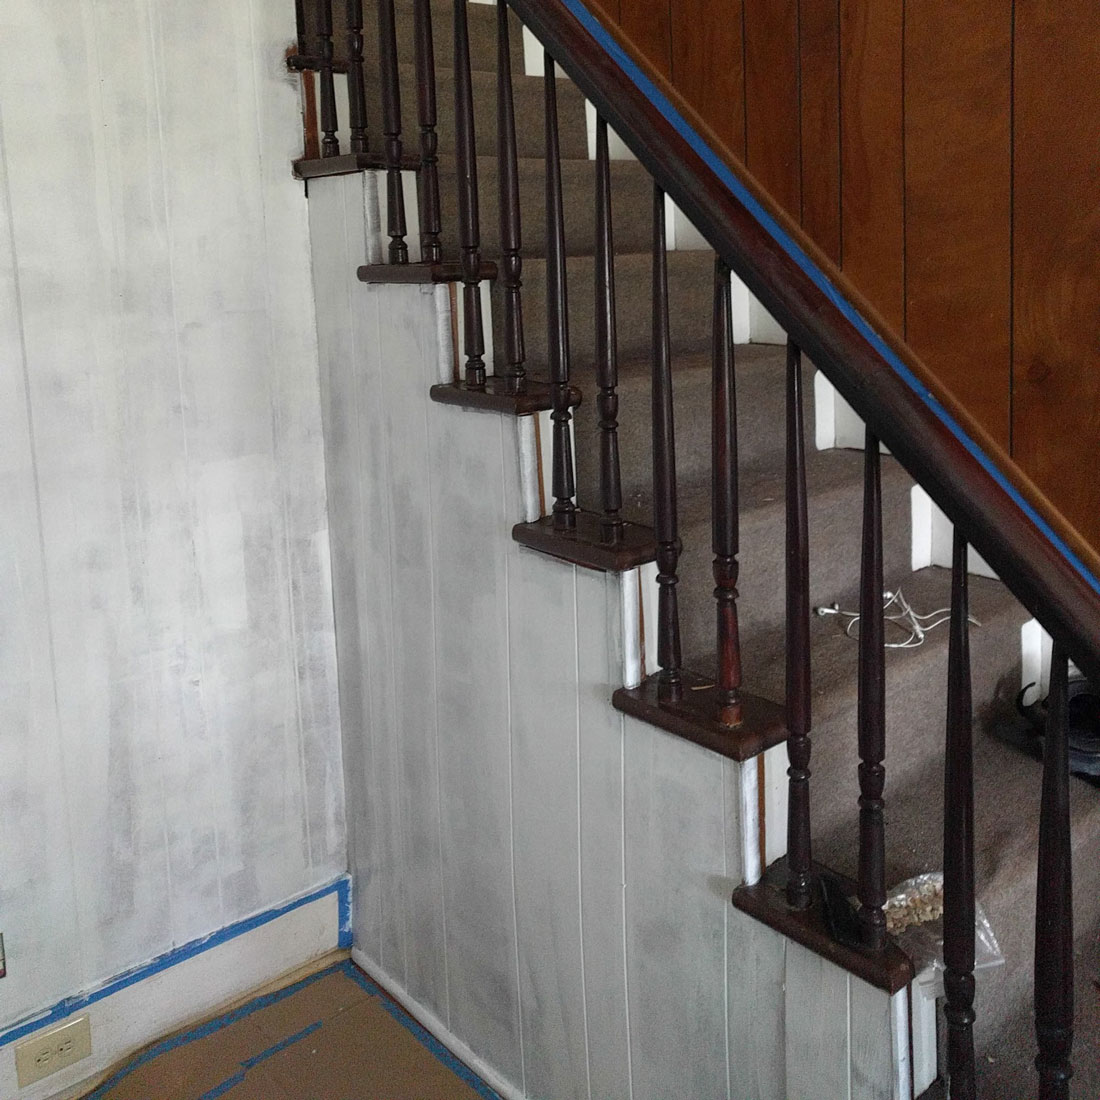
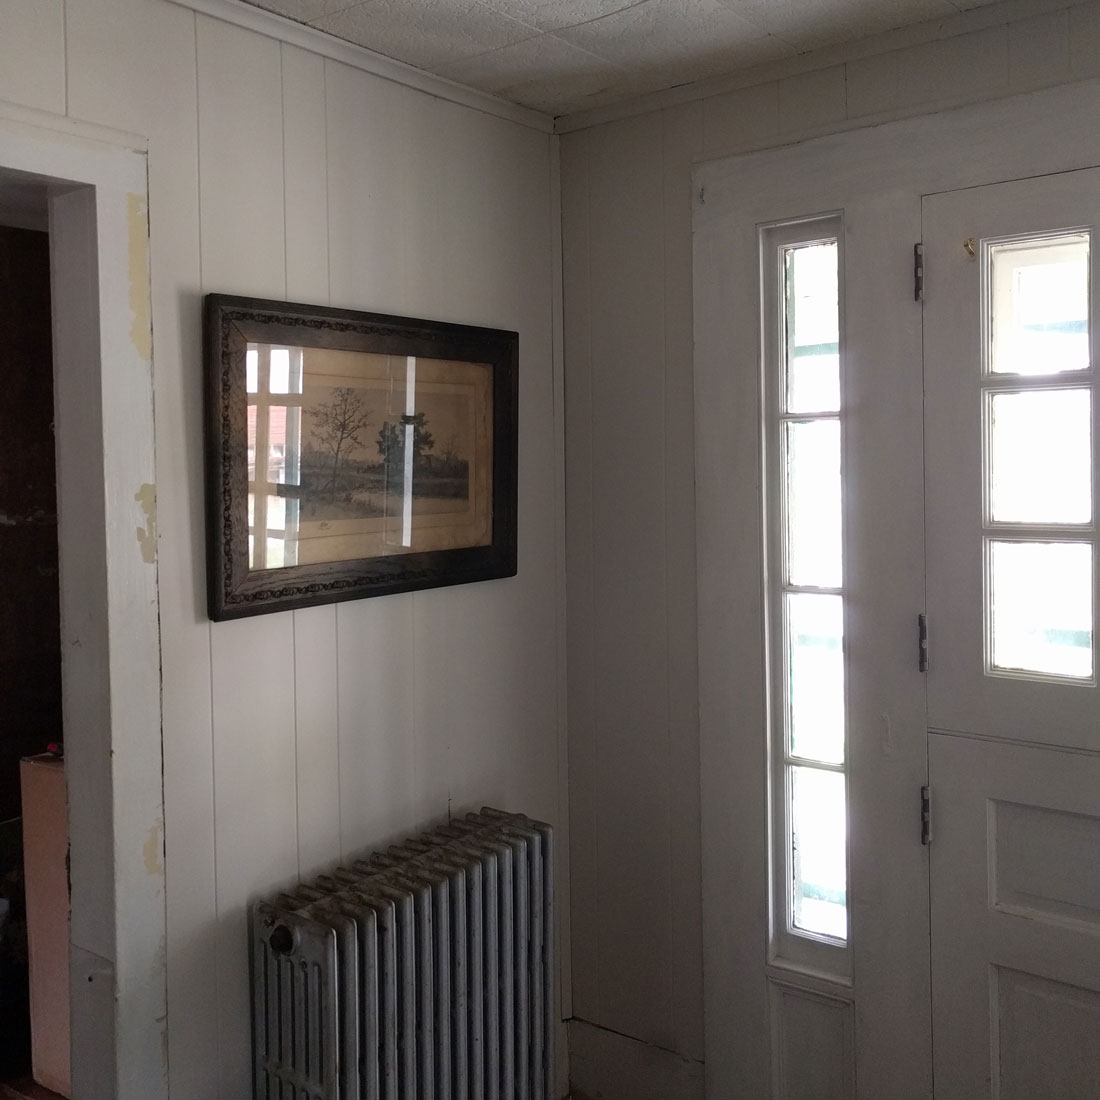
The entryway is the first impression your guests get when they come for a visit, so it was at the top of my list for a makeover. The farmhouse is full of wood paneling, but the worst offender, floor to ceiling, dark and dreary was the entryway.
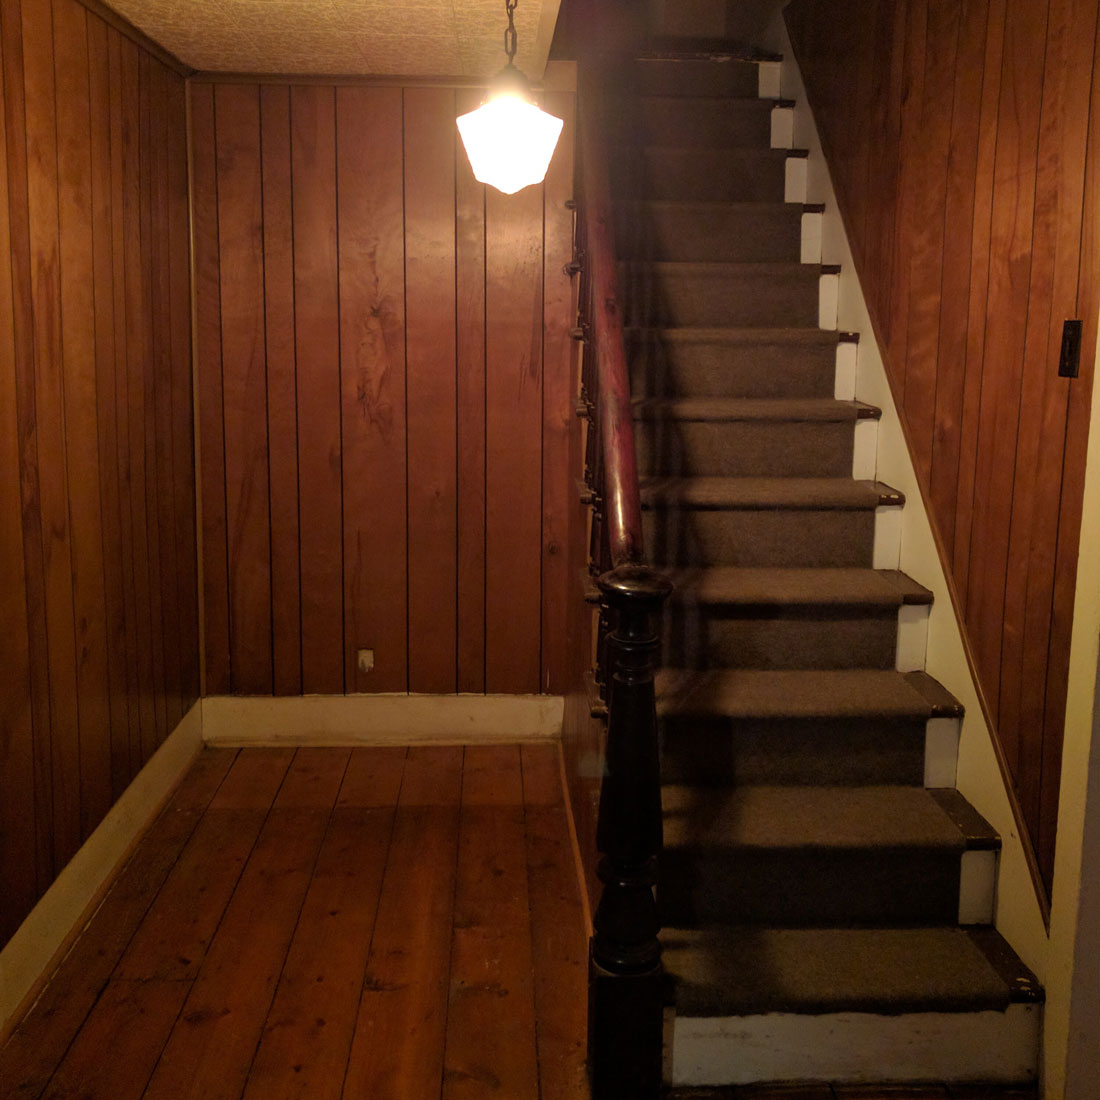
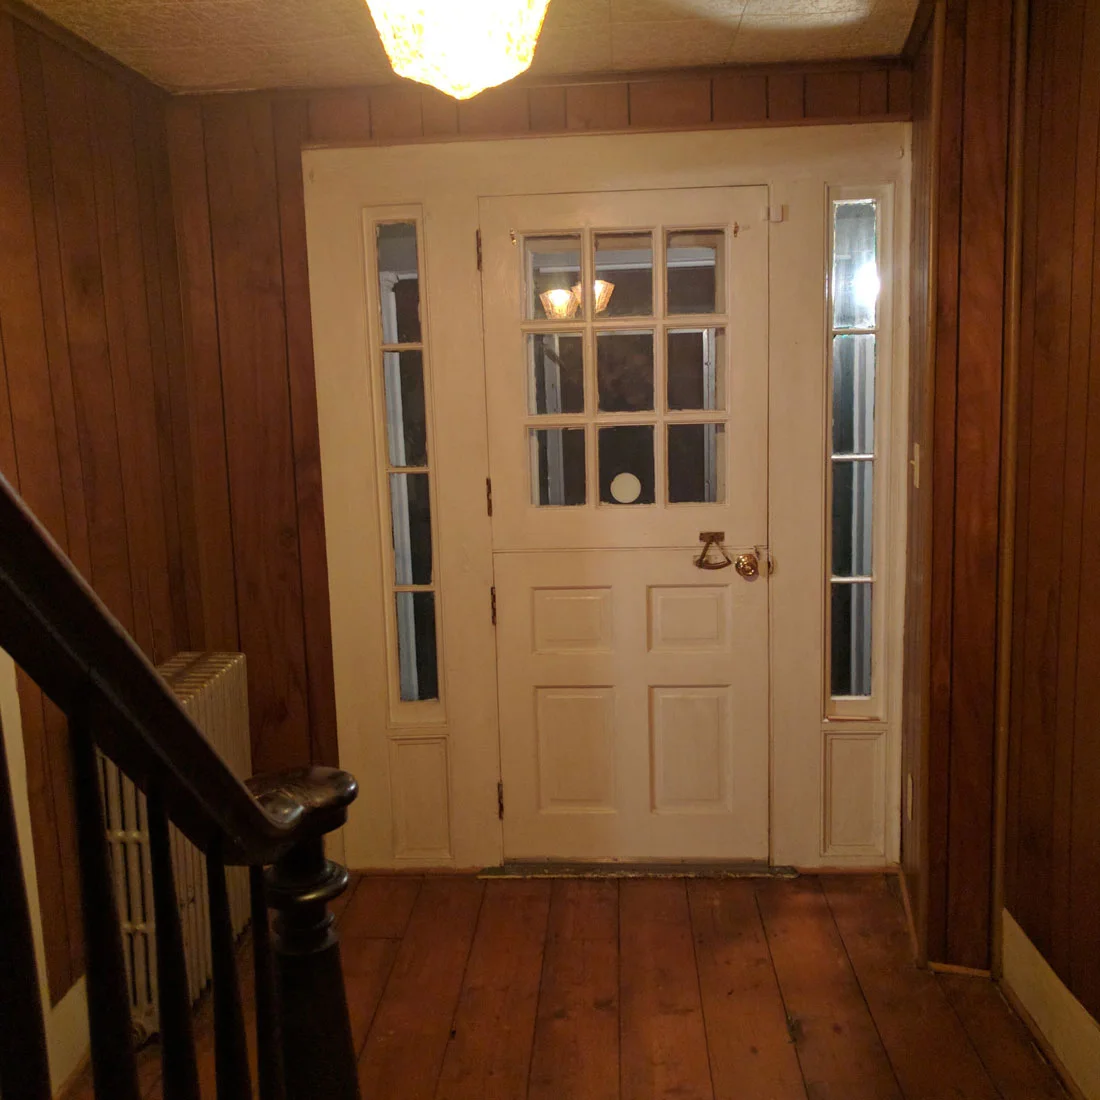
Granted these photos were taken at night, but it didn't feel super inviting to me. Before we even closed on the property I knew this entryway needed a fresh coat of a light colored paint to brighten the space and utilize the natural light that floods in through the windows around our antique dutch door.
Now, if you have ever painted wood paneling, you know it is quite a process. You absolutely must prime. Your paint says paint with primer, but you need something serious to cover up this slick dark surface. I used Zinsser, but I understand Kilz makes excellent primers as well. The tricky part about the paneling is the spaces between. There are so many grooves in the wall and you have to make sure you get enough of the primer into them, but you also want to make sure the flat part of the wall that abuts keeps a smooth coverage. I developed a system where I would do about 2 ft sections of the wall floor to ceiling before moving on. I used a paint brush to get the primer in the crevices and then came back with a small roller to smooth the build up from the paint brush and more quickly cover the flat surfaces. The results were great, but it was way more time consuming that simply cutting in and rolling like you would do on dry wall or plaster etc.
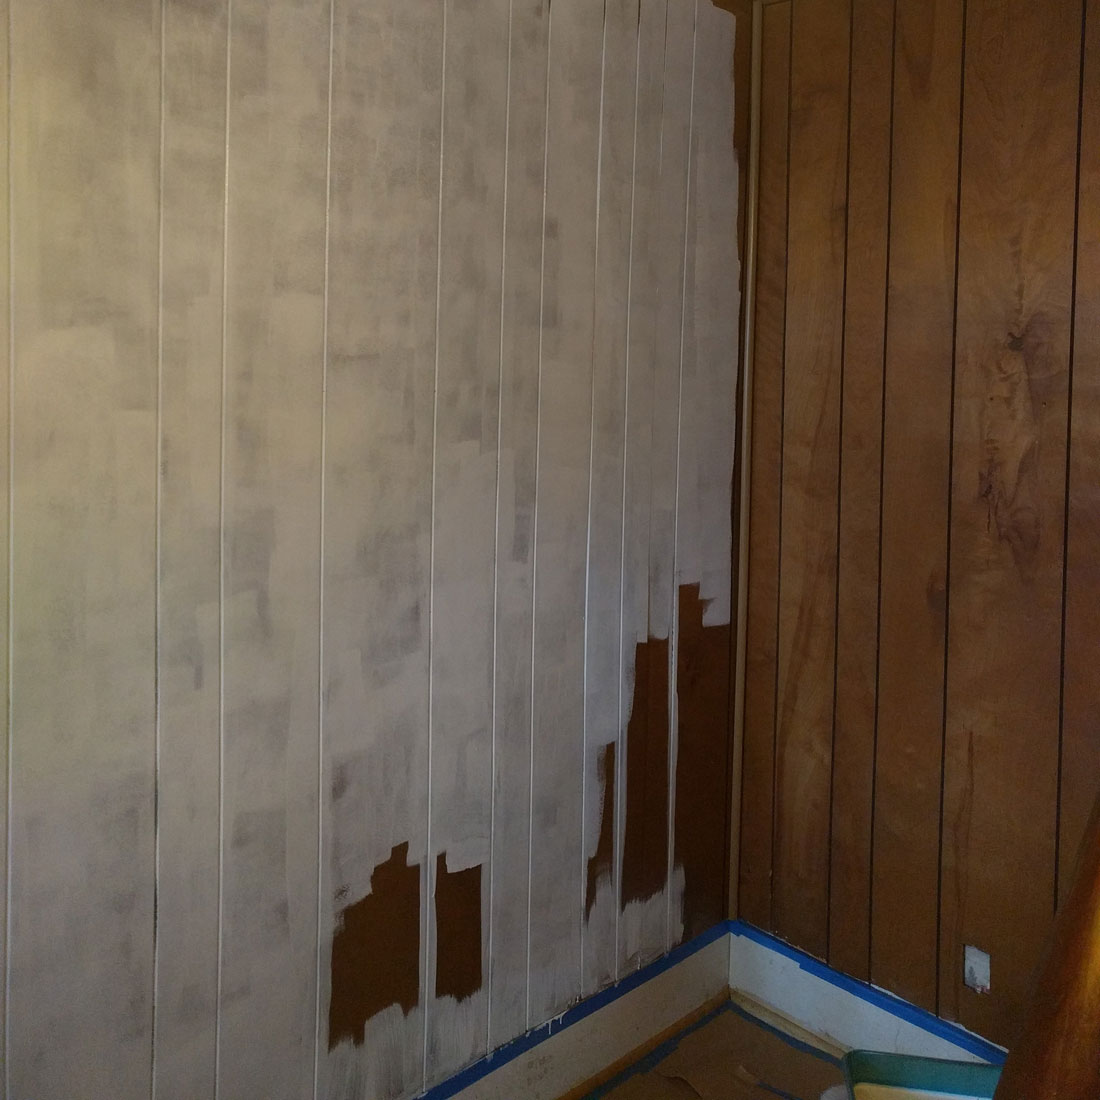
I waited a full day to let my primer dry. Mainly because my back needed a rest after all the squatting and reaching (excellent work out) but also that stuff is kind of thick so I thought better safe than sorry.
I don't know if I'm the only one, but this stage of painting makes me feel so nervous. I have painted quite a few spaces in my time, but when it looks all splotchy and uneven like this is makes me queasy, so next day I was ready to put my first coat on, lower back pain be damned.
So this is where I added an extra step to my painting that I have come to decide was well worth it. I had to repeat the process of cutting in and filling gaps with my chosen wall paint. I continued doing sections at a time like with the primer to keep a smooth coat, but this time after I rolled my paint on the flat surfaces I went back with a large paint brush lightly coated with paint and gently brushed down from floor to ceiling creating a very subtle but really beautiful texture to my surfaces. It probably added about an hour and a half of work to my space, but it has more of an authentic antique farmhouse feel to it.
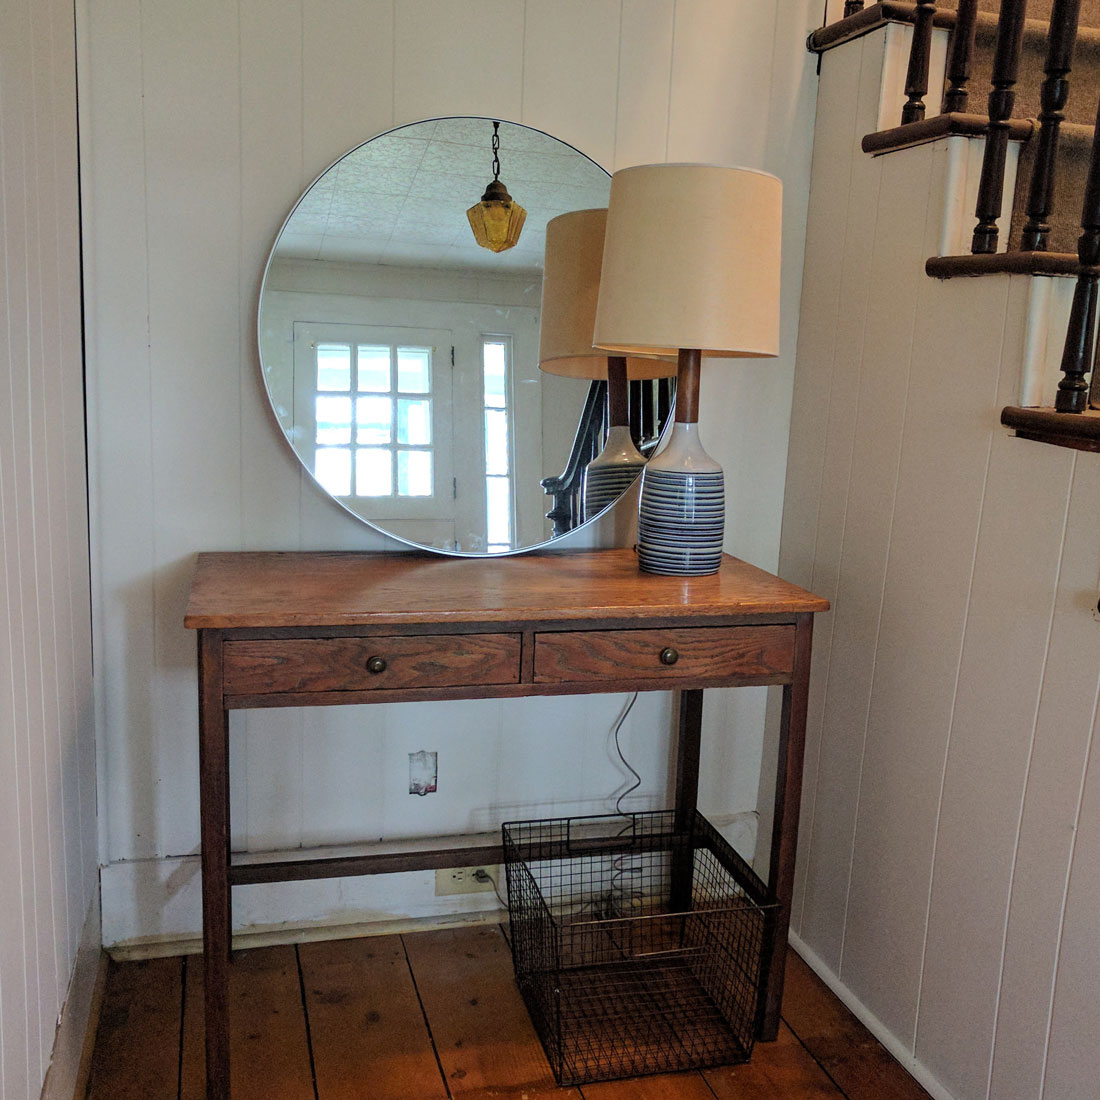
This space is by no means finished. It needs a new ceiling, the trim and door are getting stripped and painted a navy blue color that has a touch of graphite grey to it. Really lovely color. I also want to remove the pendant light that hangs to the left of the stairs (you can catch it's reflection in the first after shot). It's a nice vintage piece, but it casts an orange glow through the space and I think a flush mount centered in the space between the door and where the stairs begin would be more appropriate for this room. But I would say the space is literally like night and day already and I am truly pleased with the direction it's heading!
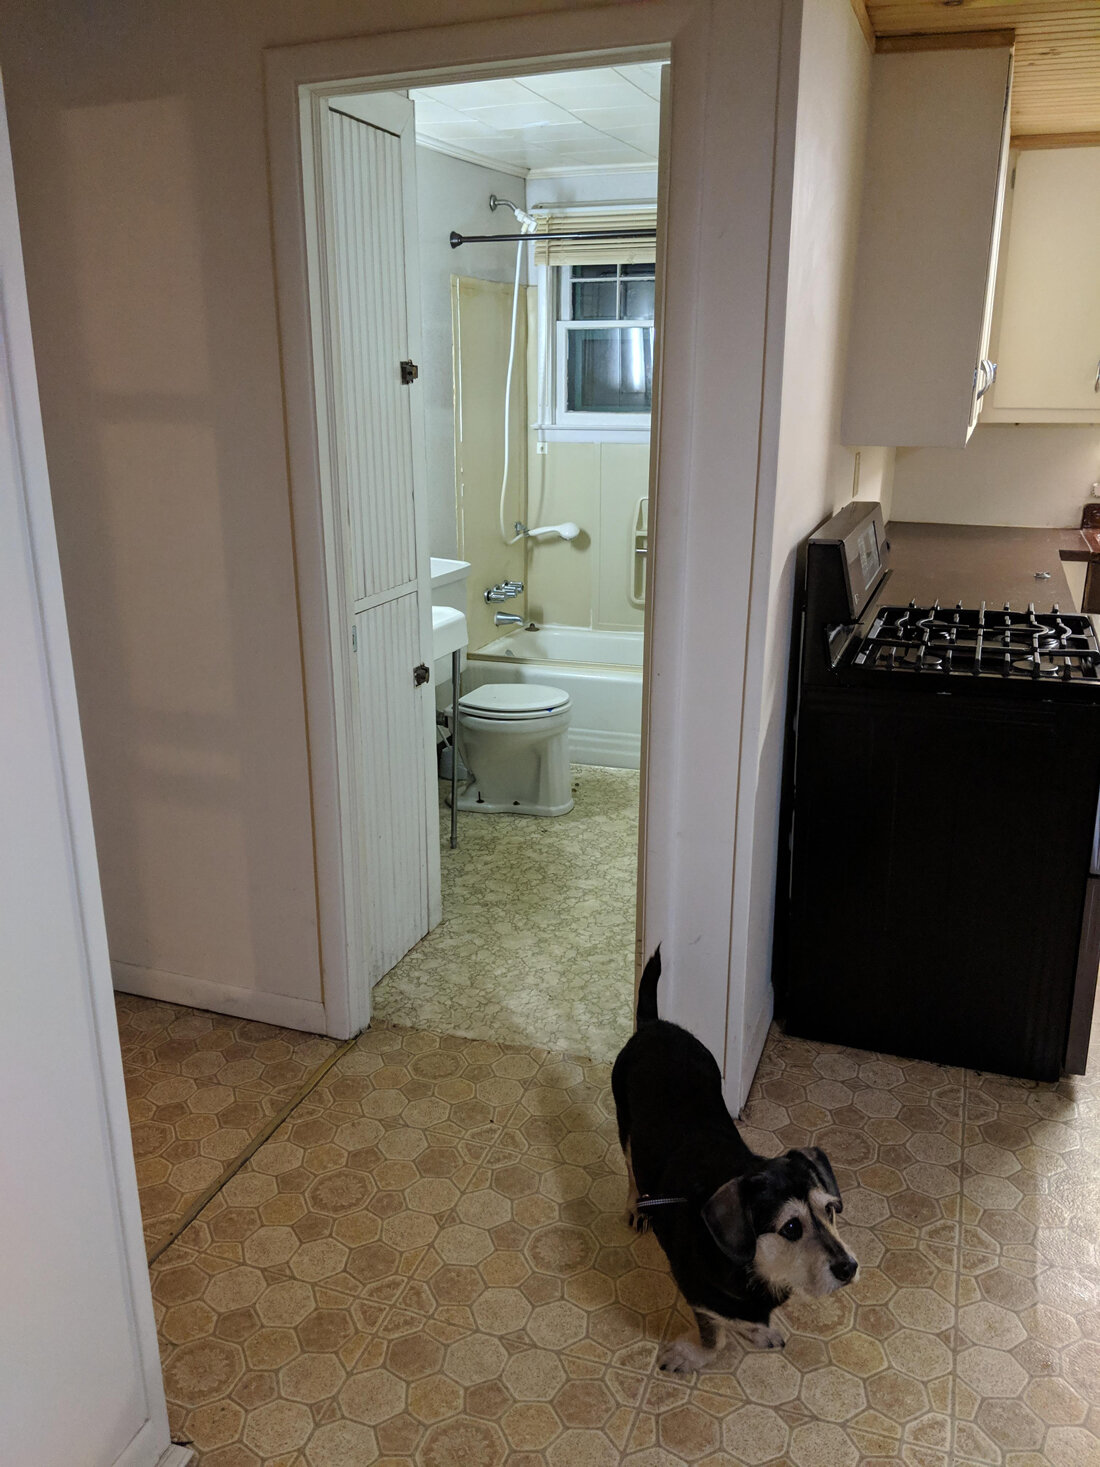
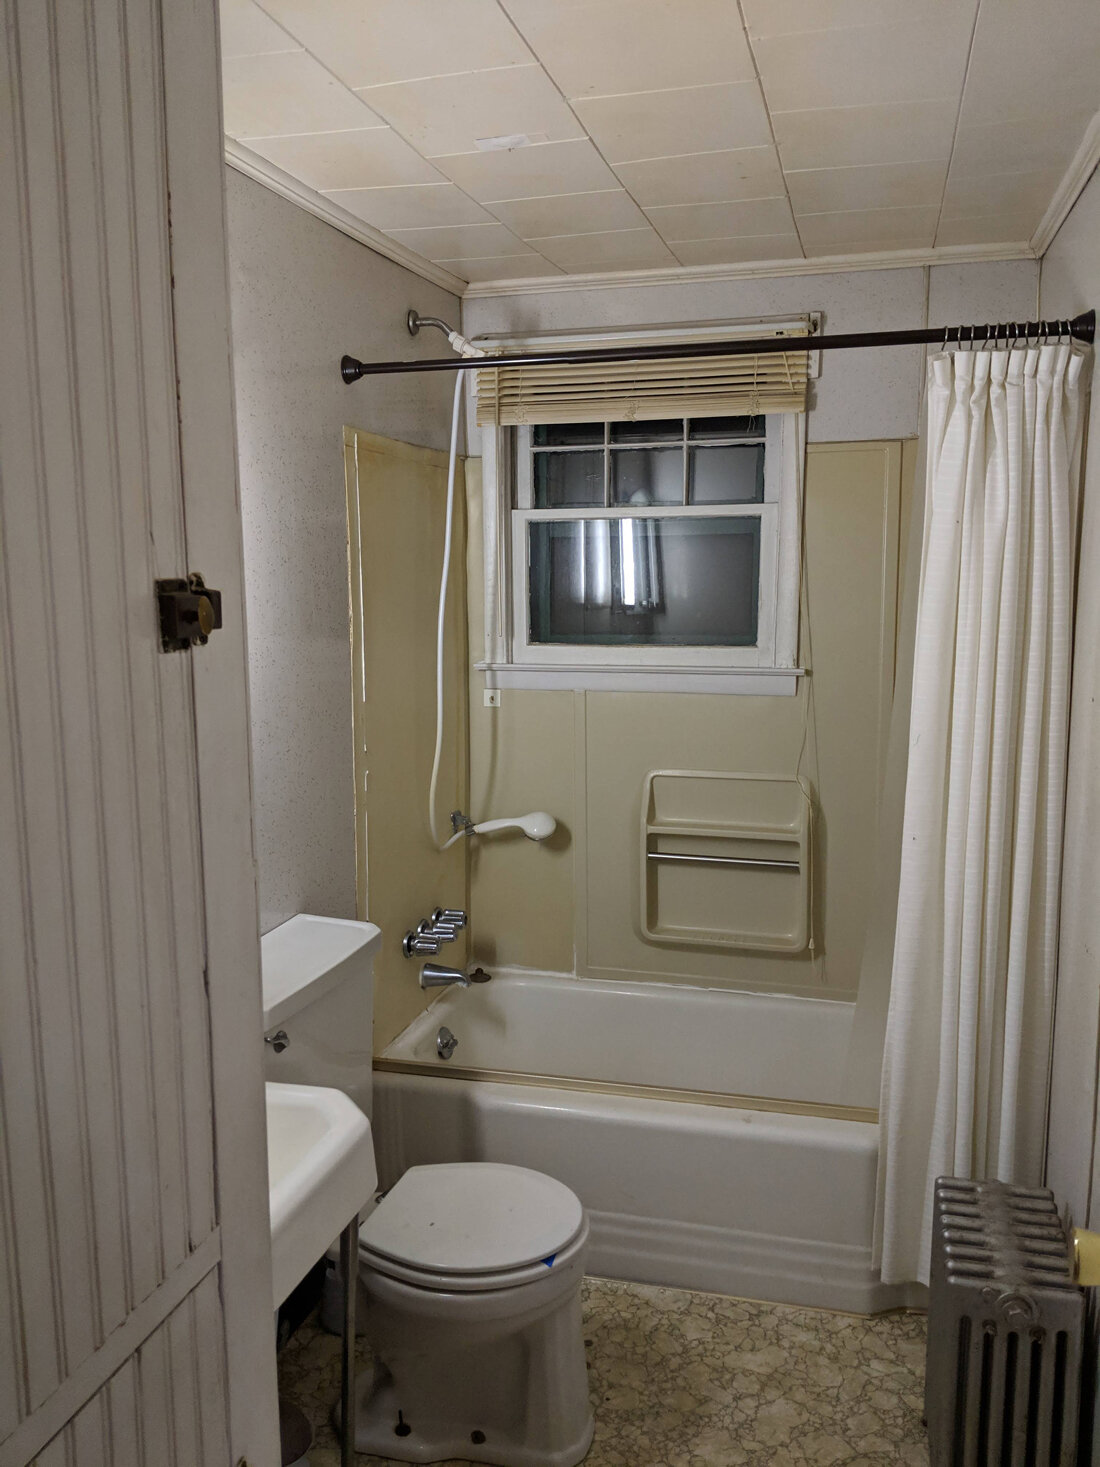
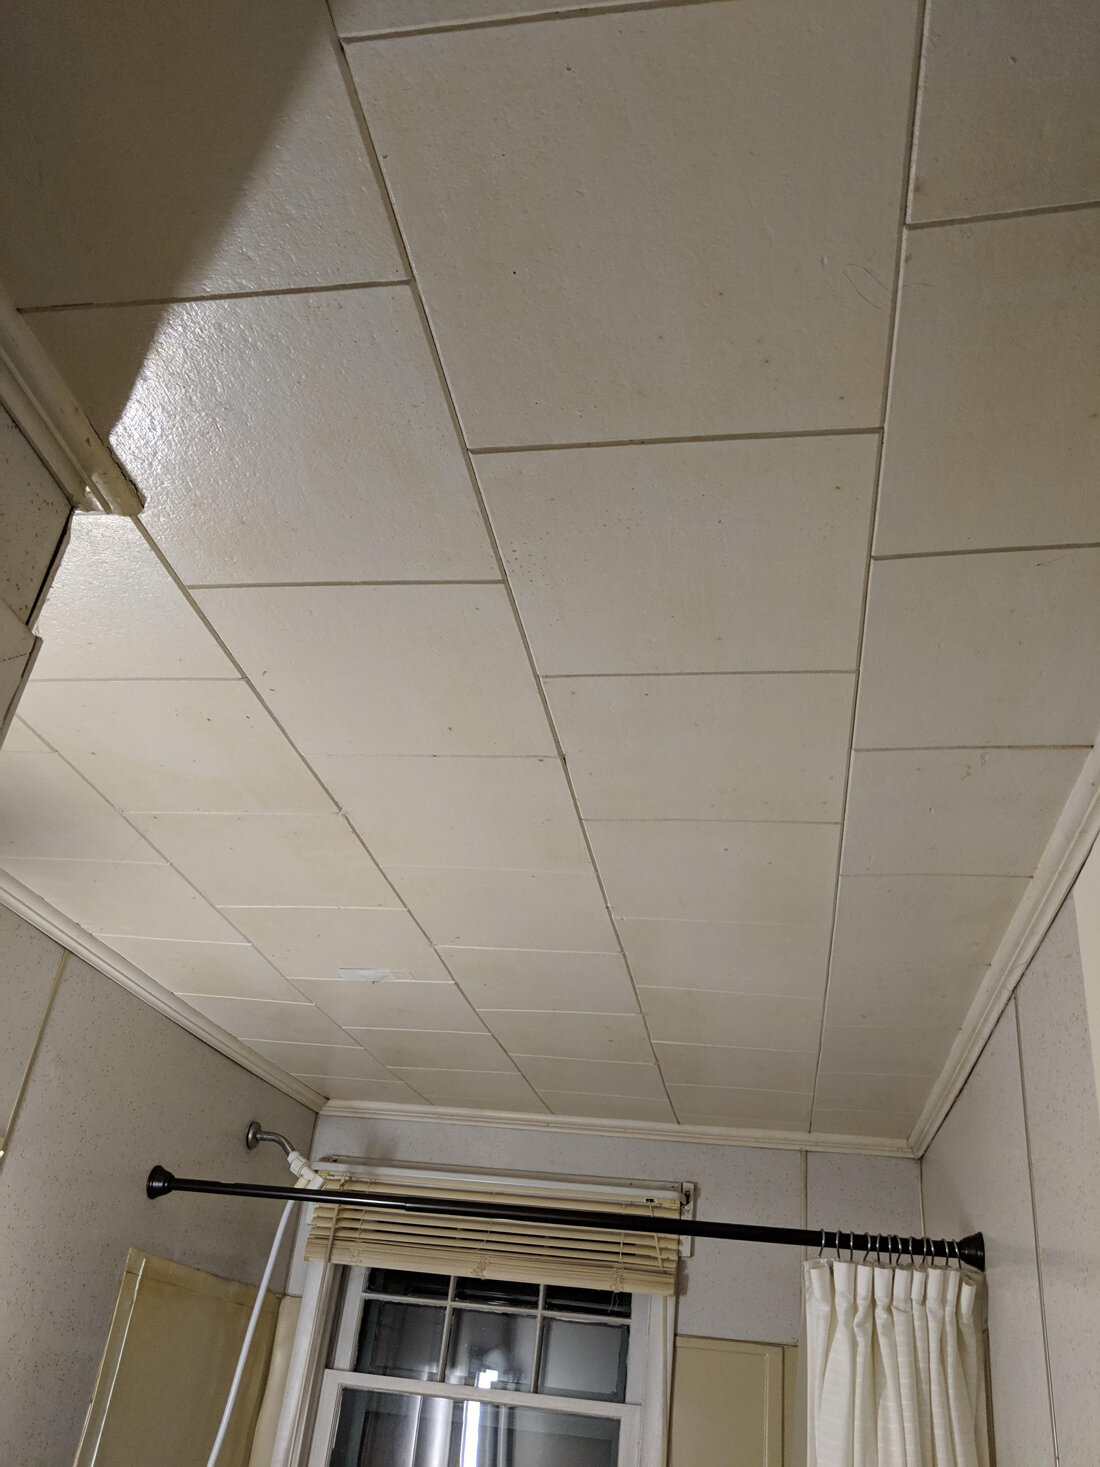
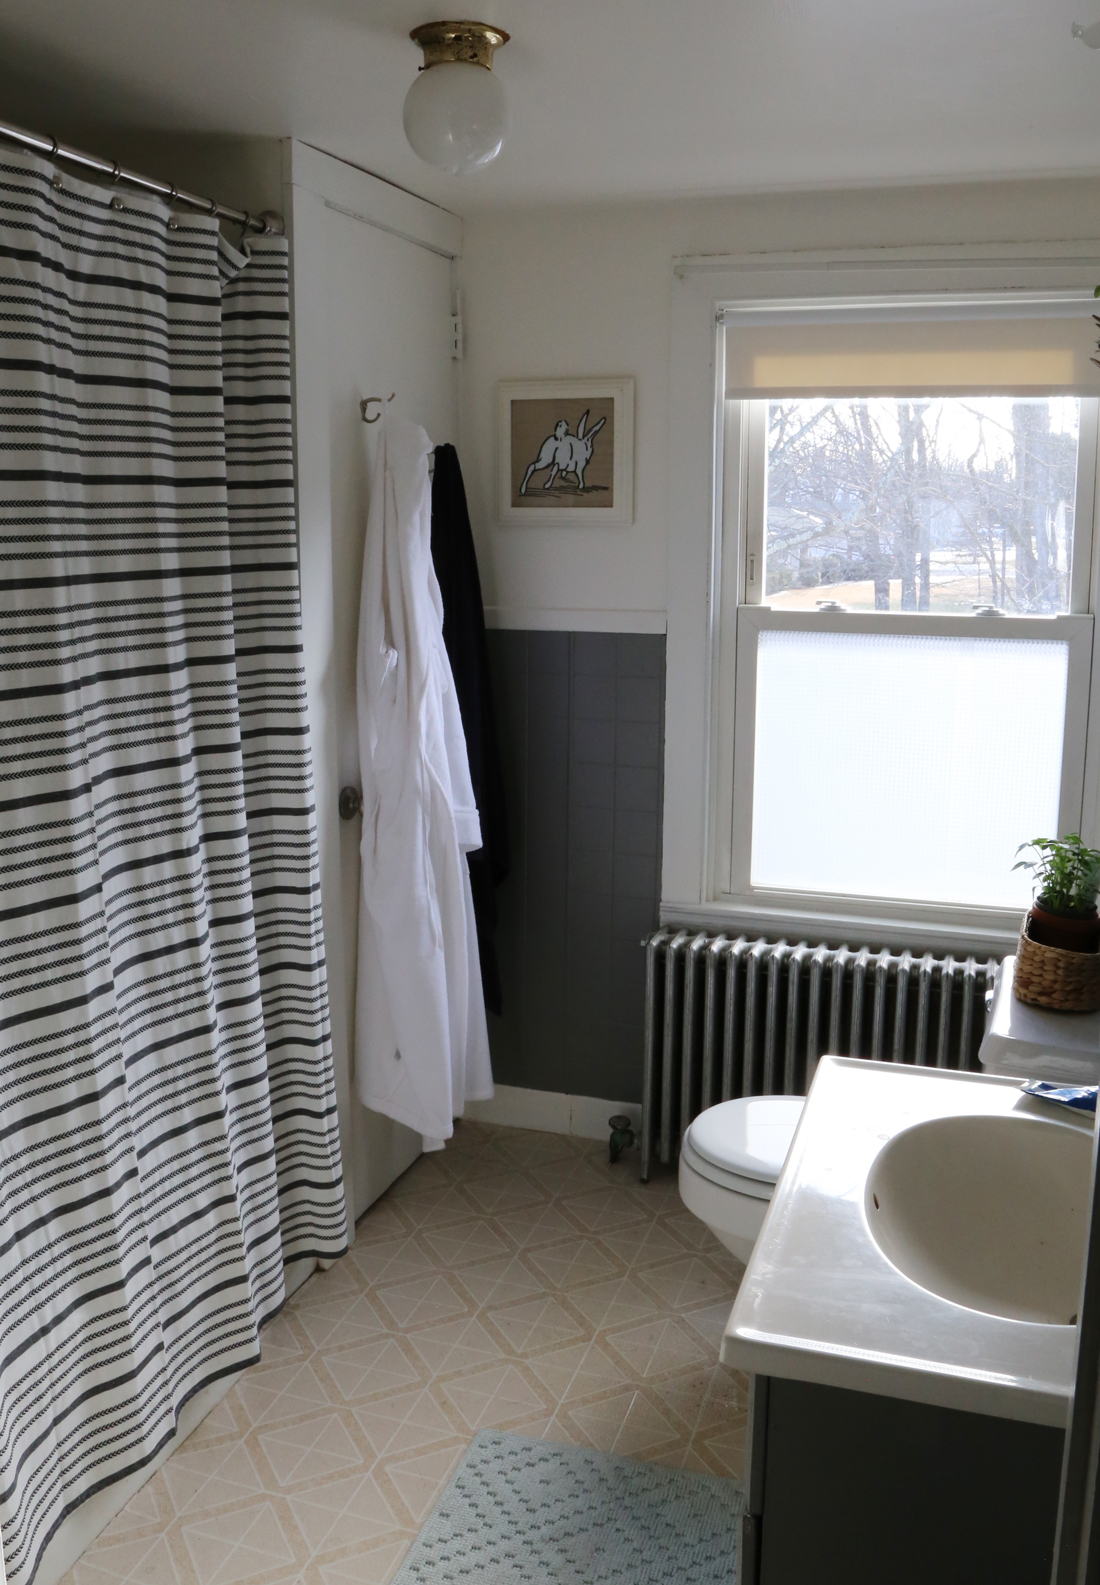
Bathroom mini makeover
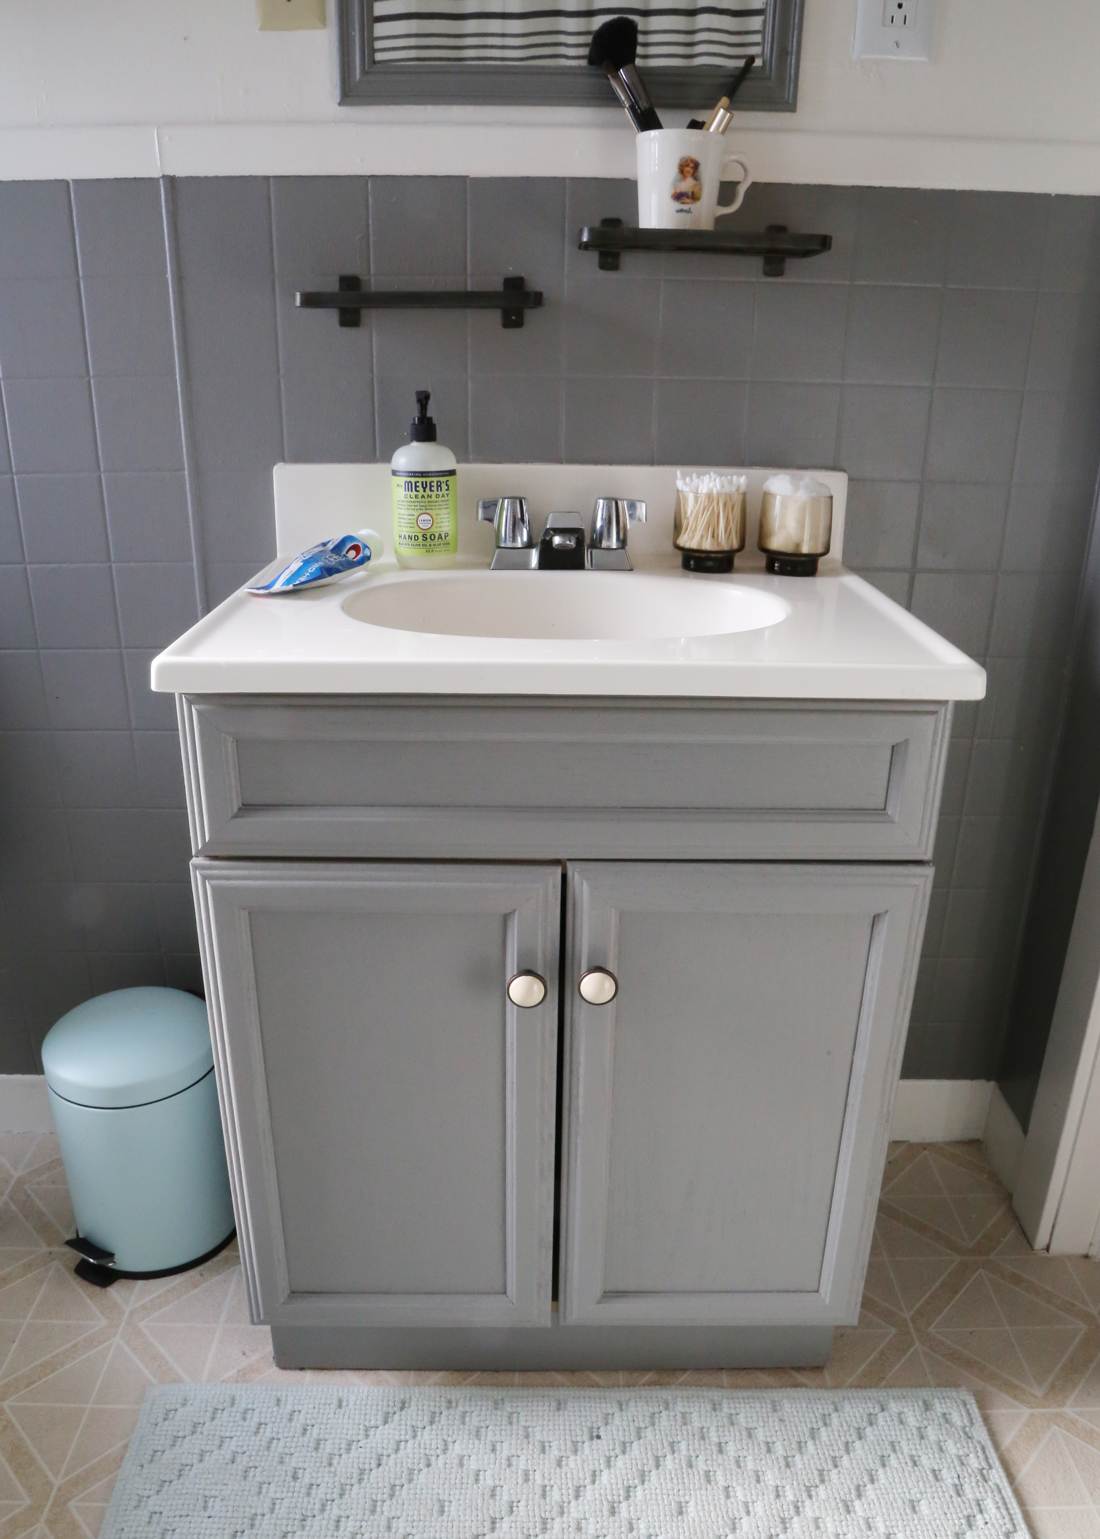
When you find yourself in a new house that needs lots of work it's hard to decide where to start. Every single room in our glorious old farmhouse needs work. I think every room needs to have at least one wall or a ceiling replaced... many of them are for aesthetic purposes and we can live in the house with it as is, but the whole thing can be a little overwhelming. We have had to go through room by room and prioritize which rooms get help first, which should get attention at the same time (for instance a bunch of rooms need drywall and insulation, so might as well do them all at once), and decide what will need to stay as is for the longest. Both of the bathrooms in the house need to be updated. The one downstairs has formica walls and is an entire gut! It's also the guest bath and powder room for non overnight guests... Meanwhile the upstairs bath has cheap finishes and was looking very dreary, but having to choose which room would get a full renovation, downstairs wins. That does not mean, however, that the upstairs bath has to stay dreary and dumpy for several years. I decided it would get a mini makeover to see us through until we actually renovate, especially since this will be the bathroom we use the most. A fresh coat of paint and some accents can go a LONG way. All in all this whole room cost about $300 (towels and all).
For the most part, I tried to pick decor items in neutral colors that would work with whatever we do in there when we do the actual renovation.
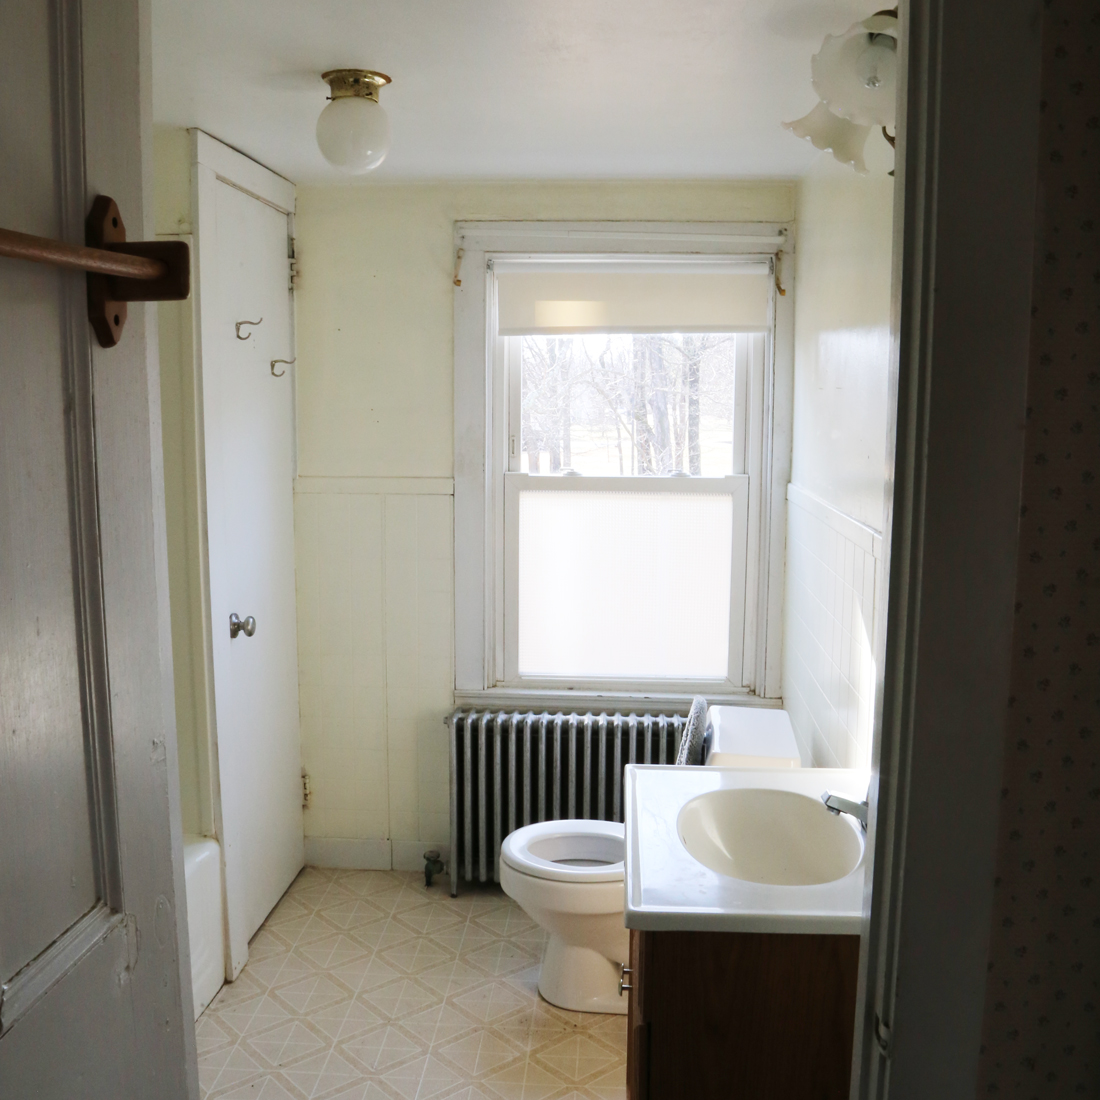
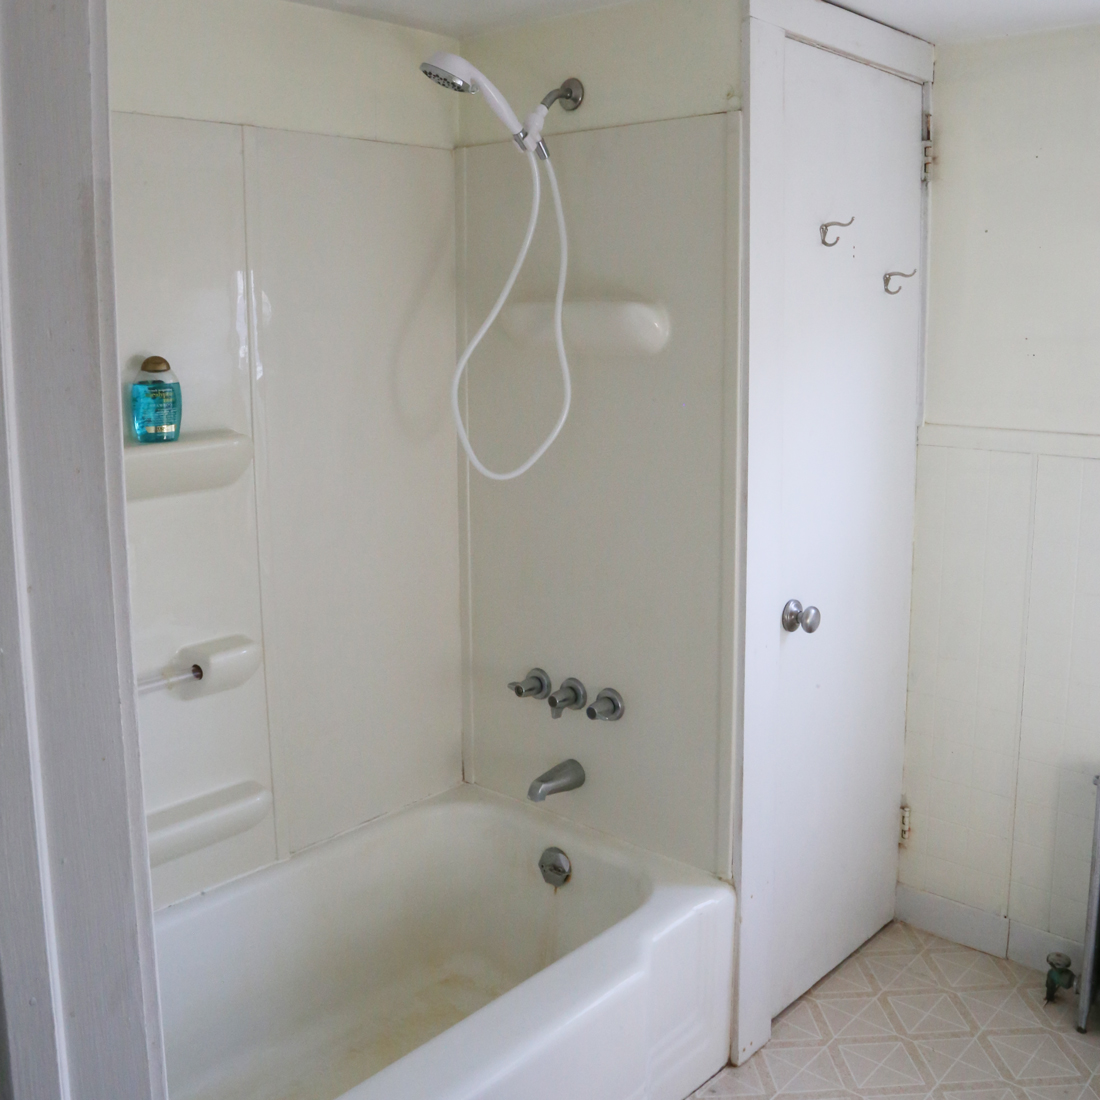
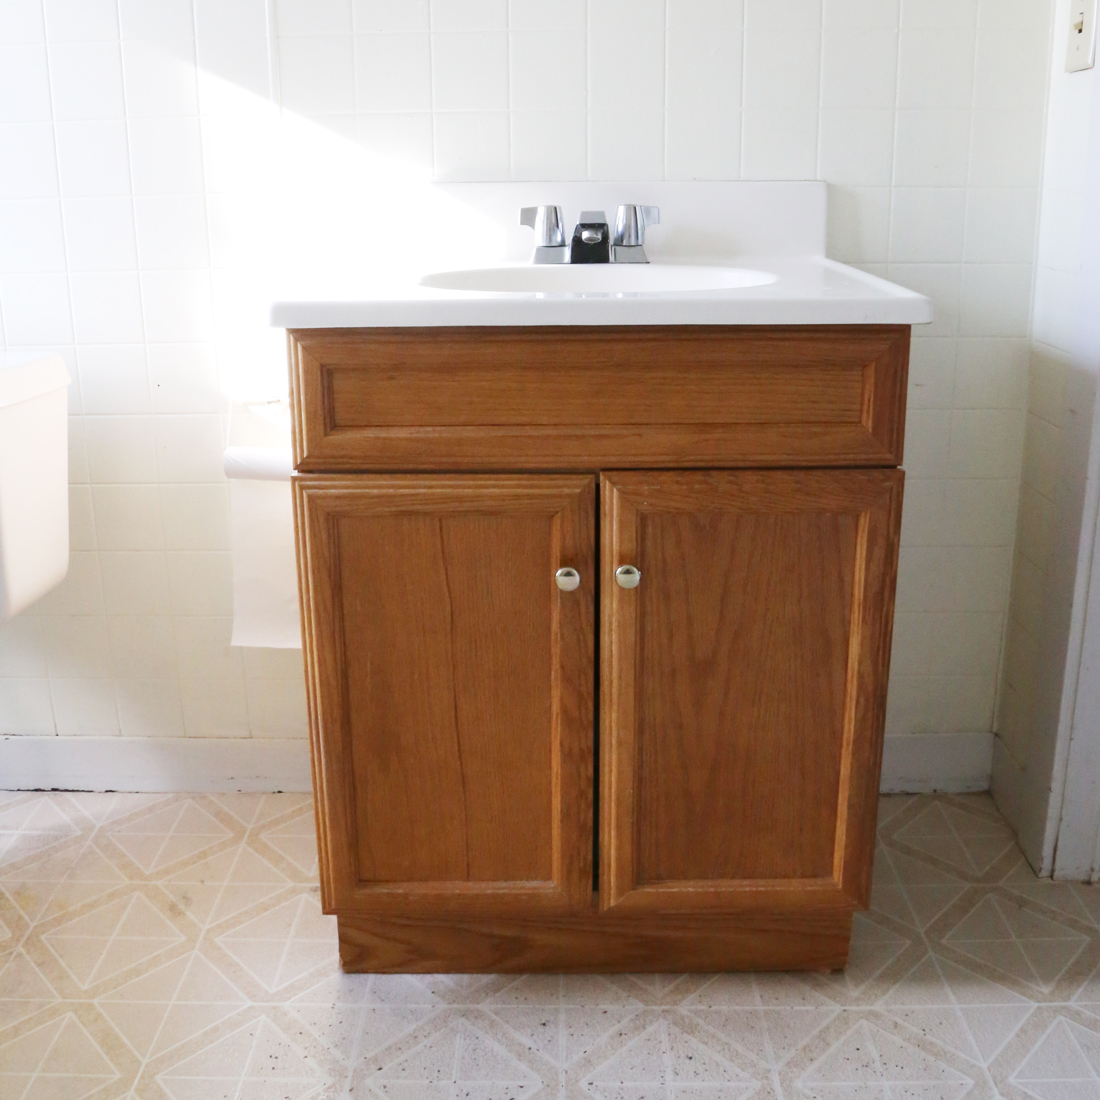
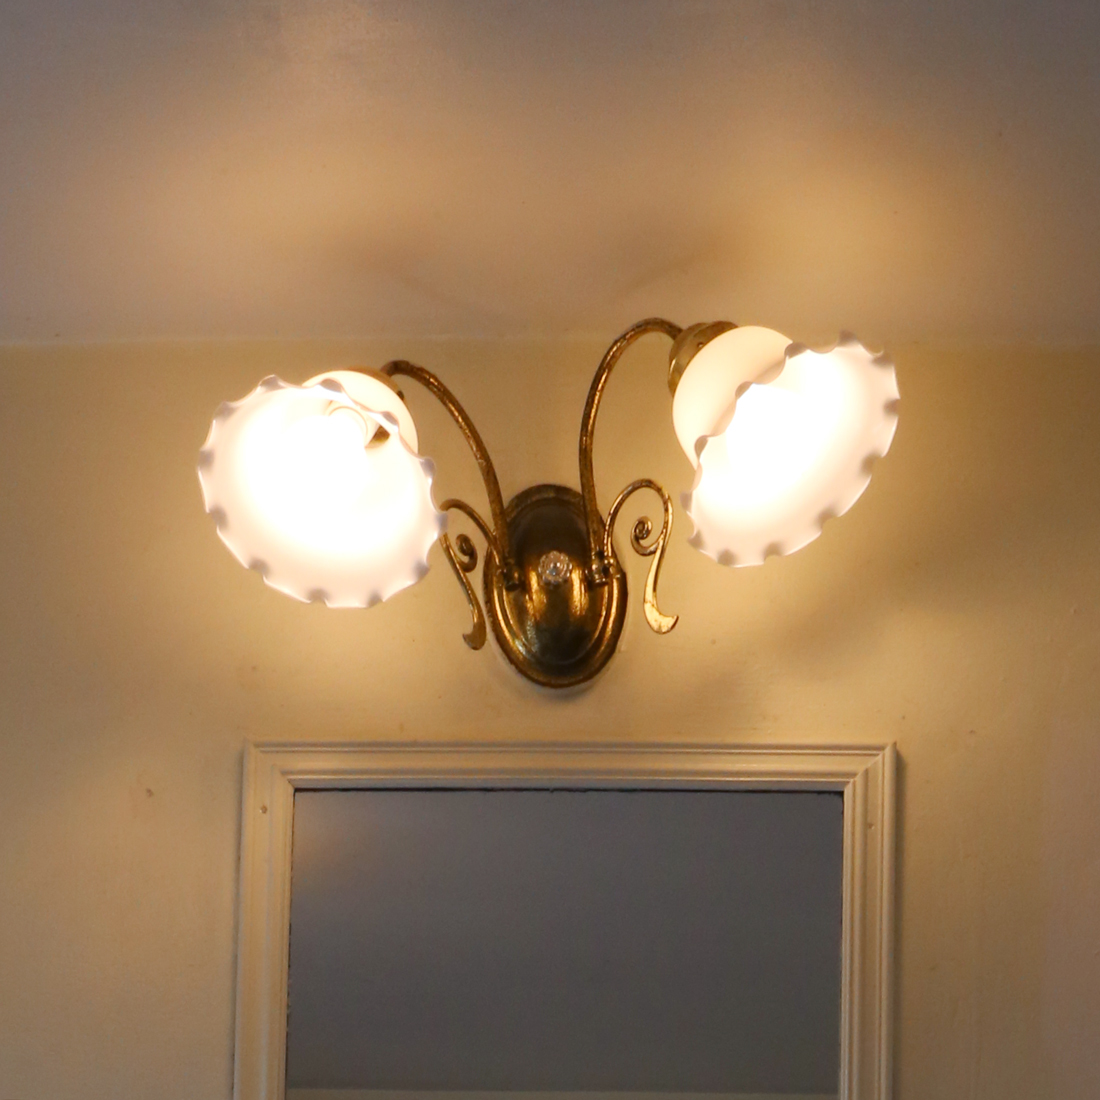
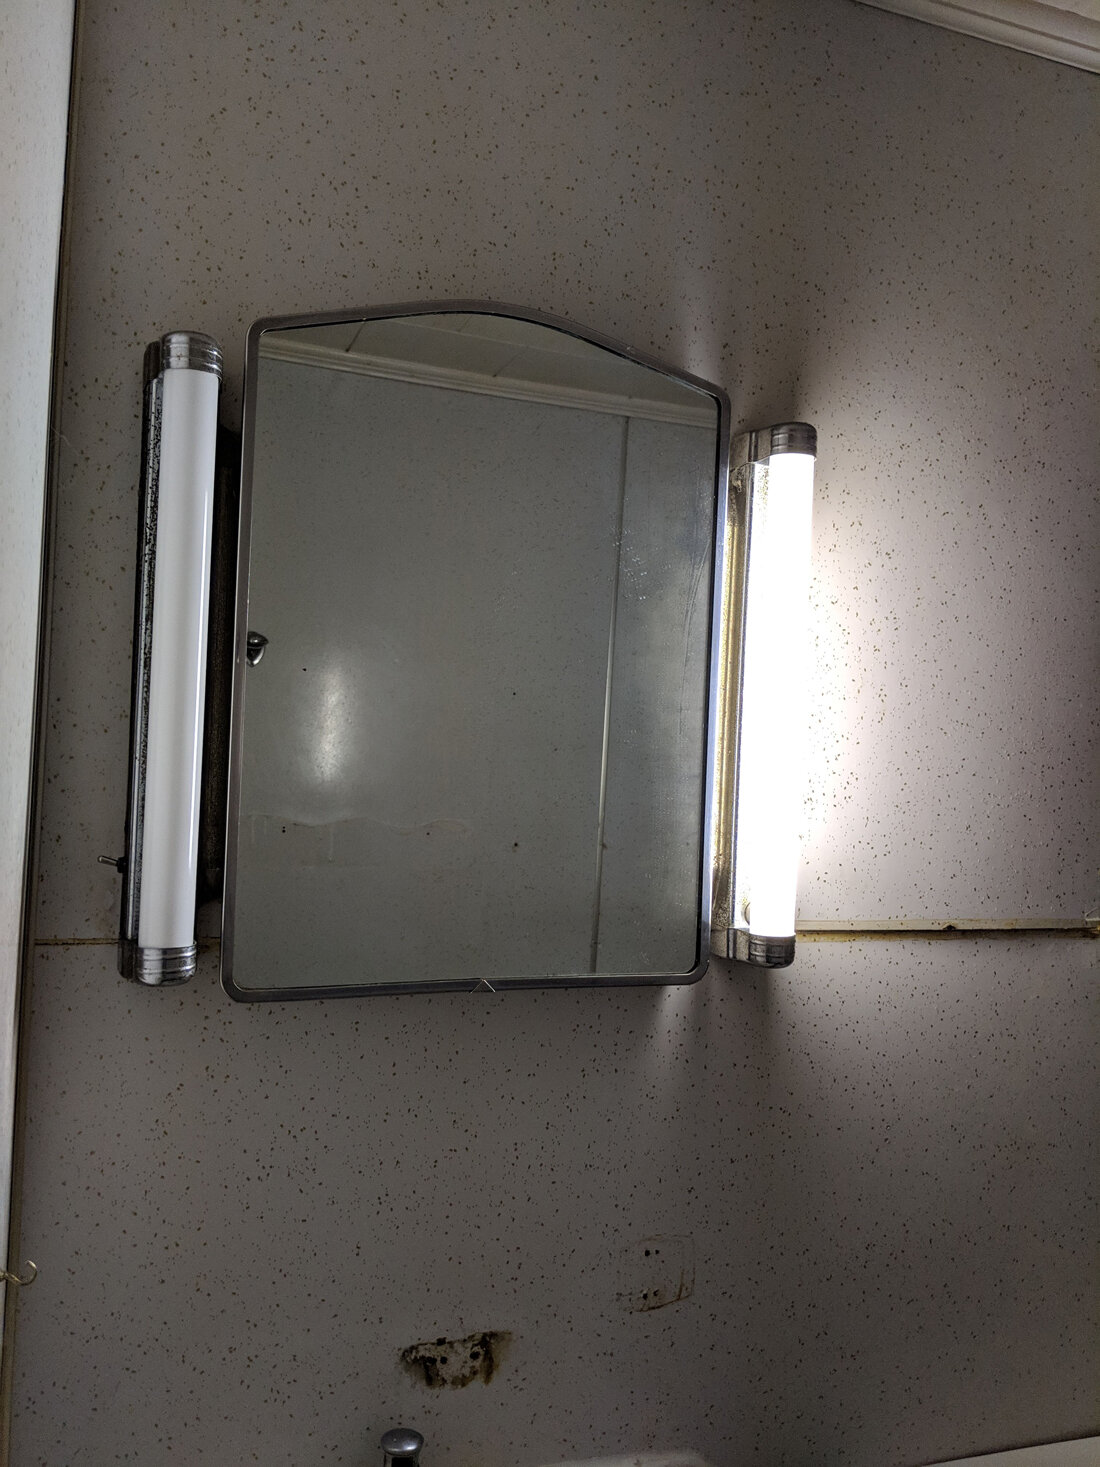
So now that you've seen the before images, lets talk about the space. As I mentioned the finishes are not anywhere near top of the line. The cabinet for the sink is your typical warm wood straight from the hardware store cabinet with matching brass knobs. The wall color was either intended to be yellow or has yellowed with age... still not 100% sure about that one! The wall above the shower is showing signs of mold. The light fixture above the sink is crooked and rusting. The linoleum flooring has mildew spots. Some of these problems we will address and others are going to have to wait for the final renovation.
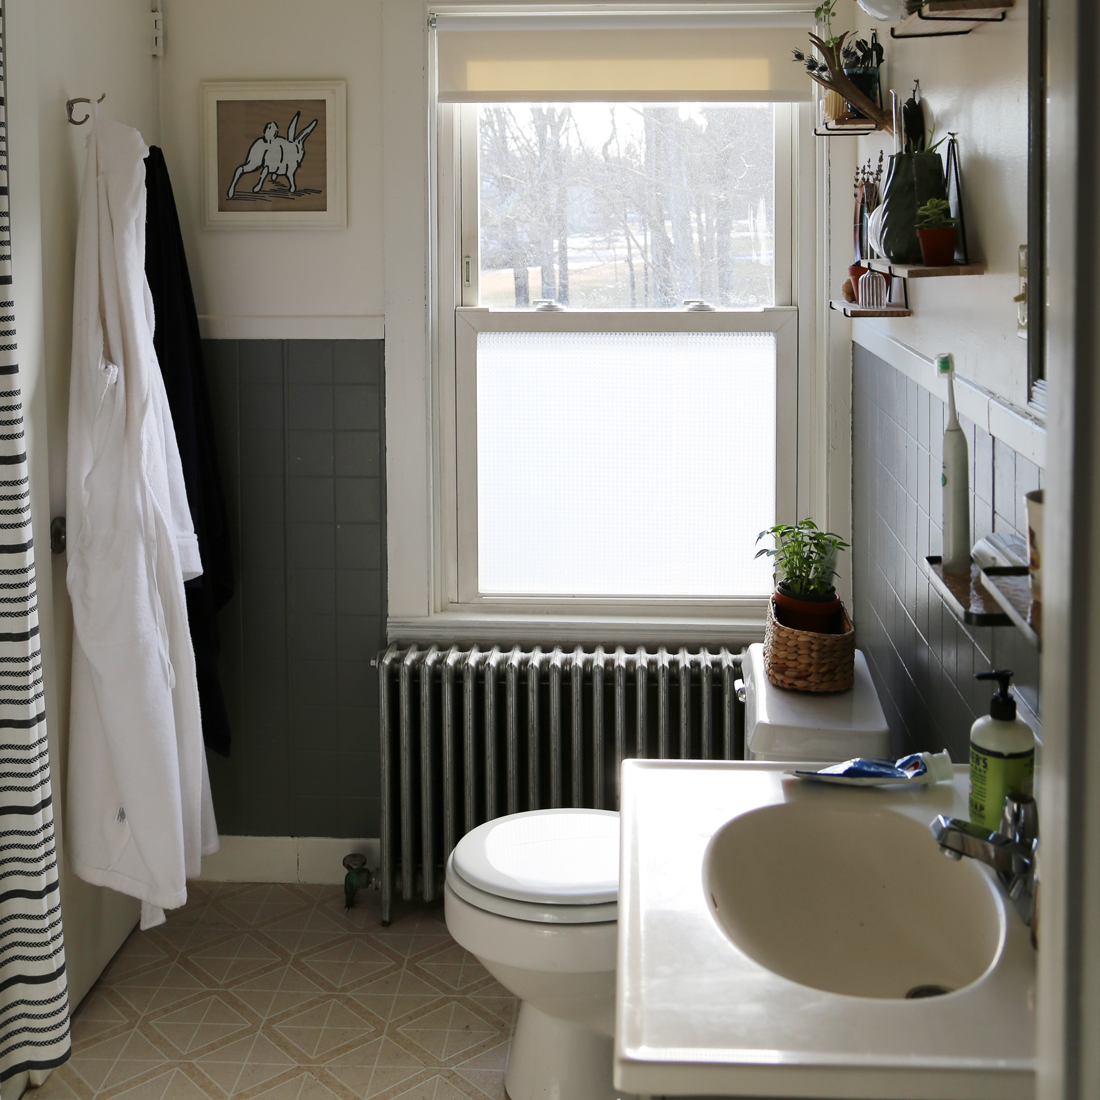
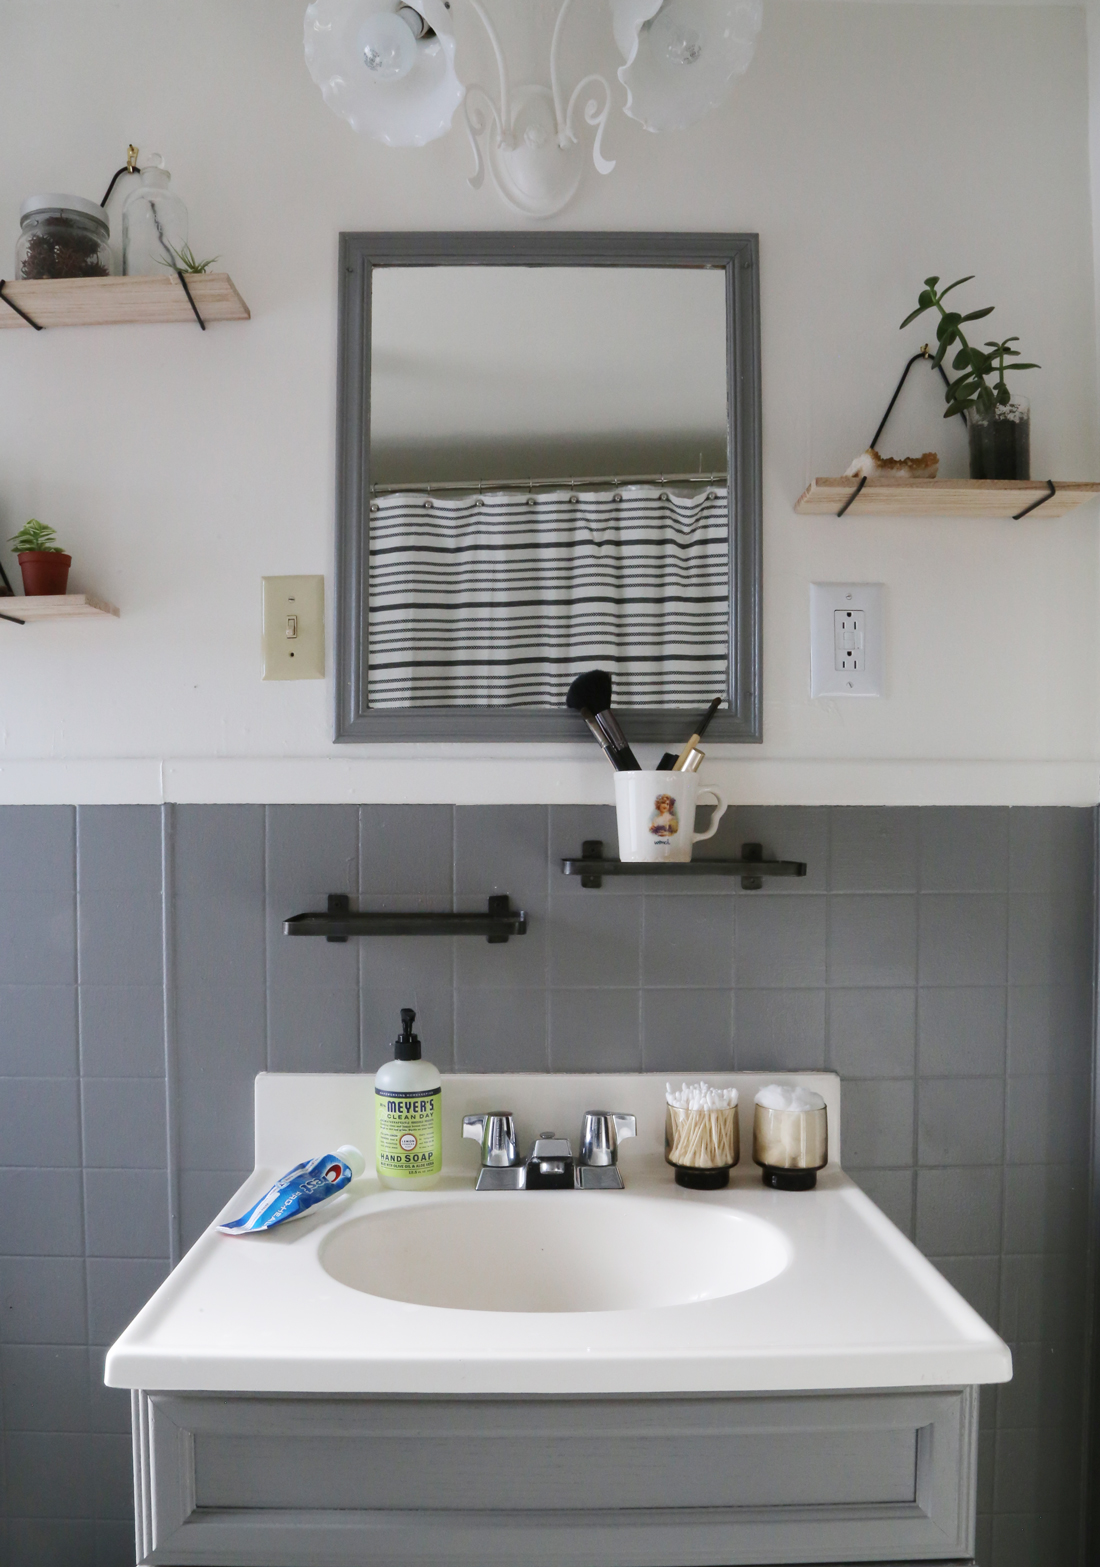

It's not perfect but I would say it's a huge improvement! The light fixture over the sink is still crooked (someone glued it to the wall??) but at least it blends in now. This makeover will last us until we can put in real tile on the walls and floor and an updated bath, sink and toilet.
Phew. One room down... for now... all the rest to go.
Whole30 Crock Pot Gumbo Recipe
In the tradition of the new year I am trying to start the year off right and I'm detoxing! I overdid it during the holidays, and lets be honest for a few months before that. I gained weight, I was feeling sluggish and bloated and over it. I started the Whole30 program on the 4th because I had some traveling conflicts that made a real start impossible until that date and I really wanted to succeed. I didn't want to undertake a 0 day program and quit on day 2 because I was not amply prepared. So this year I planned. I chose to do the Whole30 program at the suggestion of a friend. I had never really looked into it deeply because I'm like no dairy and no carbs? Forget it... but I changed my mind and decided to give it a shot when I learned about all the benefits of trying it out.
So I have been on the program for 25 days now and I have been feeling pretty great. I am not feeling hungry. I am craving cheese and occasionally a carb or two but not as much as I thought I would. Day 1 and 2 were really the worst of it. I have been continuing to prepare myself for success. I am bringing Whole30 compliant snacks with me when I leave the house, I am making sure I eat meals at appropriate times and I am grocery shopping with purpose, bringing full lists of ingredients for meals I have selected in advance. I have 2 different Pinterest boards going, one of Whole30 recipes and one of Whole30 slow cooker recipes. I am finding that by making some large meals that are easy to reheat for lunches I am making this program less difficult for myself. I think the downside, but likely what also makes it so life changing for people is the lack of easy meals. There is nothing that comes in a box on this diet, everything takes effort and thought. It makes you far more conscious of what you are putting in your mouth, but it also means you really do need to plan ahead. I also wouldn't really dare to try and eat at a restaurant while on the plan...
I thought I would share 1 recipe with you that is delicious whether you are on Whole30 or if you just like good food! Slow Cooker Gumbo with Sausage, Chicken and Shrimp. Delicious, hearty and surprisingly easy. I made it on day 7 and I am making it again today! Sp far this is my only Whole30 recipe repeat.
I used this recipe which I found on Pinterest as a guide and then tweaked it for my own tastes:

Ingredients:
1lb chicken**
1lb sausage (preferably andouille)*
1lb shrimp
2 cups chicken stock*
1 box diced tomatoes (28oz)*
1lb okra
1 bell pepper
1 onion
2 stalks celery
3 cloves garlic
1 hot pepper (jalapeno, serrano etc, totally optional if you are not into spicy food)
3 tbs cajun spice*
2 tbs salt
1 tbs pepper
1 tbs thyme
1 tbs oregano
1 bay leaf
* if you are doing Whole30 or Paleo make sure you read your labels. All of these items can have hidden ingredients including sugar, nitrates etc. but they all exist without so find the brands that work at your local marke
** You can use raw or cooked, white meat or dark or a mix... up to you, I got the best results when I used chicken that I had cooked in advance (I also used the stock I made with the same chicken in my recipe), I shredded it and the texture really added to the dish
Notes
Alot of crock pot recipes say you can just dump everything in and hits start and come home later to a perfect meal... I am of the opinion that if you do that everything ends up kind of tasting like raw onion... So I have added the step of sauteeing my onions whenever there is a recipe that suggests you just dump it all in. In this case I sauteed several ingredients to seal in some salt and add some flavor.
Another step I took which you can choose to take if it makes sense for you (if not store bought stock will work it just wont have as deep a flavor as homemade) is to make my own stock from a whole chicken (and use a portion of this chicken in the gumbo as well). I basically just take a stock pot put a whole raw chicken in, cover with water (about 2 inches above chicken), add salt (tbs or so), bring to a boil then simmer for about 1 hour. Then remove the chicken from the pot (using tongs, leaving liquid in the pot, be careful the bones will have weakened in cooking and may break apart as you lift the bird out), let the chicken cool until you can stand to touch it and take it off the bones. Add the bones back to the liquid still in the pot, add 1 carrot, 1/2 onion, 1 stalk celery 3 garlic cloves all roughly chopped and a bayleaf. I then bring it back to a boil and cook that liquid for about 2 hours on a high simmer until it has reduced significantly. Next strain it, let it cool a bit and put it into a storage container and use it for recipes all throughout the week or freeze part for later. It gets gelatinous when it's cold because of all the goodies leeched from the bones during cooking so this is totally normal and desired!
Here we go for GUMBO!
Dice all the veggies into similarly size chunks and mince the garlic up nice and small. In a large pan heat 1 tbs of olive oil, once hot add peppers and onions, sauté until onions are browned and pepper have softened, add garlic for the last minute or so of this step. You can tell by the sweet smell of the ingredients when they are done. Dump this directly into your crockpot. Next I sautéed the celery and okra together, which is likely unnecessary, but I had already dirtied the pan so I thought why not! I added the thyme and oregano for the last minute of this step. Then add this to the crockpot as well. Chop up your sausage and shred your chicken (if precooked, if raw cut it up) and shell an de-vein your shrimp. Set the shrimp aside, back in the fridge, you will not add it until later. Dump the sausage and chicken into the crock pot along with 1 28oz box (my preference is Pomi brand) or can of diced tomato, 2 cups of chicken stock, 2 tbs of cajun spices, 1 tbs salt, pepper to your taste preference. Set your crockpot on low attach the cover. Check in to stir it occasionally, but mainly just leave it alone for 6 hours. Open it up, add the raw shrimp, put the lid back on and set it on low for another hour. This time when the timer chimes it's dinner!